Tuesday, February 22, 2022

Zippy Horseradish Cheese Spread

You are going to love this spicy little number, particularly if you have some nasal congestion. This stuff will open those sinus passages right up. Horseradish has amazing medicinal powers; you don’t have to use a lot of it to benefit. What I’m trying to say here is that this can be as strong or mild as you like it. This is a wonderful spread for crackers, chips, crudites, and can also be an excellent topping for a baked potato, absolutely luscious on top of a burger, and makes stellar cheese fries. Easy to prepare, it keeps in the refrigerator for 7 to 10 days. Give it a try.

Zippy Horseradish Cheese Spread

1 1-lb.box of Velveeta
½ c.
Duke’s mayonnaise
3 to 4 oz. creamy horseradish
3-4 drops Frank’s Hot Sauce
Pinch of garlic powder

Cut Velveeta into cubes and melt in the top of a double boiler (if you don’t have a double boiler, a
Duralex bowl over a saucepan works quite well), stirring occasionally until smooth and creamy. Remove from heat and immediately add remaining ingredients, stirring until combined. Pour into individual ramekins, cover, and refrigerate until ready to serve.

As an Amazon Associate I earn from qualifying purchases.


Friday, February 18, 2022

Triple Chocolate Frozen Dessert

 The problem with making a delicious dessert to serve on Valentine’s Day is that you can’t write about it until after Valentine’s Day. Fortunately, this dessert works at any time of the year. It takes a bit of time to create due to both the cooling down of ingredients, and the freezing of the dessert itself, but it is well worth it, and so easy a child could do it.

Triple Chocolate Frozen Dessert

Slightly adapted from TastesofLizzyt.com

 7.5 oz. white chocolatefinely chopped

7.5 oz. milk chocolatefinely chopped

7.5 oz. dark chocolatefinely chopped

3 c. heavy cream

2 t. espresso powder

Optional toppings: hot fudge sauce, mini chocolate chips, chopped nuts

Spray a 9”x5” loaf pan with PAM, and then line with aluminum foil so that it completely covers the pan and extends 2 inches above the pan.

 Place the white chocolate, milk chocolate, and dark chocolate in three separate bowls.

 In a heavy-bottomed saucepan, heat the cream over medium-low heat until it is hot and simmering. Be sure to stir it often so it doesn't scorch.

 Pour 1 cup of cream over the white chocolate, 1 cup over the milk chocolate, and the last cup over the dark chocolate. Stir each of the chocolate mixtures until it is creamy and smooth, with the chocolate completely melted. (Add the espresso powder to the melted milk chocolate.) Allow the mixtures to cool for 5-10 minutes; refrigerate for 30 minutes to cool.

In the bowl of a stand mixer (or using a hand mixer), beat the milk chocolate mixture with the whip attachment on medium-high for 2-3 minutes. Watch it carefully and stop the mixture when it becomes thick like sour cream. Be careful not to over-beat. The colder the chocolate is, the faster it will whip up.

 Spread the whipped milk chocolate in the bottom of the prepared pan. Place the pan in the freezer.

 Rinse the mixing bowl and whip attachment. Repeat this process with the white chocolate. Again, be careful not to over mix. Watch the mixture as it whips and stop it as soon as it becomes thick and creamy. Spread the white chocolate over the top of the milk chocolate layer in the pan. Place the pan back into the freezer.

 Rinse the mixing bowl and whip attachment. Repeat this one last time with the dark chocolate. Spoon this mixture over the white chocolate layer and smooth the top.

Cover the top of the pan with foil and freeze until firm, at the minimum, 3 hours.

When you are ready to serve, lift up on the foil to remove the dessert from the pan. Invert the frozen dessert onto a serving plate and remove the foil. Top with the optional toppings, if desired. Slice and serve.


As an Amazon Associate I earn from qualifying purchases.


Thursday, February 17, 2022

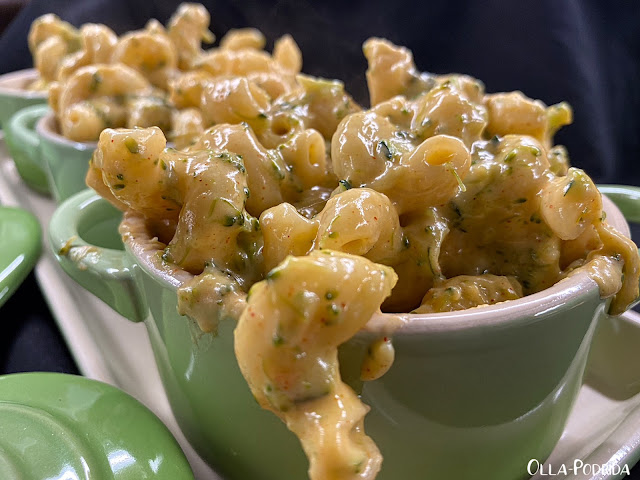
One Pot Stove-Top Mac and Cheese

I love macaroni and cheese, but I am one of those people who aren’t wild about the baked variety. It’s fine; it just always seems to turn out too dry for me. I far prefer the creamier version that is baked on top of the stove. This genius recipe from Half Baked Harvest is a one-pot wonder. Deliciously creamy mac & cheese, studded with healthy bits of broccoli and zucchini, the latter of which melts right into the mix. This is a delicious main or side dish, wonderfully creamy, very flavorful, and unbelievably easy.

  One Pot Stove-Top Mac and Cheese

 1 lb. short-cut pasta*

1 head broccoli, chopped

¾ c. heavy cream or whole milk

3 oz. cream cheese, cubed

1 medium zucchini, grated (about 1 c. grated)

1 T. Dijon mustard

2 c. shredded sharp cheddar cheese

1 c. shredded Monterey jack cheese

1 t. garlic powder

1 t. onion powder

1 t. paprika

¼ t. cayenne pepper

1-2 T. salted butter (optional)

Kosher salt and black pepper

  In a large pot, bring 4 cups of water to a boil over high heat. Add 1½ teaspoons salt, the pasta, and broccoli. Cook, stirring occasionally, for 8 minutes. Do not drain the water. Stir in the milk, cream cheese, and mustard, and cook until the cream cheese has melted and the pasta is al dente, about 4-5 minutes more. Stir in the zucchini.

Add the cheeses, garlic powder, onion powder, paprika, cayenne, and butter (if using), and stir until melted and creamy. Remove from the heat. Season with salt and pepper. If the sauce feels thick, add ¼ cup milk or water to thin.

Divide the mac and cheese between bowls. Top with black pepper.

*I used cavatappi, a longer cut pasta, so I added one additional cup of water, and increased cooking time by one minute.


As an Amazon Associate I earn from qualifying purchases.


Thursday, February 10, 2022

Cherry Cheesecake Blintzes

If you are looking for a sweet and romantic way to start your Valentine’s Day (or any day for that matter) nothing is easier than these make ahead Cherry Cheesecake Blintzes. This is my mother’s recipe, and was but one of the dozen or more dishes that would line the buffet table at her annual Christmas brunch. Employing the use of ready-made crêpes from Melissa’s Produce, and pressing your cookie scoop into service, these go together in no time.

Cherry Cheesecake Blintzes

1 10-count pkg.
Melissa’s Ready Made Crêpes

Filling:
1 15-oz. container ricotta cheese
1 large egg, beaten
2 T. sugar
½ t. almond extract
¼ t. vanilla extract
2 T. butter, melted

Sauce:
1 15-oz. can
pitted sweet cherries, drained, reserve ½ c. liquid
2 t. cornstarch
½ t. almond extract
Pinch of cinnamon

Spray a
1.5-qt. oven safe casserole dish with Pam; set aside.

In a small bowl combine all filling ingredients EXCEPT the butter; whisk until creamy. Spoon 2 tablespoons filling (I used a
cookie scoop) in the center of each crêpe. For the two opposite edges of the crêpe to overlap filling, and then fold in the remaining sides, forming a square packet. Place each blintz, seam side down into prepared dish. Cover tightly with foil and refrigerate overnight (these can be refrigerated up to two days).

Heat oven to 400°F. Remove cover from blintzes and brush with melted butter. Bake for 20 to 22 minutes or until light golden brown. While blintzes are baking prepare sauce.

Sauce: In a medium saucepan combine cornstarch and reserved cherry liquid. Cook over medium heat until mixture thickens, about 2 to 4 minutes. Stir in cherries, almond extract and pinch of cinnamon. Heat thoroughly. Serve over blintzes and garnish as desired.

Serves 4 to 5


As an Amazon Associate I earn from qualifying purchases.


Tuesday, February 8, 2022

Sriracha Honey Chicken Legs


Occasionally, actually more than occasionally if I’m honest, I will be rummaging through the freezer and come up with some real relics. An example of this was a package of pork chops with an expiry date of May, 2016 (I did not eat them). Honestly, I don’t know how they got there. I’m guessing that the late Mr. O-P bought them, and in June of this year he will be gone for six years. Oy! I had not hung onto them for the sake of sentimentality, more likely that they were too frosty to identify, and I didn’t want to risk throwing them away. I know, I know, it’s crazy. This year I told myself that I was going to get rid of things in the freezer, either by putting them to use, or putting them into the trash.

This week I found a package of chicken drumsticks. I didn’t buy them all that long ago, but as soon as I got them home, couldn’t remember why I did. So I pulled them out of the freezer and marinated them in buttermilk in the fridge, while I decided what to do. I always, I repeat ALWAYS, marinate chicken in buttermilk. It makes it so wonderfully juicy no matter how you choose to prepare it. At this point, the search was on for a recipe that looked unique and tasty. I found it at
allrecipes.com. This is so easy to put together, without the skin is lower in calories, and the taste is phenomenal!

Sriracha Honey Chicken Legs

Slightly adapted from Allrecipes.com

 2 lb. chicken legs, skin removed

2 T. olive oil

1½ t. dried thyme

1½ t. garlic powder

1 t. smoked paprika

1 t. salt

1 t. ground black pepper

3 T. raw honey

3 T. butter

2 T. Sriracha sauce

1½ T. soy sauce

 Preheat oven to 350°F. Line a baking sheet with aluminum foil.

 Combine chicken legs, olive oil, thyme, garlic powder, paprika, salt, and pepper in a large bowl. Mix chicken legs until coated and arrange on the baking sheet.

 Combine honey, butter, Sriracha sauce, and soy sauce in a saucepan over medium-low heat; cook and stir until butter is melted and sauce is smooth, about 5 minutes; set aside.

 Bake in the preheated oven for 45 minutes. Toss in Honey/Sriracha sauce and return to the oven for 10-15 additional minutes, or until an instant-read thermometer inserted near the bone reads 165°F.


As an Amazon Associate I earn from qualifying purchases.


Monday, February 7, 2022

Cheddar Garlic Muffins

 I can’t help but think of Miranda Hart in a certain scene from her British sitcom, “Miranda,” wherein she shows her disdain when love interest Gary offers her a savory muffin. 


Personally, I love a savory muffin, and this one is particularly good. It goes well with soups and salads, but I also found that I quite enjoyed it as a part of a breakfast sandwich with a scrambled egg, a slice of sausage, and additional sprinkling of cheese. These go together easily, and don’t require getting out the mixer. I love recipes like that.

Cheddar Garlic Muffins

Adapted from South Your Mouth

 1¾ c. flour

1 T. baking powder

½ t. salt

¼ t. garlic salt

1/8 t. cayenne pepper

1½ t. garlic powder

4 oz. cheddar cheese, grated

2 T. finely chopped scallions

1 lg. egg

1 c. whole milk

¼ c. melted butter

 Additional melted butter and garlic salt for topping warm muffins

  Preheat oven to 400°F. Place muffin cup liners* into a 12-well muffin tin; set aside.

 Whisk together flour, baking powder, salt, garlic salt, cayenne, and garlic powder in a medium bowl.

 Fold in cheese and scallions until all cheese is coated with flour mixture.

 In a separate bowl beat egg; whisk in milk and melted butter until well combined. Add egg mixture to flour mixture stirring with a fork until just combined.

 Divide dough evenly into muffin tin. Bake for 18-22 minutes, or until edges begin to brown.

 Remove from oven, brush with melted butter and sprinkle with garlic salt. Serve warm or at room temperature. I think they improve with age. They freeze beautifully.

 *This style holds more batter, so the end result will be 9-10 muffins.

As an Amazon Associate I earn from qualifying purchases.


Friday, February 4, 2022

Celebrate National Soup Day!


Happy National Soup Day! Boy is it ever the perfect day to celebrate. We have loads of snow on the ground, the temperatures are frigid, and I am tucked up in the house in front of the fire with my favorite cat, my favorite blanket, a tatty, bulky sweater, remote in hand, binge-watching my favorite British mystery.

 If you are as big of a soup fan as I am, then you will want to try one (or all!) of these. I have listed my favorites below (in alphabetical order because I didn’t want to play favorites). Click on the highlighted name beneath the photo to head straight for the recipe.

 Celebrate with soup! 

 Beef & Vegetable Soup


 B​​etter than Bread Co.’s* Cream Cheese Potato Soup


Cheesy Leek and Broccoli Soup


 Chicken Soup au Gratin


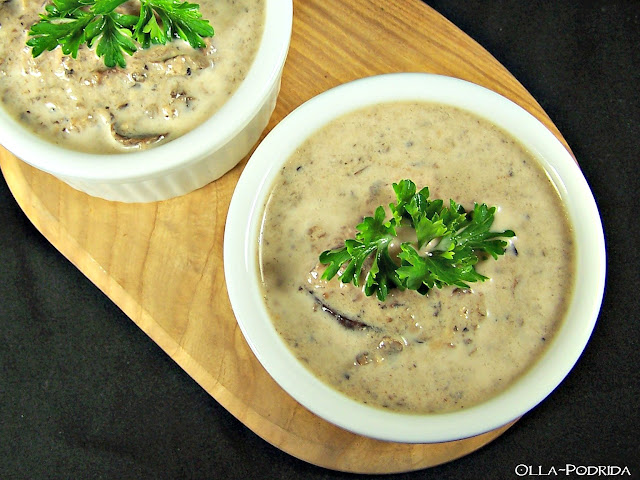
 Cream of Portobello Mushroom Soup with Sherry

 Rigatoni and Meatball Soup


 Slow Cooker Creamy Tortellini Soup


 Wonton Chicken Noodle Soup


Wednesday, February 2, 2022

Hearts of Palm and Artichoke Salad


Because I tend to use hearts of palm and artichoke hearts interchangeably, it rarely occurs to me to ever use them together, but particularly as the stars of the show. This easy to put together, sumptuous and tangy salad includes both in nearly equal measure. I found it to be unique and delicious, suitable as a side salad or main dish, and truthfully I could not stop eating it. The flavor improves and intensifies overnight in the fridge, so it also has the advantage of being make ahead.

Hearts of Palm and Artichoke Salad

Adapted from The Soccer Mom

 1 14.8-oz. jar Melissa’s hearts of palm

1 10-12 oz. jar marinated artichoke hearts

2 T. Dijon mustard

2 t. extra virgin olive oil

½ t. sugar

2 t. cider vinegar

½ bag fresh baby spinach

 Drain both the artichokes and hearts of palm. Chop hearts of palm into bite-size slices; quarter artichoke hearts.

 Combine artichokes and sliced hearts of palm in a medium mixing bowl; set aside. In a small bowl, whisk together Dijon mustard, olive oil, sugar, and vinegar. Pour liquid over artichokes and hearts of palm, and gently toss until well coated; salt and pepper to taste.

 Layer spinach on individual plates, and then top with hearts of palm and artichoke mixture.


As an Amazon Associate I earn from qualifying purchases.


Tuesday, February 1, 2022

Year of the Tiger Tablescape

Chinese New Year, beginning this year on February 1, is a colorful holiday in one of the most colorless months. I find my simple observance of it to be quite a perk after all of the activity of Christmas and New Year’s.


This “Year of the Tiger” table was relatively easy to put together because, as a lover and maker of Chinese food, I tend to keep things on hand like chopsticks, and Chinese take out boxes. Recently, I added fun and colorful Chinese fans to the mix. I gathered these things into a basket, tucked a bit of crinkly, shredded black paper left over from Halloween, to fill in some spots, and my centerpiece was born.

Years ago when I threw an Asian theme party for my parents for one of their anniversaries, I bought the fabric that I used here as a table covering and napkins, and hand painted Chinese characters on plain glasses that, at that time, I bought for $.50 each at Old Time Pottery.

The plates, celebrating the Year of the Tiger, may look like a special purchase, but I assure you they are not. That is nothing more than a picture of a tiger beneath one of my most used Duralex clear plates. These, luncheon-sized (9 inch) plates can turn any table into anything that you want it to be just by changing up the picture below. I used them, as you may remember, in this post.


The butterfly dishes for holding both sweet and sour and mustard sauces, I have had for decades! I was quite enamored with these when Pier 1 carried them back when I was in college, and couldn’t resist buying them. It was an odd purchase for someone accumulating items to set up housekeeping for the first type, but I guess that says everything about my character, personality, and shopping tendencies.


The teapot and teacups with their leaf-shaped saucers belong to my number two son. A number of years ago he asked me if I could store this set for him, and then never seemed to want it back. It gets pressed into service every year at this time.


Because not everyone is as adept with chopsticks as I used to be, a knife and fork are included. It saves on cleanup. :-)


I hope that you found this table as enjoyable to view as I did putting it together. Previous Chinese New Year tables can be found here and here.


Now go celebrate something colorful!

 This post is linked to: Tablescape Thursday

 As an Amazon Associate I earn from qualifying purchases.