Showing posts with label cupcakes. Show all posts

Sunday, June 8, 2025

Cupcakes for Any Occasion, Reviewed

 
Cupcakes for Any Occasion by Rachel Lindsay, a.k.a. “Caked by Rach” to her over three million social media followers, is a delightful and inspiring guide that transforms cupcake baking and decorating into an accessible, joyful experience, and this is something I do not say lightly. As someone who typically dreads baking — I do it, but I don’t like it — I found myself genuinely excited to try the recipes and designs in this book. Without hesitation, I can say this is the best cupcake book I’ve encountered, perfect for novices and seasoned bakers alike.
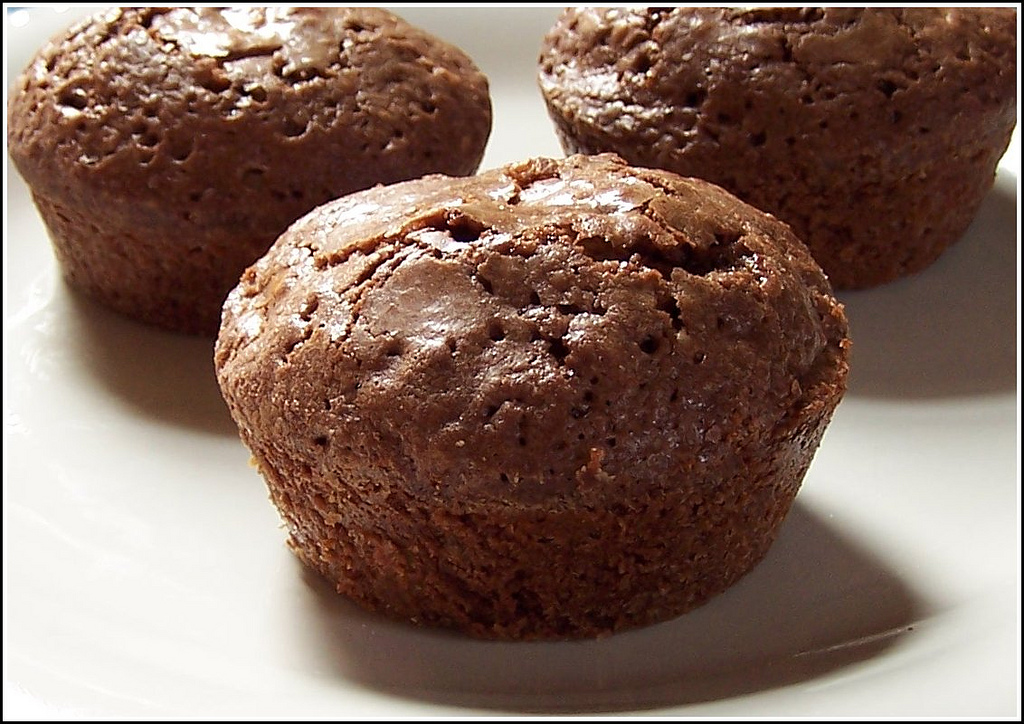
The book features 20 delectable cupcake and frosting recipes, paired with over 50 creative decorating projects tailored for holidays, birthdays, weddings, baby showers, and more. From whimsical Halloween ghosts and festive Christmas trees to charming butterflies and even playful spaghetti and meatballs designs, Lindsay’s creations are as imaginative as they are approachable. (Her skull cupcakes really spoke to me.)
Each project is accompanied by detailed, step-by-step photography and straightforward instructions, making complex-looking designs achievable for bakers of all skill levels. If you’ve ever wondered how to properly use a pastry bag, your questions are answered here — that alone, in my opinion, is worth the price of the book.What sets this book apart is its focus on simplicity and affordability. Lindsay uses basic tools and techniques that anyone can master. The recipes for cupcake bases and buttercream frostings are versatile, allowing endless mix-and-match possibilities to suit any occasion. Her clear guidance on essential baking and decorating methods ensures that even those with no prior experience—like myself—can produce stunning, professional-looking results.For added value, pairing the book with Lindsay’s online videos (Instagram and YouTube) enhances the learning experience, offering visual demonstrations that complement the written instructions.Cupcakes for Any Occasion is a foolproof guide that delivers. Whether you’re a reluctant baker or a cupcake enthusiast, this book will leave you eager to whip up your next batch of show-stopping cupcakes. Highly recommended for bakers of all ages and skill levels!

You can order your copy here.

 Many thanks to NetGalley and the publisher who provided me with an advanced digital copy in exchange for an honest review. 

 As an Amazon Associate I earn from qualifying purchases.

Monday, July 16, 2018

Slider Cupcakes


The apple didn’t fall far from the tree when it comes to my cousin, Emma. This nine-year-old soccer player is following in the footsteps of her mom, and generations of women before her, developing her talents as a baker. When her mom sent me this darling picture of the burger cupcakes that she had made for a soccer barbecue get together, I knew that I wanted to have her as a guest blogger in the hopes of encouraging other young people to join in on the baking fun.

Emma says that she got the recipe last year at Living World Church Cooking Camp. Ever since first trying them, she has been keenly interested in making them at home. We made them first at my grandma's house just for fun, then I made them for my soccer team's swim party and BBQ, she said, My friends said they were the best burgers ever! At first, the grown ups didn't even realize they weren't real sliders.

The results, as you can see, are wonderful.
Slider Cupcakes
Recipe from Living World Church Cooking Camp

1 box white or yellow cake mix
1 box brownie mix
2 cans vanilla frosting*
Red, green, and yellow liquid food coloring
Sesame seeds

Prepare cupcakes according to directions on cake mix package. When cool, slice them in half horizontally with a serrated knife to create the
bun.
 Prepare brownies according to package directions. When cool, cut them with a 1-1/2-inch circle cookie-cutter to create the “meat.
Use ample amounts of food coloring to mix a batch of red icing (ketchup), green icing (lettuce), and another batch of yellow icing (mustard).
Lightly dampen burger lids with water, and sprinkle with sesame seeds so they stick.

To create burger layers, put red icing on the bottom bun, then add the “meat,
then add the yellow and green icings, and top with the lid. Finish by using a cocktail toothpick to keep it all together.

* An equal amount of homemade frosting would work here too.
Many thanks to Emma for this wonderful post, and her mom for the lovely photos.


This post is linked to:

This post contains affiliate links.


Sunday, April 29, 2012

Ponchatoula Strawberry Cupcakes

It’s strawberry picking season, and while I no longer have the knees for such a task, I do love going to the local farm and buying as many quarts of still-warm, fresh-from-the-fields strawberries as I can carry.  I also find this time of the year a great one to pluck Screen Doors and Sweet Tea: Recipes and Tales from a Southern Cook (one of my favorite cookbooks) from the shelves and page through in search of something new to put on the table.  Frankly, I find the title alone to be charming.  It reminds me of lazy summer days, refreshing glasses of lemonade, and cool salads for supper instead of a hot, heavy meal.

This recipe jumped out at me as a great way to use some of the rapidly ripening strawberries scenting my kitchen with their heady aroma.  These cupcakes just say summer to me.  The texture is wonderfully moist, the strawberry flavor truly fresh and genuine; the frosting that drapes itself over the sides of the cupcakes, I could eat with a spoon.

Ponchatoula Strawberry Cupcakes
(Makes 24 cupcakes)

2 ½  cups cake flour 
1 teaspoon baking soda
¼ teaspoon salt 
1/3 cup buttermilk
¼ cup canola oil
½ teaspoon almond extract
1 teaspoon vanilla extract 
½  cup (1 stick) unsalted butter, softened
1 ½  cups granulated sugar 
2 large eggs
1 cup mashed fresh or frozen strawberries
1 teaspoon grated orange zest 
Strawberry Frosting (see recipe below)

Make the cupcakes:  Preheat oven to 350°F.  Spray a muffin tin with non-stick cooking spray or line with foil baking cups.
In a medium bowl, sift together the flour, baking soda, and salt. Set aside dry ingredients.   In another bowl, combine the buttermilk, oil, almond and vanilla extracts; set aside. 

In an electric mixer, cream the butter and granulated sugar until light and fluffy. Add the eggs, one at a time, beating well after each addition. Gradually add the buttermilk mixture. Beat for 1 minute at medium speed. 

Reduce the speed to low and add the flour mixture. Mix until just combined. Stir in the strawberries and orange zest. Spoon into prepared muffin tins, filling them two-thirds full. Bake for 18 to 20 minutes, or until cupcakes spring back when touched lightly in the center. Cool in the pan for 10 minutes, then invert the cupcakes from the pan and cool on racks. Let cool completely before frosting.

Strawberry Frosting

½ cup chopped fresh or frozen strawberries 
2 tablespoons strawberry jam
1 teaspoon fresh lemon juice
1 8-oz. pkg. cream cheese, softened 
1 ½  cups (3 sticks) unsalted butter, softened
4 cups confectioners' sugar, sifted

In a small saucepan over medium heat, combine the strawberries, jam, and lemon juice. Cook and stir for 5 minutes, or until the jam is melted and the strawberries are soft. Press any big pieces with the back of a spoon to mash. Let cool to room temperature.

In an electric mixer fitted with the paddle attachment, beat the cream cheese and butter at medium speed until creamy. On low speed, slowly add the confectioners’ sugar and mix until combined. Add the strawberries and mix until combined.

When the cupcakes are completely cool, spread with the frosting.

This post is linked to:


Tuesday, June 14, 2011

Truly Different Cupcakes & a Giveaway

This is my 200th post!  I can't believe I've actually been able to write 200 of these since last October.  I'm not sure if this means that I am very dedicated, or overly chatty, but whatever the case, to celebrate I have a giveaway, the details of which are at the bottom of this post.

*  *  *  *
I've been going through all sorts of old cookbooks and recipes lately.  It's quite a moving experience as I have recipes going back to when I was a little girl, handwritten by relatives long gone.  This is the way of life, of course, but it makes me sad that my grandmother can't be here to see just how much I enjoy making her recipes.  

One recipe I found was one my mother made quite a bit when I was in high school, and it was always a hit.  It's a simple, but tasty chocolate cupcake that is easy to make (read: no electric mixer and only one pan) and popular with everyone who tries them despite their rather humble appearance.  No frosting is involved as these have a rather crunchy exterior and dense, moist interior, and so are rich enough to hold their own without the addition of icing.  

The only downside to these is that they tend to stick to the pan, so I cannot emphasize enough the importance of greasing AND flouring the pan.  Don't even consider using those paper liners.  They'll come out of the pan all right, but you'll spend half a day picking off the bits of paper.  One time I made these for a party at work.  Everyone loved them, but were enormously frustrated with their attempts to remove the paper (and I was mortified).  One adventurous soul just popped the whole thing into his mouth and said that he'd eat the cupcake right off the paper and then spit out the paper.  I don't recommend this, just tell you this story to emphasize the need for the greasing and flouring.

They are quick and easy to mix together and are best when eaten within two days.  They freeze well, however, if the two-day thing is more than you can manage.

TRULY DIFFERENT CUPCAKES

1 cup margarine (I used 1/2 cup butter and 1/2 cup Crisco)
4 squares semi-sweet chocolate
1 teaspoon vanilla
1/4 teaspoon butter extract
1 cup unsifted flour
1-3/4 cups sugar
4 large eggs
1-1/2 cups chopped pecans

Preheat oven to 350 degrees F.  Grease and flour 2 cupcake pans (I used two jumbo pans, each with 6 wells). Melt margarine (or shortening combination), chocolate and butter extract in heavy saucepan, stirring occasionally.  Remove from heat and stir in remaining ingredients, mixing thoroughly by hand.  Fill cupcake pans 2/3 full and bake for 20-25 minutes (for regular-size pans) or 25-30 minutes (for jumbo pans) until done.  Because these are moist and chewy on the inside, using a cake tester to test for doneness doesn't work.  If the tester comes out clean, they're overdone.

*  *  *  *
GIVEAWAY - I have a boxed set of four RSVP fluted-edge biscuit cutters to give away to one lucky follower of this blog.  All you have to do is be a public follower and leave a comment on this post telling me about your favorite recipe from your past and you'll be eligible to win. The winner will be drawn at random and announced on Sunday.  Good luck, and thanks for reading my blog!

RSVP Biscuit Cutters Square - Fluted Edge (set of 4)

Product Features 

Stainless steel - Comfortable arched handles and thin blades to cut through thick or thin dough - Nest for easy storage - Set of four ranges from 1-1/2" to 2-3/4" diameter


Monday, February 14, 2011

Le Valentin Traite pour Deux - Chocolate Cupcakes

A cheery little pair of sweets for two.

A number of years ago, my mother and I hosted a shower for the young woman who was soon to become our granddaughter- and daughter-in-law, respectively. I'd learned from my son that her favorite dessert was chocolate cake, so in the weeks preceding the shower I tested close to a dozen different recipes, popping samples into the mouths of anyone who happened to walk in the door.  She was, after all, going to be family, so I wanted nothing but the best.  I ended up making individual chocolate cakes, plumped with a chocolate filling, and topped with a chocolate glaze that were, eh, okay.  For all of the work, I ended up with rather disappointing results.

A month or so after this, company unexpectedly descended upon us late one evening -- more chocolate fans (are there non-chocolate fans?) -- and I was at a complete loss as to what to do.  So, when everyone was asleep, I reached for the box of Duncan Hines Dark Chocolate Fudge Cake Mix and made cupcakes, then grabbed The Hummingbird Bakery Cookbook for the frosting, that I piped on in a delicate pattern. Naturally I destroyed the box so thoroughly no CSI would have been able to identify it, but left the cookbook conspicuously on the counter.  I got raves!  Indeed the cupcakes were delicious.  It seems, then, that a cupcake may just be more about the icing than it is about the cake, not that the cake itself wasn't very moist and delicious.  So for this Valentine's Day ending to our romantic dîner pour deux, I went with the boxed cake (Duncan Hines Swiss Chocolate this time) and the homemade frosting, topping the cupcakes with some Valentine decorations that I scored on sale.  Cute, no?

Hummingbird Bakery CookbookThe Hummingbird Bakery Notecards With Recipes (Paperstyle Notecards in Tins)I'm a chocolate cake/vanilla frosting girl, but if you prefer chocolate icing to vanilla, I've provided you with recipes for both along with the recommendation that you get this book (the lemon cupcakes and lavender cupcakes are delicious and worth the price alone), or the darling kit and little cupcake book they offer, or the great notecards. Great gifts at any time of the year for yourself, or that special person in your life, or hey, as a not-so-subtle hint to someone to make you some cupcakes!  The notecards, I find, are just perfect to use for writing Thank You notes.  I've often received a "Thank You" note back for having sent the card!


VANILLA FROSTING
2 cups powdered sugar, sifted
5 T. unsalted butter, room temperature
2 T. whole milk
A couple of drops pure vanilla extract


Beat powdered sugar and butter together in electric mixer with paddle attachment on medium slow speed until mixture comes together and is well mixed. Turn mixer down to slower speed. Mix milk and vanilla in another bowl, then add to butter mixture a couple of teaspoons at a time. Once all the milk has been incorporated, turn mixer up to high speed. Continue beating until frosting is light and fluffy, at least 5 minutes. The longer the frosting is beaten, the fluffier and lighter it becomes.  (I tinted half of mine with red gel food coloring.) 

CHOCOLATE FROSTING
2 1/3 cups powdered sugar, sifted
6 1/2 T. unsalted butter, room temperature
1/3 cup unsweetened cocoa powder, sifted
2 T. whole milk

Beat powdered sugar, but and cocoa together in electric mixer with paddle attachment on medium slow speed until mixture comes together and is well mixed.  Turn mixer down to a slower speed. Add milk to the butter mixture a couple of teaspoons at a time. Once all milk has been incorporated, turn mixer up to high speed. Continue beating until frosting is light and fluffy, about 5 minutes. The longer the frosting is beaten, the fluffier and lighter it becomes.

Some sweet Valentines received from friends and family. Thanks everyone! I love getting fun things in the mail, particularly when they're handmade as some of these were.
This is linked to:
Keeping It Simple