Friday, December 29, 2023

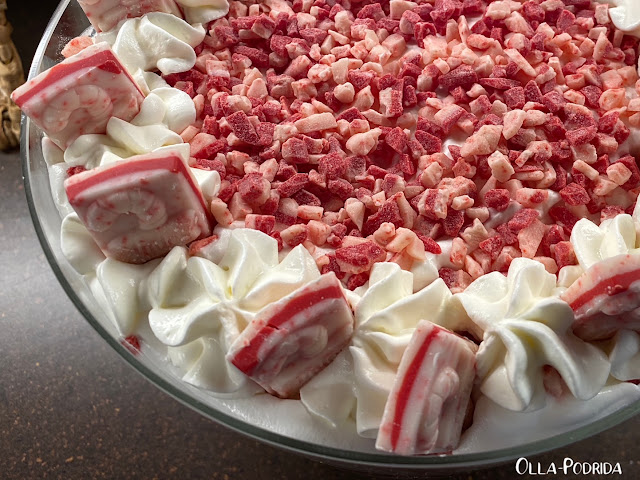
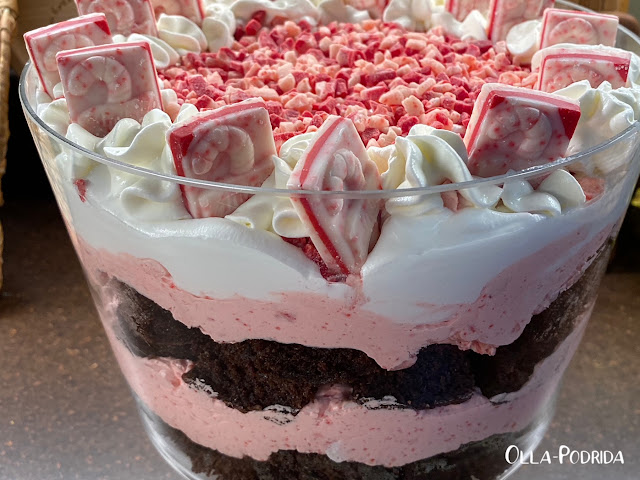
Peppermint Brownie Trifle

 
If you’re looking for something both festive and memorable to serve on New Year’s Eve, or New Year’s Day, this very well could be your answer. I made this to serve as dessert on Boxing Day, and people gobbled it up. It’s referred to as a trifle, but my impression was more that it was a layered dessert rather than a trifle, because, in my experience, trifles are more custard-y than this one that has layers of brownies, separated by peppermint cheesecake. It’s unique and showy; and elements can be made ahead of time prior to assembly. I encourage you to make this 2 to 3 days prior to serving.

Peppermint Brownie Trifle

 For the Brownie Layer

1 c. butter

½ c. dark cocoa powder

4 large eggs

2 c. sugar

2 t. vanilla extract

1 t. kosher salt

1½ c. flour

½ t. baking powder

 For the Cheesecake Layer

2 8-oz. pkgs. cream cheese, room temperature

½ c. powdered sugar

1 t. vanilla extract

½ t. peppermint extract

2½ c. Andes Peppermint Crunch Chips, divided

2 t. shortening

3 T. whole milk

2½ c. heavy whipping cream, whipped, divided

 Andes Peppermint Crunch candy bars

 Preheat oven to 350°F. Spray a 9” x 13” pan with Baker’s Joy.

Melt the butter in a small saucepan. Whisk in the cocoa powder. Let cool slightly.

 Beat the eggs until light colored. Add the sugar and extracts and beat again. Stir in ¼ cup of butter/cocoa mixture quickly. Add the rest of the butter mixture and beat again.

 Sift together the flour, salt, and baking powder. Slowly beat into the wet mixture in the bowl. Pour into prepared pan. Bake for 30 minutes. Do not over bake. Remove and let cool.

 Beat the cream cheese, sugar, and extracts until light and creamy. Set aside.

 Place 1½ cups Andes peppermint chips and shortening in a microwave safe bowl. Heat for 30 seconds. Stir and heat again if needed until creamy. Pour into cream cheese mixture and beat until mixed in. Fold in 1 cup of the whipped cream and ½ cup Andes chips.

 Cut the brownies into 1” squares. Place half the brownies in the bottom of a trifle bowl.

 Top with half of the peppermint cheesecake. Repeat layers. Cover the top with 1 cup of whipped cream and top with more Andes chips.

 Pipe the remaining whipped cream around the edges with a piping bag and icing tip #21. Top with Andes Peppermint Crunch candy bars. Lightly cover with plastic wrap and keep refrigerated until serving.


As an Amazon Associate I earn from qualifying purchases.

Wednesday, December 27, 2023

Top Ten Posts of 2023

It's time for my year-end wrap-up featuring the 10 most popular posts of 2023

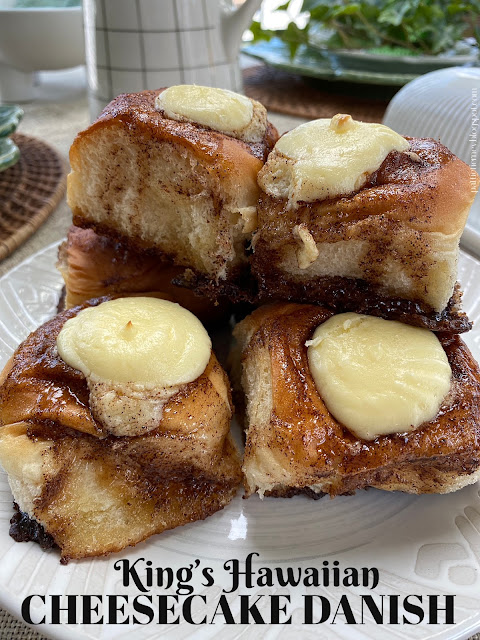
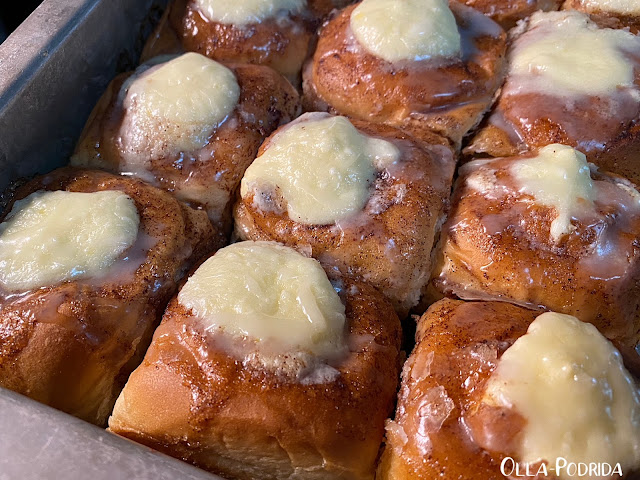
 The number one most popular blog post this year, and it is not even close, was the King’s Hawaiian Cheesecake Danish. I got more hits on that one post than I did on the entire blog for the last two years. One might say it went a bit viral. Those rolls are good, and they’re easy to make, so if you haven’t tried them, you might consider it.

Another thing that really surprised me was the fact that tablescape posts were more popular than food posts. I’m not sure what this tells me about the direction in which I should be heading next year, but I definitely need to give this some thought.

Thanks to all of you who visit my blog, I really appreciate having you here. To see the blog post and recipe or tablescape associated with each of these pictures (shown in descending order of popularity), click on the title below the photo and it will take you directly to the post.

 Happy viewing, and have a wonderful New Year!


 King’s Hawaiian Cheesecake Danish

 To view previous Top Ten Lists click one or more of the follow links:

Top Posts of 2022

Top Posts of 2021

Top Posts of 2020

Top Posts of 2019

Top Posts of 2018

Top Posts of 2017

Top Posts of 2016

Top Posts of 2015

Top Posts of 2014

 Top Posts of 2013 

 Top Posts of 2012


Tuesday, December 26, 2023

Tomato Basil Soup from The Country Club Bar and Grill

 
I mentioned last week that I have been going through old recipes. This is one that I had cut out of the newspaper back in 2019. I happen to be a fan of tomato soup – all kinds – so I am never one to pass up a new recipe. This was published in the food section of the St. Louis Post-Dispatch, September 24, 2019, in the “Special Request” column wherein people ask for recipes for dishes that they’ve enjoyed at local restaurants. Some restaurants participate, others don’t. This recipe is from an establishment called The Country Club Bar and Grill. I’ve never been there, so I can’t say if the end result is as good as what they offer in the restaurant, but it was certainly tasty.
I found this recipe to be a rather interesting one in its assemblage (if that’s the right word) of the soup. I had to wonder why they warmed up the half-and-half and troubled themselves to temper it when they could have just as easily used heavy cream (that requires no tempering) and skip that step. Nonetheless, I tend to stick to the recipe as written the first time I make something.
As in most cases, I found the soup was better the second day. I also found that a tiny squeeze of lemon juice brightens the flavor a little bit, so I served mine with a little lemon wedge on the side.

Tomato Basil Soup

The Country Club Bar and Grill

 2 to 3 c. water

6 c. premium marinara sauce*

2 c. half-and-half

T. chopped fresh purple basil

¼ c. plus 2 T. grated Parmesan cheese

T. granulated garlic

Kosher salt to taste

T. finely chopped leaves of flat-leaf Italian parsley

T. shredded pecorino

 Place the water in an instant kettle or in a small pot on the stove and heat to a boil. Maintain it at a low simmer.

 While the water heats, pour the marinara sauce into a 4- or 5-quart saucepan over medium heat until it just begins to bubble. Reduce heat to medium low.

 Place the half-and-half in a small mixing bowl. Temper the half-and-half by adding ¾- to 1-cup of hot sauce, stirring slowly until it incorporates. This step prevents the soup from curdling. Slowly pour the tempered half-and-half into the hot sauce, stirring as you pour.

 Add the chopped basil and granulated garlic into the soup. Stir thoroughly, down to the bottom of the pot. Cook uncovered over medium-low heat for 15 minutes.

 Add the Parmesan cheese and stir well, scraping the bottom and the sides of the pan.

 Add hot water gradually to the hot soup, ½ cup at a time, stirring down to the bottom, until the desired consistency is reached. You will probably not use all of the water but keep it at the ready to add if needed. For the test, we added 2 cups total.

 Reduce heat to low. Simmer for an additional 12 to 15 minutes, stirring often, down to the bottom and around the edges. Taste. Add salt if needed. Remove from the burner to a warm place, cover and let rest 5 to 10 minutes.

Top with chopped parsley and grated pecorino.

 Yield: 6 servings

 *I used Rao’s Tomato Basil.

As an Amazon Associate I earn from qualifying purchases.


Thursday, December 21, 2023

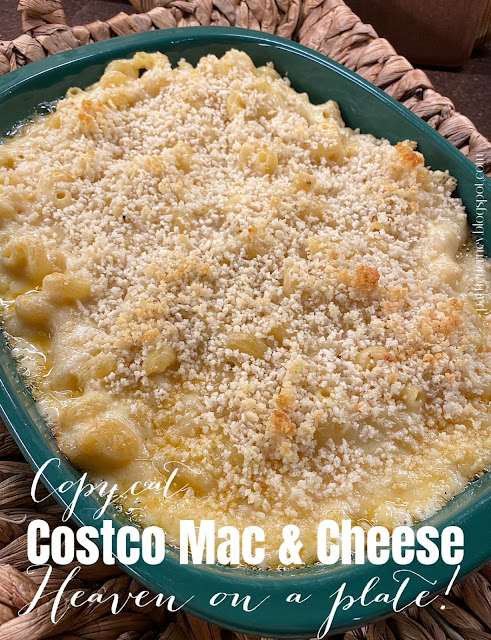
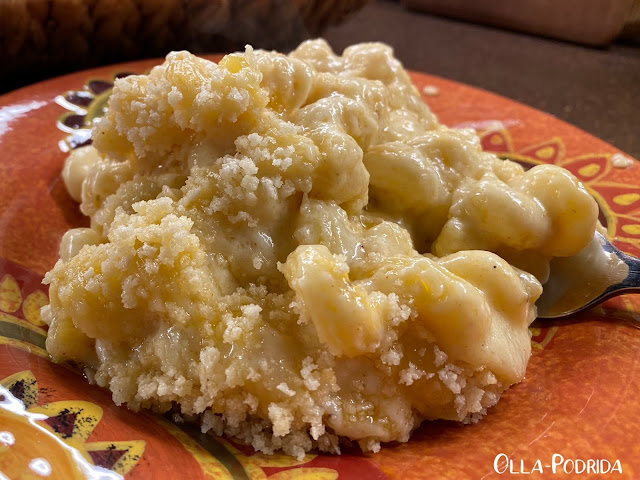
Copycat Costco Mac and Cheese

I am not a member of Costco, ergo I didn’t realize that they had their own signature mac and cheese that, indisputably, everyone seems to enjoy. The copycat recipe has been making the rounds on the Web lately and, as I never turn down mac and cheese, was eager to give this a try. I must say that it sold me with the inclusion of five different cheeses, resulting in a complex flavor along with a rich and creamy texture. I think this is the best mac and cheese that I have ever tasted. It will go swimmingly with Christmas ham.
Copycat Costco Mac and Cheese

1 lb. cavatappi pasta

1 T. olive oil

1/2 c. butter

1/2 c. flour

1 c. heavy cream

3 c. whole milk

3-1/2 c. grated white cheddar cheese 

2 c.  Gruyere cheese

3/4 c. Romano cheese

1/2 c. Parmesan cheese

1/2 c. medium cheddar cheese

1/2 T. kosher salt

1/2 t. freshly ground black pepper

¼ t. paprika

¼ t. garlic powder

1/8 t. freshly ground nutmeg

½ c. panko

2 T. butter, melted

Preheat the oven to 375°F.

 Drizzle oil into a large pot of boiling salted water. Add the cavatappi and cook according to the directions on the package, 6 to 8 minutes. Drain well.

 In a large saucepan, melt the 1/2 cup butter over medium heat. Once the butter is melted, add the flour and whisk well, cooking for 1-2 minutes.

Slowly add the cream and milk, whisking continuously, until smooth and completely combined.  Remove from heat and stir in all cheeses as well as the salt, pepper, paprika, garlic powder, and nutmeg. Once the cheese has melted, fold in cavatappi.

Pour into a 9” x 13” baking dish. Stir together panko and melted butter, and sprinkle over the top. Bake, uncovered, for 20-25 minutes, until the cheese is melted and bubbly. Serve immediately.

 NOTE: The original recipe did not call for a panko topping, but I tend to like that sort of thing on top of baked mac and cheese. Use it or don’t.

I cut the recipe in half and it turned put beautifully.

As an Amazon Associate I earn from qualifying purchases.


Wednesday, December 20, 2023

Holly & Berries Tablescape

 
Christmas isn’t Christmas without the traditional colors of red and green. That’s my story and I’m sticking to it. Nothing says Christmas more than this table. Not only because of the color combination, but because these beautiful bone china dishes in the “Yuletide” pattern by Rosina-Queens once belonged to my mother. I’m not entirely sure when she bought this set, but she bought service for 12, with all of the completer pieces, and used those to serve her Christmas brunch every year after she made that purchase. They go back to at least the 80s, maybe earlier. When she passed away, it was such an honor to bring these to my home.In addition to the dinnerware, the adorable little ceramic baskets with Holly leaves and red berries were hers as well.
She used to place a truffle, or other delicious bit of chocolate in each one at each place setting.The mercury glass ornament place card holders belonged to her too, as well as the gold flatware; the woman set a beautiful table.
My contributions to this table besides the hunter green tablecloth and gauzy runner are the wonderful placemats that I bought from Pier 1 years ago. Just setting them on the table makes it feel like Christmas.
 
The napkins are from Pottery Barn, as are the little reindeer votives.
 
The red goblets are from Villeroy and Boch. 
The centerpiece is a simple hurricane with a candle and a small wreath. When you have such beautiful dinnerware, a simple centerpiece is all that you need.I’ll be thinking of my mother, and her legendary brunches, when I dine at this table during the coming week.
 
As an Amazon Associate I earn from qualifying purchases.

 This post is linked to: Tablescape Thursday


Tuesday, December 19, 2023

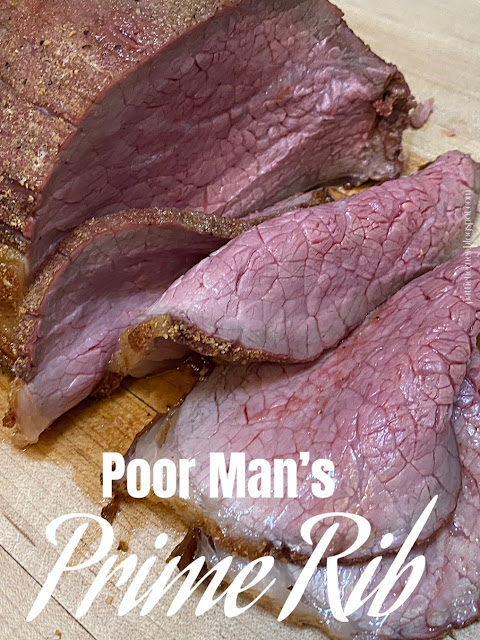
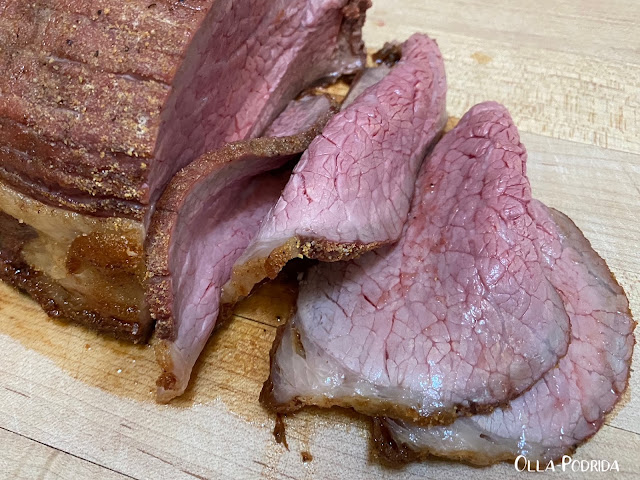
Poor Man's Prime Rib

 
I don’t know about the rest of you, but I have a lot of recipes, and I have them everywhere. I have books full of bookmarks and Post-it notes, recipe boxes bursting at the seams, files overloaded with printed out recipes, as well as seven different labeled folders in my email. The other day I thought it might be a good idea to clean out one of my email folders, and came across this recipe that I had saved more than a decade ago. As luck would have it, the place where I shop had eye of round roast on sale this week, so I decided to give it a try. 
 
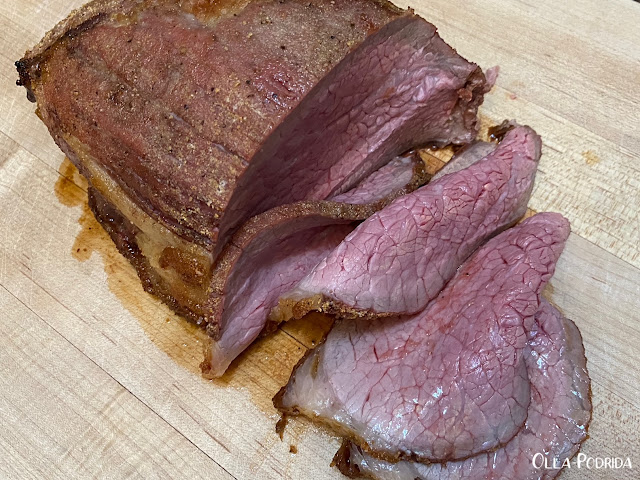
I have to confess, I wasn’t expecting much. In fact, it took a great deal of strength to shove a $20 roast into a 500° oven with nothing other than a thin coating of dry seasoning. Much to my surprise, it turned out to be delicious. It reminded me quite a bit of the roast dinners that we used to get Sundays in our local pub when we were living in Oxford. For the sake of nostalgia, I served mine with roasted potatoes and two veg. It was an easy meal to put together, a wonderful bit of nostalgia, and tasty to boot. I will be making French Dip Beef Sandwiches later in the week. Yum! Poor Man's Prime Rib

 3 lb. beef eye of round roast

1 t. garlic powder

1 t. onion powder

Salt and freshly ground black pepper, to taste

 Preheat the oven to 500°F. Combine garlic powder, onion powder, salt and pepper in a small bowl. Rub thoroughly into the meat and place roast into a roasting pan or baking dish.

 Do not cover or add water.

 Place the roast in the preheated oven. Reduce the temperature to 475°F. Roast for 21 minutes (seven minutes per pound), turn off the oven, and let the roast sit in the hot oven for 2½ hours. Do not open the door at all during this time!

 Remove the roast from the oven (the internal temperature should have reached at least 145°F). Carve into thin slices to serve.

As an Amazon Associate I earn from qualifying purchases.


Monday, December 18, 2023

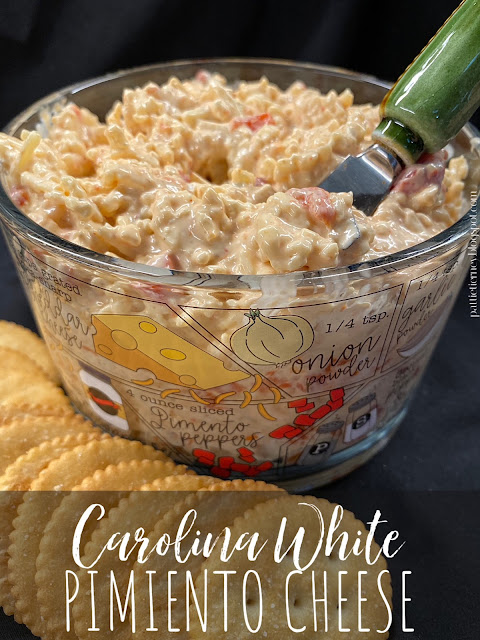
Carolina White Pimiento Cheese

 
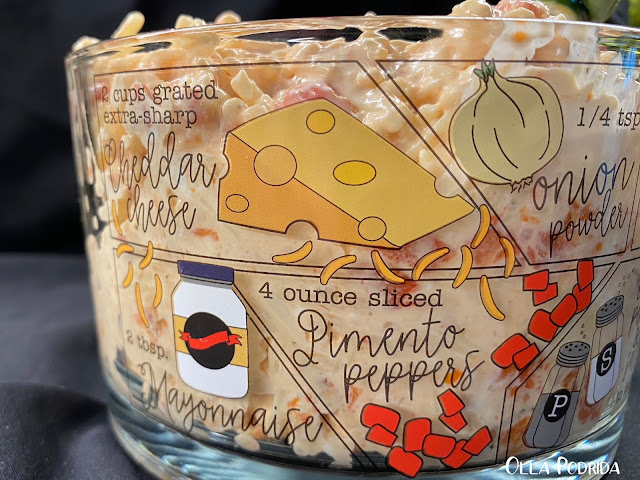
By now, you, my faithful readers, are well aware that I am a big fan of pimiento cheese. Recently, I received a wonderful pimiento cheese bowl for my birthday. The bowl is from the fabulous Mud Pie, and I am totally in love with it (as I am with all of their products). Yes, I have tried the recipe illustrated on the side of the bowl, but today I was feeling a little spicy. I was interested in trying a white variety of pimiento cheese, which got me thinking about white barbecue sauce. So I combined ingredients that would normally be present in pimiento cheese along with a few other ingredients that would be found in white Carolina barbecue sauce, and thus Carolina White Pimiento Cheese was born. It’s a zesty winner!

Carolina White Pimiento Cheese

 1 8-oz. block white cheddar cheese, grated

2 oz. cream cheese, room temperature

½ c. chopped Melissa’s Fire Roasted Red Peppers

3 T. Duke’s mayonnaise

1 T. apple cider vinegar

1 t. Worcestershire sauce

1 t. brown mustard

1 t. horseradish

1 t. fresh lemon juice

Pinch cayenne

Pinch paprika

Kosher salt, to taste

Freshly ground black pepper, to taste

 Place above ingredients into a medium mixing bowl. Using a fork, combine ingredients thoroughly. Turn out into a bowl, cover with plastic wrap, and store in the refrigerator for at least four hours to meld flavors.


As an Amazon Associate I earn from qualifying purchases.