Showing posts with label freezer friendly. Show all posts

Tuesday, July 2, 2024

Herbed Chicken Casserole

 
This is a recipe that dates back to the 70s. I remember my mother making it, and, once my young self got past the worminess of the baked chow mein noodles, I loved it. I was recently missing those days, and those casseroles that I so enjoyed, so I decided to make it for myself. I added a bit more seasoning to it than the original called for, and because I had a box of Stove Top Stuffing (sacrilege!) on hand, used it instead of the called for Pepperidge Farm stuffing mix. It was wonderfully comforting. It’s easy to put together, can serve 6 to 8, and freezes quite well. If you’re missing the good old days (and with the current state of things, who isn’t?) give this recipe a try and reminisce.

Herbed Chicken Casserole

3 c. cooked chicken, cubed or shredded
½ c. chopped onion
1/3 c. chopped celery
1 8-oz. can
sliced water chestnuts
¼ c. + 2 T. milk
1 10.5-oz. can
cream of mushroom soup, undiluted
1 10.5-oz. can
chicken with rice soup, undiluted
1 c.
La Choy chow mein noodles
¼ t. Montreal chicken seasoning
1/8 t. freshly ground black pepper

1/3 c. butter, melted
¼ c. sliced almonds
1 c.
Stovetop Stuffing*

Preheat oven to 350°F. Spray an 8
x 8 casserole dish with PAM; set aside.

In a large bowl stir together chicken, celery, water chestnuts, milk, both soups, Chinese noodles, and seasonings. Turn out into prepared dish. In a small bowl mix together melted butter, sliced almonds, and dry stuffing mix. Sprinkle over the top of the casserole. Bake, uncovered, for one hour.

* I used “Savory Herb. You can also use Pepperidge Farm herb stuffing.

As an Amazon Associate I earn from qualifying purchases.

Friday, April 28, 2023

King’s Hawaiian Lemon Cheesecake Danish

 
Last month I made Cheesecake Danish using a recipe I’d found on the web. It made use of the King's Hawaiian rolls, and it was delicious. The other day I was thinking about that recipe, and wondering how well it would translate into a lemon filling with a lemon glaze. It did, easily, and the results were outstanding! If you enjoy lemon as much as I do, you need to give these a try. They freeze beautifully, so don’t fail to make these because it results in a dozen. They’ll keep so that you can enjoy them on 12 separate, tasty occasions.
King’s Hawaiian Lemon Cheesecake Danish

 Lemon Cheesecake Rolls:

1 12-pack King's Hawaiian original sweet rolls

½ c. + 2 T. butter melted

3 T. brown sugar

2 t. ground cinnamon

¼ t. ground nutmeg

8 oz. cream cheese, softened

¼ c. granulated sugar

¼ t. lemon oil (NOT extract)

2 T.  grated lemon peel from 2 larges lemons

1 large egg, beaten

Lemon Glaze Topping:

½ cup powdered sugar

1 T. fresh lemon juice

Fresh grated lemon peel for garnish (optional)

 Preheat oven to 375°F. Melt 2 T. butter and brush evenly along the bottom and up the sides of a 10” x 10” baking dish; set aside.

 Separate the rolls and place into prepared pan. With a sharp knife (I used a fish boning knife), cut an “X” into the top of each roll about 2/3 of the way down.

Stir together the 1/2 cup butter, brown sugar, nutmeg, and cinnamon in a small bowl; pour evenly over the rolls.

Beat the softened cream cheese until smooth. Add sugar, lemon extract, lemon zest, and egg, and beat until incorporated.

Transfer cream cheese mixture into a piping bag fitted with a wide tip. Press the tip down into the “X” that you created in each roll, and pipe full. You will see the roll expand as it fills with the delicious lemony cheesecake filling.

 Bake, uncovered, for 12 to 15 minutes. In order to prevent sticking, allow rolls to cool for a couple of minutes.  Prepare glaze and drizzle over the top. Allow glaze to set for ten minutes before removing to a serving plate. Serve warm.

 As an Amazon Associate I earn from qualifying purchases.

Tuesday, April 25, 2023

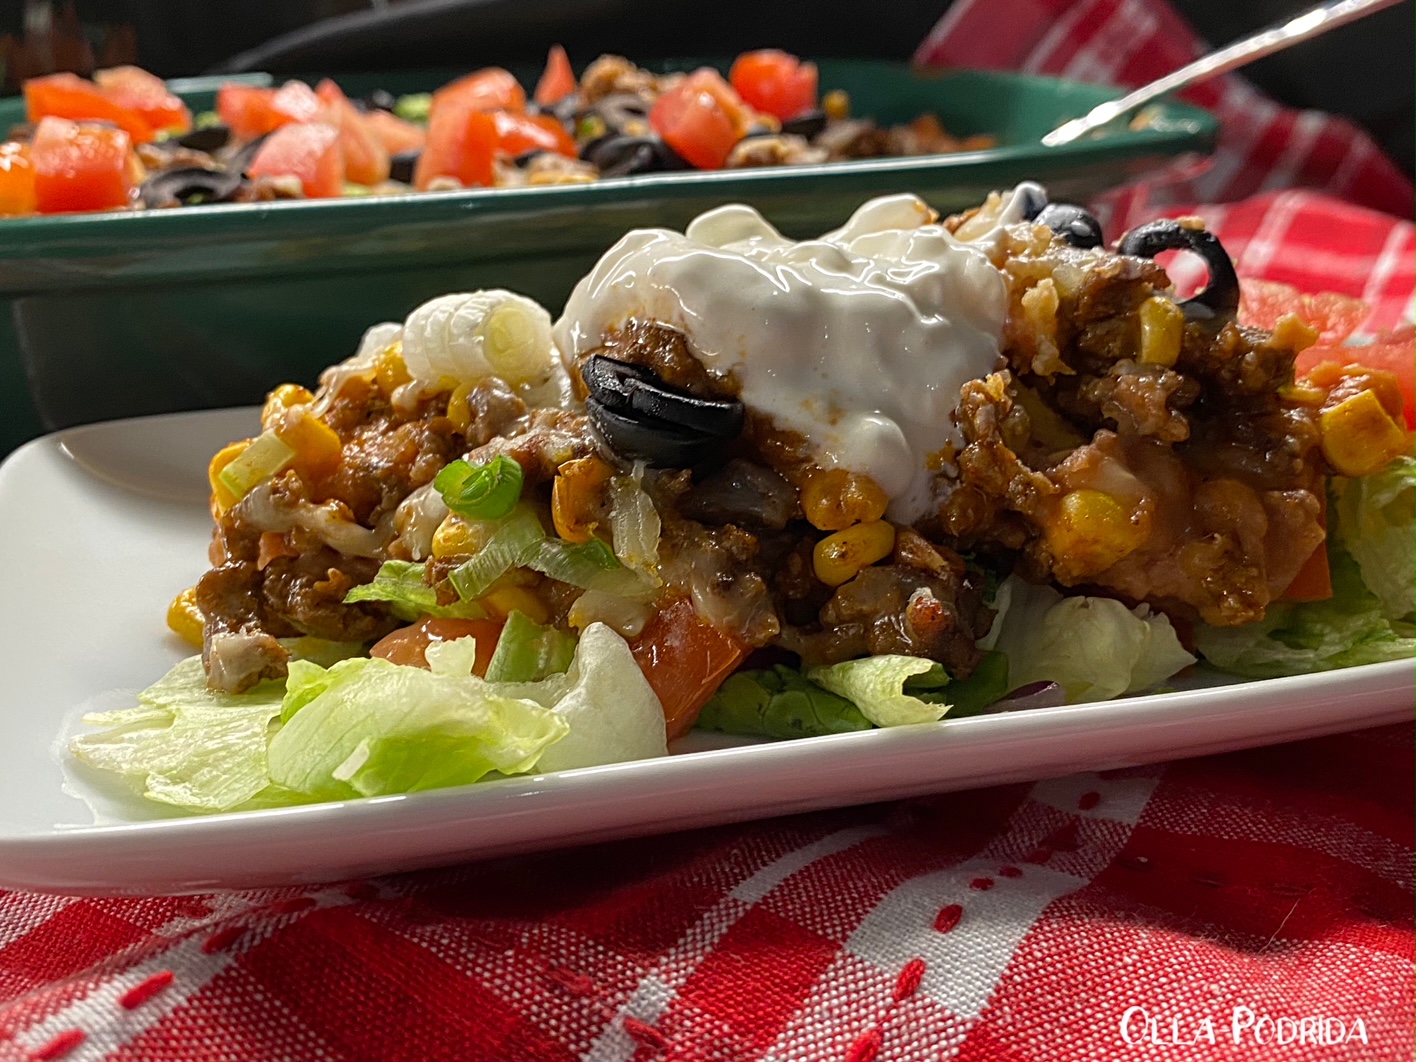
Layered Taco Casserole

 
I don’t know about you, but I never get tired of Mexican food. That’s not to say that this layered casserole is Mexican, but it’s what we have Americans consider to be Mexican, so I’m just going to go with that. The beauty of a casserole is that you can change it up to suit your tastes in any way that you like. If there are ingredients that you would like to add, feel free to do so. Had I had a small can of green chilies on hand, I would have stirred them into the refried beans. Instead, I added some sliced jalapeños to the beef along with the corn. This is one of those dishes that is pure comfort. It makes a decent amount, particularly if there are just one or two of you, but it freezes beautifully. I filled individual au gratin dishes with single servings, wrapped them in plastic wrap, and put them into the freezer in Ziploc freezer bags so that I can enjoy them at some point in the future…probably with a margarita.

Layered Taco Casserole
 Adapted from aboutamom.com


1 lb. ground beef
1 1.25-oz. pkg. taco seasoning

1 c. frozen corn

¼ - ½ c. sliced Melissa’s pickled jalapeños 
1 15-oz. can refried beans
2 c. Monterey Jack cheese, divided
1 c.
salsa
2 green onions, chopped
1 2.25-oz. can
sliced black olives
1 tomato, chopped
2 cups corn chips (coarsely crushed)

 Preheat oven to 375°F. Spray the bottom of an 8” x 8” casserole dish with PAM. Place crushed corn chips into the bottom of casserole dish; set aside.

 Heat refried beans on stove until hot. Add 1 cup cheese and 1 cup salsa. Stir until combined. Spread beans over corn chips in dish.

 In a 10" skillet, brown ground beef; drain off any excess fat. Add taco seasoning and cook according to package directions. Stir in the frozen corn and jalapeños. Place beef/corn/jalapeno mixture on top of beans. Sprinkle remaining cheese over top. Sprinkle black olives and green onions over cheese.

 Bake for 15 to 20 minutes, or until the cheese is sufficiently melted.

 Remove from oven and sprinkle chopped tomatoes on top. Allow to cool a couple of minutes before serving. Nice when served over a bed of shredded lettuce with sour cream and guacamole on the side.

As an Amazon Associate I earn from qualifying purchases.


Friday, March 24, 2023

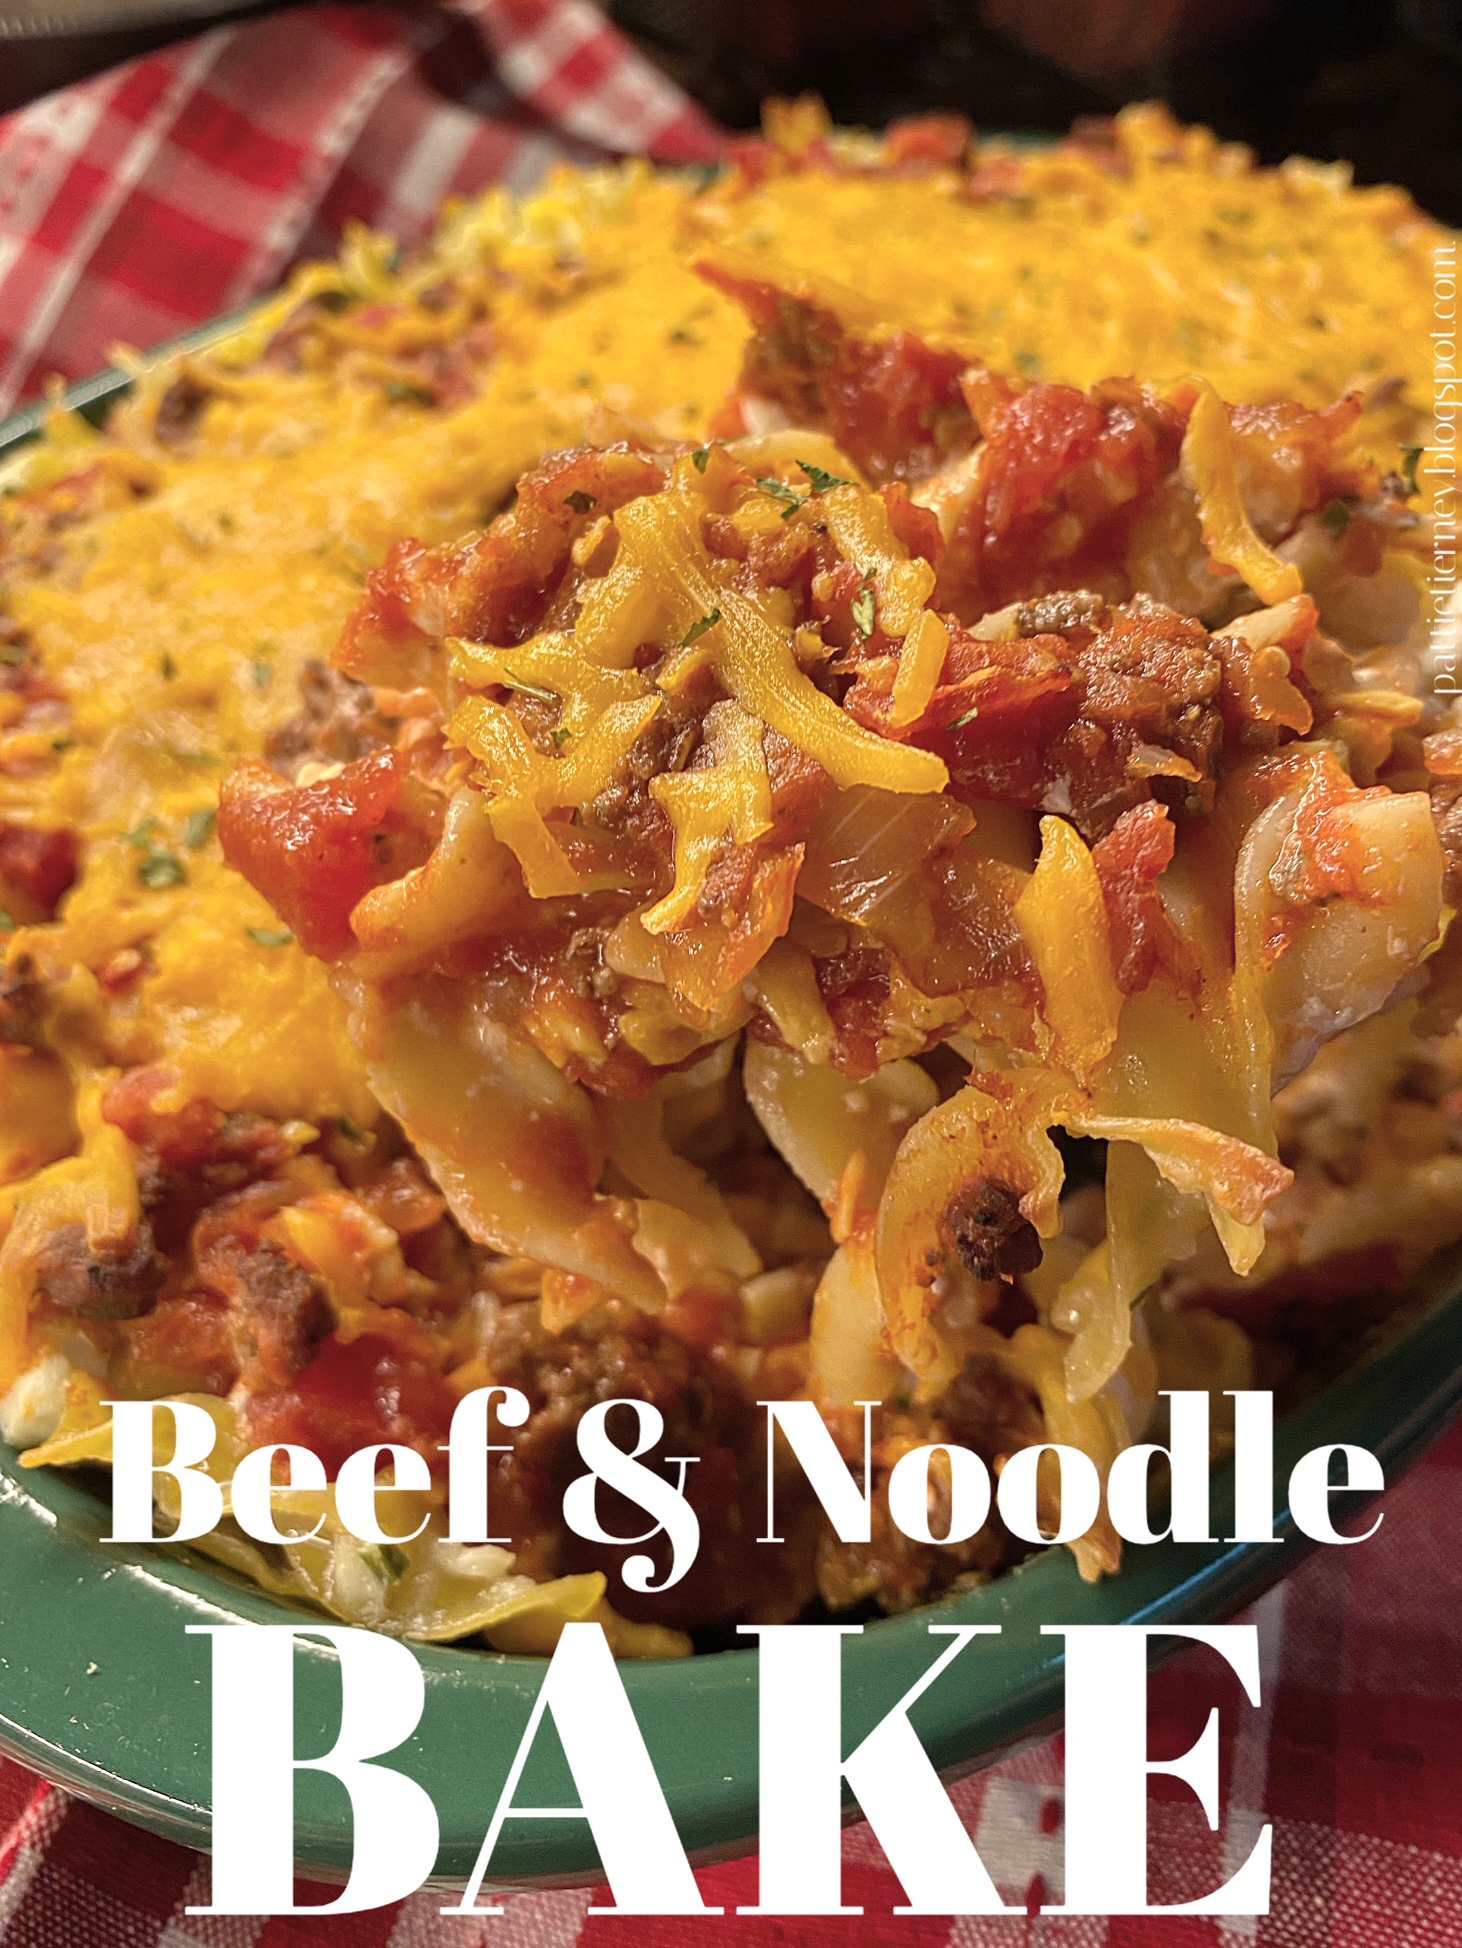
Beef & Noodle Bake

 About 20 years ago, when the late Mr. O-P and I were working together (as we did for 20+ years), we employed the use of a programmer who would come to our home once a week for dinner to transfer data for us and update the program if need be. It was always a nice evening because he was good company. Naturally, because he was a bachelor, I wanted to make dinners for him that he would enjoy. One evening, I asked him what his favorite food was, and his answer surprised me. “Casseroles,” he told me. I don’t think I’ve ever gotten that as an answer to that question. It did make cooking for him very easy from there on out because I don’t find anything easier to put together than a casserole. Truth be told, it’s also a favorite of mine. There is something down home and comforting about a casserole, particularly when noodles are involved. Here’s the recipe I served to Joe a number of times, sending him home with more to heat and enjoy the following day. I don’t know anyone who doesn’t like it. It is hearty and filling, tasty, and freezes well. What more could you possibly want?

 Beef & Noodle Bake

  Adapted from the cookingthecookingjar.com

 12 oz. uncooked egg noodles

1 lb. ground chuck

1 yellow onion, finely chopped

1 T. Melissa’s minced garlic

1 15-oz. can tomato sauce

1 14.5-oz. can fire roasted diced tomatoes, drained

½ c. chopped fresh parsley, more for garnish

1 T. Worcestershire sauce

2 t. smoked paprika

Red pepper flakes to taste

Salt and pepper to taste

8 oz. sour cream

8 oz. small curd cottage cheese

½ c. Parmesan cheese, shredded

2 c. cheddar cheese, shredded

Fresh parsley to garnish, if desired

 Preheat oven to 350° F. Spray a 9” x 13” casserole dish with PAM; set aside.

Bring a pot of salted water to a boil and cook the egg noodles according to package directions until al dente. Rinse in cold water to stop the cooking process. Add a splash of olive oil to prevent the noodles from sticking.

 Meanwhile, brown the ground chuck in a skillet, breaking up any clumps; drain. Add chopped onion and garlic to the skillet and sauté until fragrant, about 3 minutes. Pour in tomato sauce and diced tomatoes.  Season with Worcestershire sauce, smoked paprika, red pepper flakes and salt and pepper to taste and simmer until sauce has thickened, about 5 minutes.

 In a large mixing bowl, combine sour cream, cottage cheese, Parmesan cheese and cooked egg noodles. Mix well.

Spoon half the creamy pasta mixture into casserole dish. Top with half the beef mixture and half the cheddar cheese. Repeat with one more pasta – beef – cheddar layer each. Finish with a cheddar cheese layer on top.  Bake uncovered for 25-30 minutes or until cheese has melted.

 Top with optional parsley and serve hot.

  As an Amazon Associate I earn from qualifying purchases.


Friday, September 16, 2022

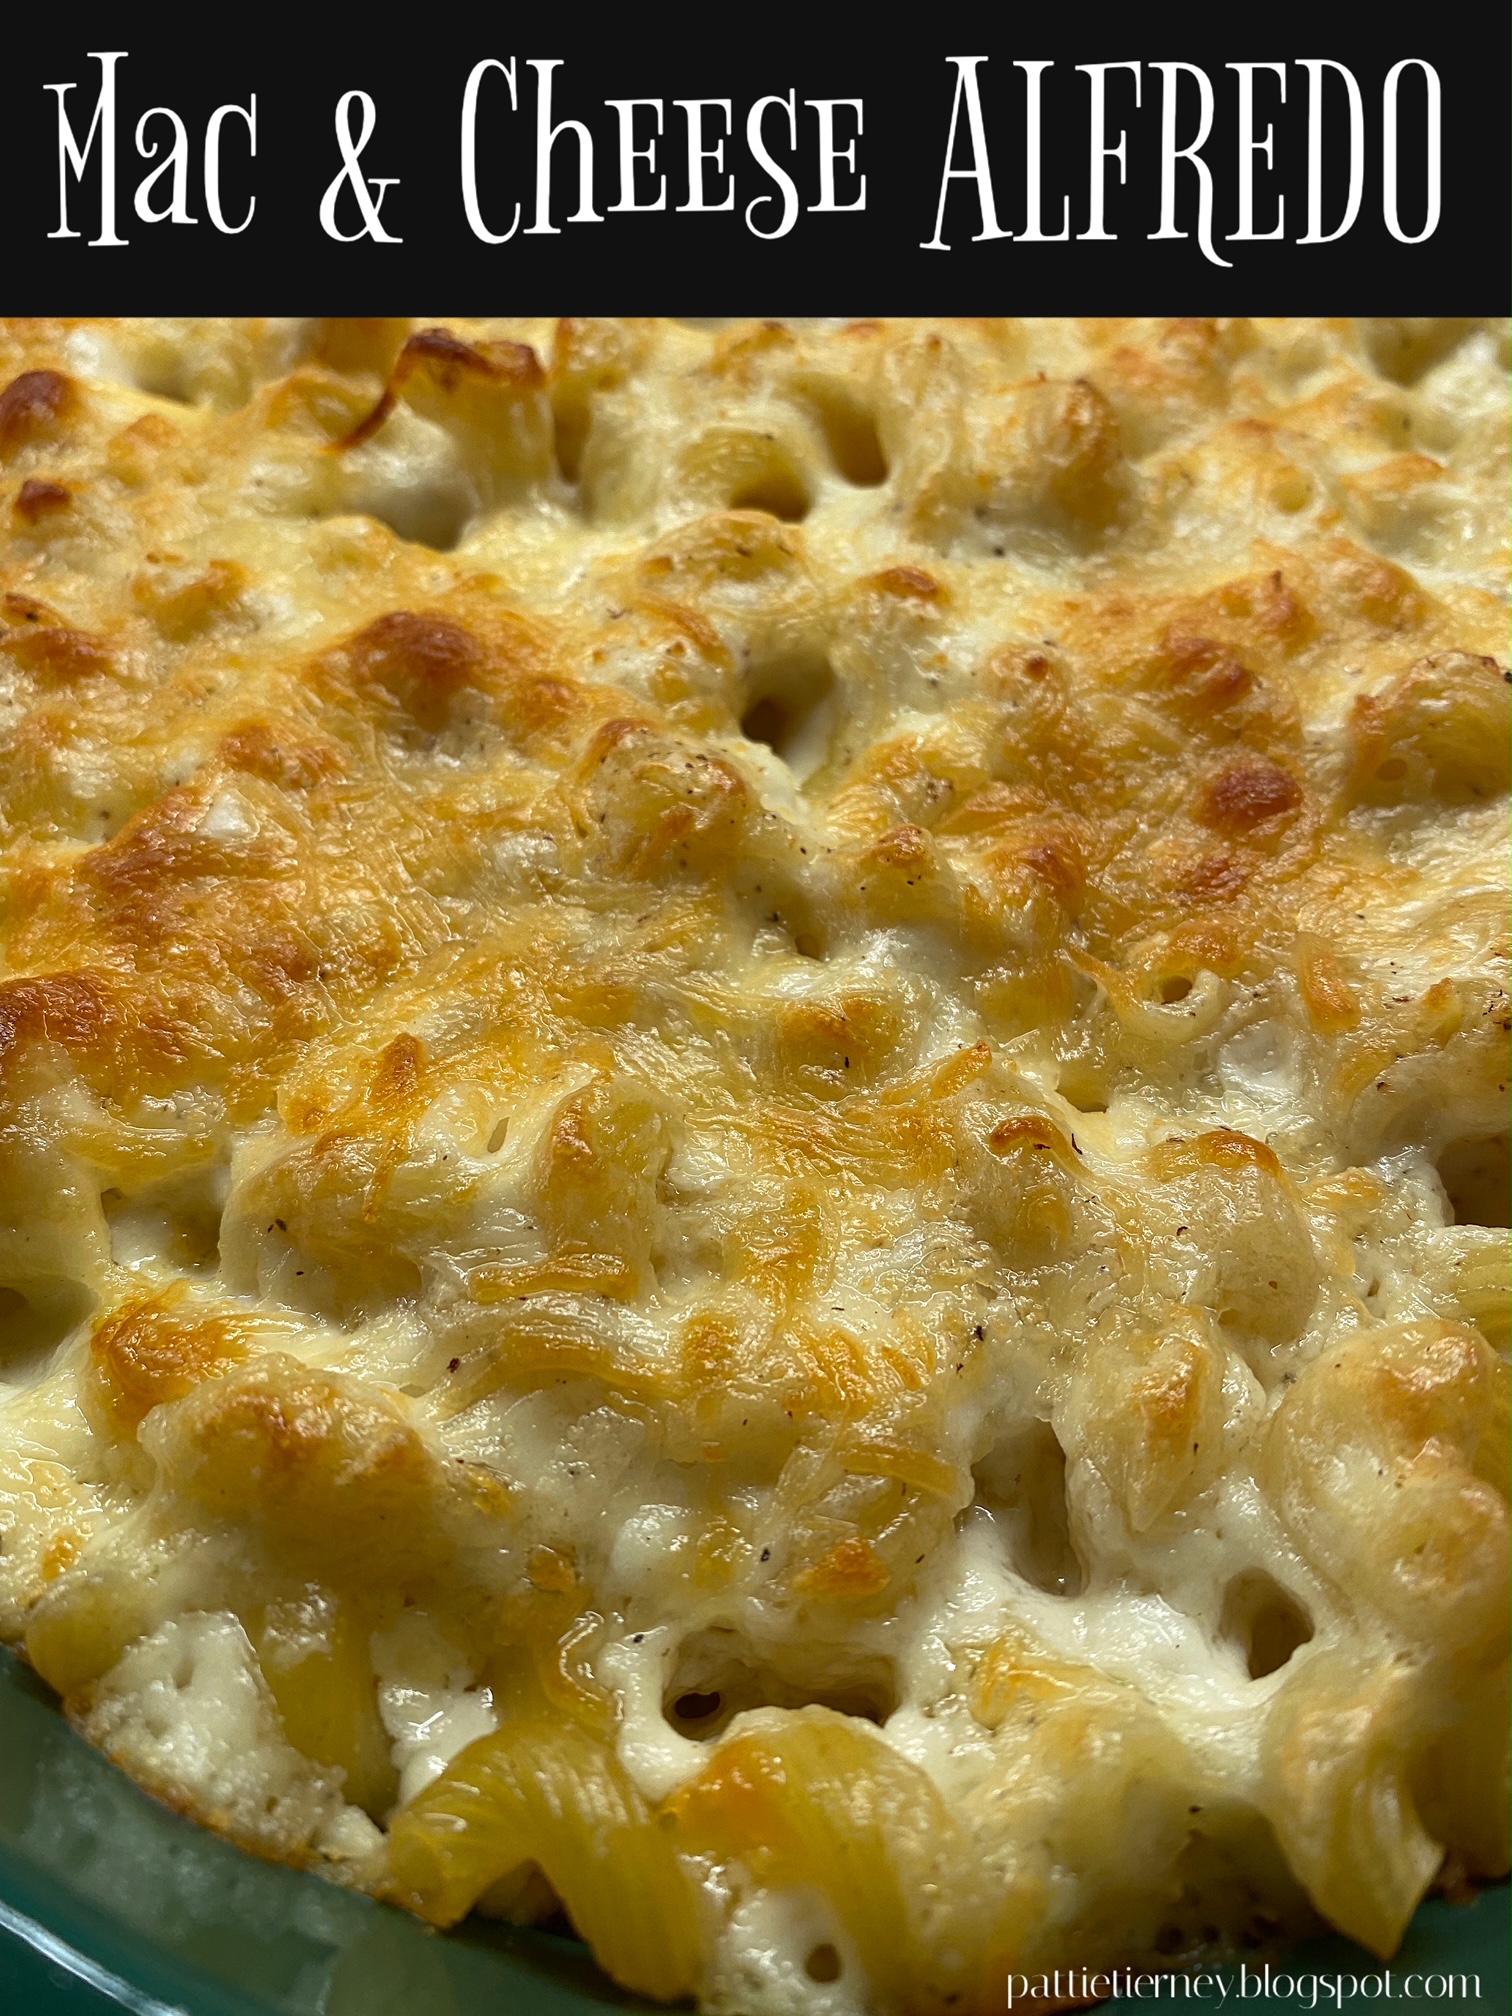
Alfredo Mac and Cheese

My number two son asked me the other day if I had ever come across a recipe for Mac & Cheese Alfredo. He loves Fettuccine Alfredo, but prefers the smaller noodle. It hadn’t occurred to me, so I went looking for one. I found a couple of them, and they seemed unnecessarily complicated. Macaroni and cheese is peasant food. It is supposed to be an easy dish to put together and serve to the family. Recipes that require jumping through hoops no longer interest me. When I got to thinking about it, I figured that, based upon my comfort culinary experience, I could come up with one on my own. Here it is, and it’s a good one -- all of the convenience and comfort of macaroni and cheese, with the taste of Alfredo!

Alfredo Mac and Cheese

 2 c. rotini, cooked al dente*

1 c. whole milk

1 c. heavy cream

2 T. butter 

2 T. flour

1/8 t. white pepper

1/8-¼   t. kosher salt

2 t. Melissa’s minced garlic

½ c. Parmesan cheese, finely grated

1 c. mozzarella cheese, grated

Few gratings fresh nutmeg

 Preheat oven to 350°F. Spray a 1.5 quart baking dish with PAM; set aside.

 In the same pan that you have cooked your pasta, i.e., while it is still warm, melt the butter over medium heat. When the butter is melted, whisk in flour and cook for 1 to 2 minutes. Add garlic, continuing to whisk, and cook for 30 seconds. Slowly add milk and cream, whisking constantly. Cook, whisking regularly, until it begins to thicken. Add Parmesan cheese, whisking until it has melted, remove from heat, and whisk in nutmeg. Taste for seasoning. If you think it needs more salt, pepper, or nutmeg, now is the time to add it.

 Add half of the cooked pasta to the prepared dish. Pour on half of the sauce and sprinkle with half of the mozzarella cheese. Repeat the layers of pasta and sauce and sprinkle the remaining mozzarella on top. Grate a bit of fresh nutmeg over the top.

 Bake for 45-60 minutes until the sauce is bubbling and the top just starts to lightly brown.

Serve.

 *I like cellentani, because I think it’s more fun, but use your favorite pasta.

As an Amazon Associate I earn from qualifying purchases.


Wednesday, April 28, 2021

Sausage and Pepper Pasta

This post contains affiliate links.

The late Mr. O-P was an excellent cook. I really miss the days when someone made a nice meal for me. Jim’s specialty was salmon as well as all types of Italian food. He made a mean sausage and pepper sandwich that I can still taste to this day. I had a hankering for them the other day, but not having bread on hand decided to try something different. Instead of the bread, I decided to toss it with cooked pasta. I think he would have approved.

Sausage and Pepper Pasta

3 links Italian sausage, sliced into ½” diagonals
1 T. olive oil
1 red pepper (or orange or yellow or a combination of all three), thinly sliced
1 3-oz. pkg. Melissa’s shallots, sliced
Pinch red pepper flakes
6 oz. cavatappi pasta
1 32-oz. jar of pasta sauce
1/8 t. dried basil
1/8 t. dried oregano
Salt and pepper to taste
Few gratings of Parmesan cheese

Put a large pot of water on to boil for the pasta.

Heat olive oil in a 12-inch skillet over medium high heat. Add sausage to the hot skillet and cook, stirring until it begins to brown. Add bell pepper and shallots, reduce heat slightly, and cook, stirring, until the peppers are tender, 15 to 20 minutes. Stir in hot pepper flakes, pasta sauce, basil, oregano, and salt and pepper to taste.

Cover and reduce heat to low. Allow sauce to simmer until the pasta has finished cooking.

When the water has come to a boil, add pasta and cook according to package directions. Drain pasta reserving ½ cup pasta water. Stir pasta and pasta water into pasta sauce. Cook until heated through. Serve topped with a few gratings of Parmesan cheese.

Amply serves four.


Friday, April 23, 2021

Pistachio Pesto

This post contains affiliate links.

 I had some pistachios left over from the Pistachio Dream Pie and wanted to put them to particularly good use because those things don’t come cheap. I was in the mood for pesto so figured, why not use them instead of my usual walnuts or pine nuts? I was also low on fresh basil, so made up for it with baby spinach. This is a winner! I saved some of the crushed pistachios to sprinkle on top, gave it a bit of a squirt of fresh lemon juice, and it was some of the best pesto that I have ever eaten.

 Pistachio Pesto

 1/3 c . shelled pistachios
2 cloves of garlic
½ c. grated Parmesan
1 c. packed fresh basil
1 c. packed fresh baby spinach
¾ c.
olive oil

 Place all ingredients into the work bowl of a food processor and pulse until a paste forms. If the pesto looks a bit dry just add some more oil. Keeps in the fridge for 2 weeks. Freezes beautifully.


Monday, March 23, 2020

Meatball Nirvana

This post contains affiliate links.
On March 9th we celebrated National Meatball Day, wherein I provided you with links to a lot of varied and delicious meatball recipes. That day I decided to try a new recipe, and I think it is probably my favorite overall. I made good-sized meatballs so that I could enjoy them with either my homemade marinara sauce or with homemade gravy. While they have a definite Italian bent, the beauty of these meatballs is that they go well with either treatment. They are tender, flavorful, and spicy, but not so spicy has to be off-putting by people who don’t care for too much heat. We’re all home this week, and for a number of weeks in the future I reckon, so experiment with some recipes. My guess is that you have all of these ingredients on hand, so try them. If not, thank goodness for Amazon!
Meatball Nirvana
Adapted from Allrecipes.com

1 lb. ground chuck
½ t. sea salt
¼ c. finely chopped fresh mushrooms
½ t. garlic salt
1 ½ t. Italian seasoning
¾ t. dried oregano
¾ t. crushed red pepper flakes
2 drops Frank’s hot pepper sauce, or to taste
1 ½ T. Worcestershire sauce
1/3 c. milk
¼ c. Parmesan cheese
½ c. Italian breadcrumbs

Preheat an oven to 400ºF.

Place the beef into a mixing bowl, and season with salt, shallot, mushrooms, garlic salt, Italian seasoning, oregano, red pepper flakes, hot pepper sauce, and Worcestershire sauce; mix well. Add the milk, Parmesan cheese, and breadcrumbs. Mix until evenly blended, form into 1½” meatballs, and place onto a baking sheet.

Bake in the preheated oven until no longer pink in the center, 20 to 25 minutes.


Wednesday, January 8, 2020

Homemade Garlic Butter

This post contains affiliate links.

If you like garlic bread as much as I do, but don’t like the hassle of making it, have I got a recipe for you! Homemade garlic butter is a wonderful thing to have on hand. Slather it on a split loaf of French bread, run it under the broiler, done in no time it will be eagerly consumed by your fellow diners. If you want to perk up a rather dull vegetable, toss it with your favorite, and this will add loads of taste. Did I mention how delicious this is melted on top of an Idaho baker? Heaven! I have even been known, in desperation, to spread it on a saltine cracker as a snack. Frankly, I hate being without it. So feel free to double or even triple the recipe depending upon the size of your family. You would be wise to make this now, because I’m going to be using it in a recipe later in the week that you are definitely going to want to try.

Homemade Garlic Butter

½ c. (1 stick) unsalted butter, room temperature
3 cloves garlic, minced*
1/3 c. grated Parmesan cheese
¾ t. dried fresh basil
¾ t. dried parsley
1/8 t. dried oregano
½ t. Kosher salt
¼ t. freshly ground black pepper

In a medium bowl beat butter until light and fluffy. Add remaining ingredients, beating until well blended. Transfer to an airtight container, and store in the refrigerator for up to two weeks. It can also be frozen for up to a year. Although you may be tempted, do not use fresh herbs, unless you plan to consume this within a couple of days.

*If you don’t feel like mincing your own, I have often used
Melissa’s Minced Garlic in place of the real thing.


Monday, August 26, 2019

Fresh Tomato Marinara Sauce

I do a lot of cooking, as you all know, and I grow a lot of vegetables. Despite both of these facts, I have never made fresh tomato marinara sauce. Having now done just that, I will never use the jarred variety again as long as fresh tomatoes are at hand.
Whereas previously I was wondering how on earth I was going to use up all of these tomatoes, I am now wondering if I’m going to have enough. I will be stocking the freezer with this wonderful sauce, and if you can get your hands on some fresh tomatoes, you should too. It is magnificent!
Fresh Tomato Marinara Sauce

3 T. olive oil
1 3-oz. pkg.
Melissa’s shallots
12 Roma (or medium tomatoes), peeled* and quartered
6 cloves garlic, minced
1 bay leaf
½ c. good red wine
1 T. dark brown sugar
½ c. packed fresh basil
1 t. dried oregano
1 t. dried marjoram
1 t. kosher salt
Few gratings freshly ground black pepper
¼ t.
fennel seed
Pinch crushed red pepper
1 tablespoon balsamic vinegar, more or less to taste

Heat olive oil in a medium stock pot over medium heat. Sauté shallots in oil until softened, 1 to 2 minutes. Stir in tomatoes, garlic, and bay leaf. Bring to a simmer, and simmer until tomatoes are softened, about 30 minutes

Place wine, brown sugar, basil, oregano, marjoram, salt, black pepper, fennel seed, and crushed red pepper into a small food processor. Pulse until blended. Add to tomato mixture, bring to a simmer, and cook another 30 minutes longer. Remove from heat, whisk in balsamic vinegar.

*To peel tomatoes, remove core and cut an “X” in bottom. Immerse into boiling water for 30 seconds. Remove to a bowl of ice water. Turn upside down and peel at “X.” The skin will come right off.


Serve with your favorite pasta. This sauce turned pre-made cannelloni into Food for the Gods!


This post contains affiliate links.


Monday, June 17, 2019

Baked Spaghetti

The late Mr. O-P loved pasta. And because of this love, and because we shared cooking duties, we would have pasta in some form once a week. That tradition came to an end when he did, and I’m sorry about that. I do like pasta; I just don’t often think to make it.

Today I was looking for something comforting, reminiscent of the old days, and in casserole form. It seemed a bit of a tall order initially, but then I thought about how much Jim used to like spaghetti and I thought why not make a big spaghetti casserole, and so I did. It was as good as I hoped it would be.
Baked Spaghetti

8 oz.
spaghetti
1 lb. ground chuck
1 medium yellow onion, chopped
1 clove garlic, minced
¼ c. chopped Italian flat-leaved parsley
½ t. Montreal steak seasoning
1 32-oz. jar spaghetti sauce (your favorite)
½ t.
seasoned salt
¼ t. dried basil
¼ t. dried oregano
2 large eggs
1/3 cup grated Parmesan cheese
5 tablespoons butter, melted and cooled
1 15-oz. container of ricotta cheese, divided
4 cups shredded mozzarella cheese, divided

Preheat oven to 350° F. Lightly grease a 1½-quart baking dish; set aside.

Bring a large pot of lightly salted water to a boil. Cook spaghetti, stirring occasionally, until al dente, about 12 minutes; drain.

While pasta is boiling, cook beef and onion in a large skillet over medium heat until meat is browned and onions are soft and translucent, about 7 minutes. Stir in garlic and parsley and cook 1 to 2 minutes more; drain. Turn off heat; return drained meat mixture to pan. Stir in spaghetti sauce, seasoned salt, basil, and oregano.

Whisk eggs, Parmesan cheese, and butter in a large bowl. Add drained spaghetti to egg mixture and toss to coat.


Place half of the spaghetti mixture into your baking dish. Top with half of the ricotta cheese, 1/3 of the mozzarella, and half of the meat sauce. Repeat this layer once more. Top with the final third of the mozzarella. Cover with foil and bake for 40 minutes. Remove foil and continue to bake until the cheese is melted and lightly browned, 20 to 25 minutes longer.

Remove from oven and allow to stand for 10 to 15 minutes before slicing and serving.

Serves 6

Another delicious baked pasta dish is Baked Ziti.


This post contains affiliate links.