Showing posts with label lemon juice. Show all posts

Monday, March 25, 2024

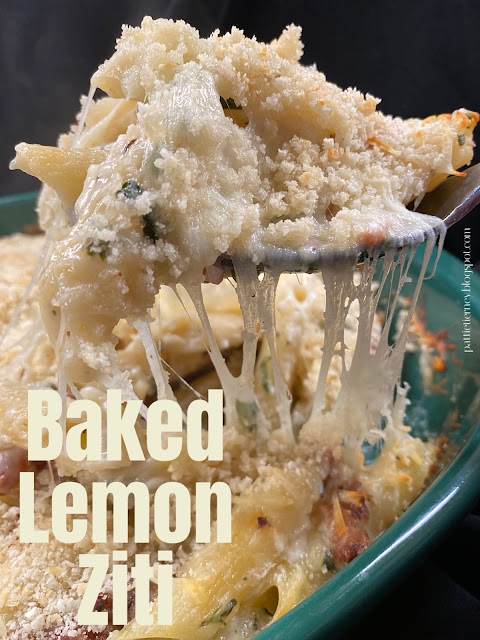
Lemon Baked Ziti

 
I bought lemons, and when I say I bought lemons, I mean I REALLY bought lemons. What can I tell you? They were on sale, I had a hankering, one thing led to another, and I came home with about 5 pounds of them. Fortunately there are all kinds of things I can use them for from savory to sweet, salad dressing to beverages, even in soup. Lemons are quite versatile.

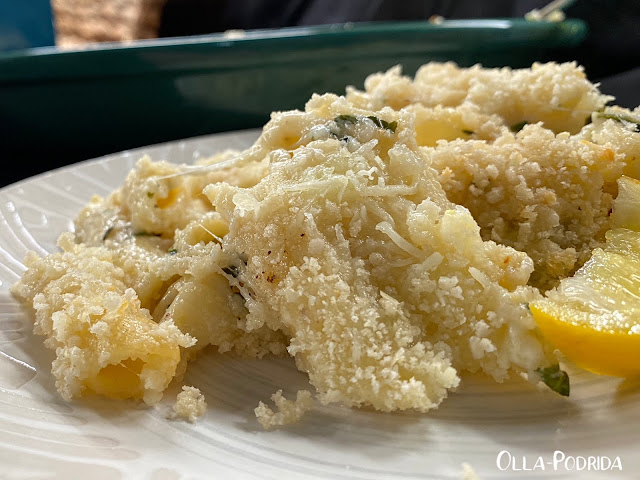
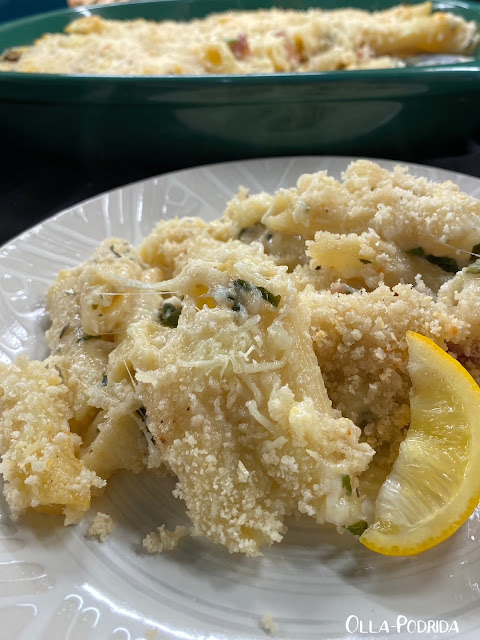
 The first thing I decided to do was to satisfy my curiosity by making a Giada DeLaurentis recipe. Her Lemon Baked Ziti has long intrigued me, so I thought I would give it a try.  It is excellent! I cut the recipe in half, and I used bacon instead of pancetta. When I make it next time, and there will be a next time, I am only going to use seven ounces of pasta rather than eight, because I would have liked this to have been a tiny bit saucier. Definitely drizzle the topping with the pancetta cooking juices in place of the olive oil. Give it a try. It is wonderful!

Lemon Baked Ziti

From Giada DeLaurentis

 Pasta:

Butter, for greasing the baking dish

Salt

1 lb. ziti pasta

1 T. extra-virgin olive oil

12-oz. pancetta, sliced into ¼” thick slices

 Sauce:

½ c. (1 stick) unsalted butter, room temperature

½ c. all-purpose flour

3½ c. whole milk, room temperature

Zesty of 2 large lemons 

¾ c. grated Parmesan

1 t. kosher salt

¼ t. freshly ground black pepper

1 c. chopped fresh basil

2 T. chopped fresh thyme

¼ c. fresh lemon juice (from 1 large lemon)

2 c. shredded mozzarella

Topping:

2/3 c. plain breadcrumbs*

1/3 c. grated Parmesan

Extra-virgin olive oil, for drizzling

For the pasta: Place an oven rack in the center of the oven. Preheat the oven to 350ºF. Butter a 13” x 9” x 2” baking dish.

 Bring a large pot of salted water to a boil over high heat. Add the pasta and cook until tender but still firm to the bite, stirring occasionally, 8 to 10 minutes.

 In a large nonstick skillet, heat the olive oil over medium-high heat. Add the pancetta and cook until brown and crispy, about 8 minutes. Using a slotted spoon, remove the pancetta and drain on paper towels.

 For the sauce: In a 2-quart saucepan, melt the butter over medium heat. Add the flour and whisk until smooth, about 2 minutes. Gradually add the milk, whisking constantly to prevent lumps. Add the lemon zest. Simmer over medium heat, whisking constantly, until the sauce thickens, about 10 minutes. Remove the pan from the heat and stir in the Parmesan, salt and pepper.

 In a large bowl, combine the cheese sauce, cooked pancetta, pasta, basil and thyme. Toss until the ingredients are coated. Stir in the lemon juice. Spoon the mixture into the prepared baking dish and sprinkle with the mozzarella.

For the topping: In a small bowl, combine the breadcrumbs and Parmesan.

 Sprinkle the topping over the pasta mixture. Drizzle the top with olive oil and bake until the top is golden brown, 25 minutes. Cool for 10 minutes and serve.

*Use panko here, and everywhere else where plain breadcrumbs are called for. Trust me on this.


As an Amazon Associate I earn from qualifying purchases.

Friday, August 6, 2021

Broccoli and Basil Pesto

This post contains affiliate links.

Over the course of our lives, we all fall victim in one way or another to a good sale. I recently fell victim to a broccoli sale. Yes, you read that right, broccoli. What can I tell you? It was a great deal. Little did I realize how far that 2-pound bag of broccoli florets would take me. You are the winners here because I did end up with some unique and wonderful recipes that I would encourage you to try, although unlike me, not in four days of succession. We won’t even go there.

The first that I’m going to share makes use of fresh seasonal basil as well as broccoli. This is so good that I was, quite literally, eating it with a spoon. Who needs pasta when you have something this tasty? Aside from a quick blanch of your florets, this goes together in a flash.

Broccoli and Basil Pesto

1½ c. broccoli florets*
1 c. packed fresh basil leaves
2 T. freshly squeezed lemon juice
1 t. lemon zest
2 large garlic cloves
¼ c. Parmesan cheese
1/3 c. extra virgin olive oil
Freshly grated black pepper, be generous

Bring a rather large pot of boiling water of water to a boil and add florets. Allow water to return to the boil, and boil for 30 seconds. Immediately empty into a strainer to drain, and then flip into a waiting pan of ice water to chill in order to stop further cooking. Drain and place in a food processor. Add remaining ingredients, and process until smooth. If it’s too thick for your liking, add a little more olive oil, if it’s too thin, add a little more Parmesan cheese.

*These don’t have to be small, mine were large. Don’t trouble yourself to break them down into tiny bits.


Tuesday, June 7, 2011

Emeril's Strawberry Lemonade

Louise at Months of Edible Celebrations blog is hosting a picnic, inviting bloggers to celebrate by bringing a full alphabet of picnic treats.  Louise assigned me the letter E for which I'm contributing Emeril's Strawberry Lemonade, an easy, refreshing, and delicious summer beverage.

I'm going on this virtual fantasy picnic, and I'm bringing:

A -
Apricot Cobbler from Mae 
B - Banana Cream Pie from Marjie
C - Cherry Bars in a Jar from Barbara
 D- Diva Doggie Bites from Channon
 E - Emeril's Strawberry Lemonade

Other bloggers will be bringing foods from F through Z. Hope you'll stop by and join in the fun.
I love this time of the year when the strawberries are plentiful, and driving up to the farm stand is fragrant with the ripe scent of the newly-picked berries.  Of course, as it's also in the upper nineties with heat indices around 100, I've found one of the best ways to consume the strawberries is in liquid form.  Emeril's Strawberry Lemonade is nectar for the Gods during weather like this; I seriously wanted to dive right in!  Knowing I had a tall glass (okay three glasses, if you must know) waiting for me after spending so much time working in the yard, was incentive alone to keep on going.  This was so delicious that I'm going to serve it at my Ladies' Luncheon later in the month - they will LOVE it!  I'm also going to experiment with raspberries and blackberries, in place of the strawberries. I'll let you know how that works out.  In the meantime, whip up a batch of this.  You can't go wrong, I promise you.
Emeril's Strawberry Lemonade
2 cups water
1 cup sugar
1 tablespoon grated lemon peel
1 cup fresh lemon juice
1 pint fresh strawberries, hulled and halved
2 cups cold sparkling water or club soda
Ice
Mint sprigs, garnish
Whole strawberries, garnish


In a medium saucepan, bring the water and sugar to a boil. Reduce the heat and simmer, stirring occasionally, until the sugar dissolves. Add the lemon peel and lemon juice, stir, and remove from the heat. Let cool completely, then strain into a clean pitcher.
In a blender, puree the pint of strawberries and add to the pitcher with the lemon juice. Stir well to combine and refrigerate until well chilled.  Add the sparkling water and stir well. Pour over glasses filled with ice and serve, garnished with mint and strawberries.


Tuesday, March 8, 2011

Baby Greens, Pear, Walnut, and Blue Cheese Salad


This combination of tastes is a real winner. It made for the perfect light dinner last evening. Next time, for color and a hint of sweetness, I think I'll add a sprinkling of dried cranberries (I was pleased to see the trio of cranberry plants that I put in last year are returning this spring so maybe one of these days I'll have my own fresh cranberries!). The fresh thyme used in the dressing is one of the few things currently available in the garden. 


Baby Greens, Pear, Walnut, and Blue Cheese Salad
Bon Appetit September 2002
Hot and Hot Fish Club, Birmingham, AL
Yield: Makes 6 first-course servings

3 tablespoons fresh lemon juice
1 tablespoon Dijon mustard
1 medium shallot, minced
1 1/2 teaspoons chopped fresh thyme
1/2 cup olive oil

1 5-ounce bag mixed baby greens
2 large ripe pears, halved, cored, thinly sliced lengthwise
1 cup crumbled blue cheese
1 cup walnuts, toasted, coarsely chopped

Whisk first 4 ingredients in small bowl to blend. Gradually whisk in oil. Season dressing to taste with salt and pepper.

Toss greens in large bowl with enough dressing to coat. Divide greens among 6 plates. Top with pear slices, dividing equally. Sprinkle with cheese and walnuts. Drizzle lightly with remaining dressing and serve.


This post is linked to:

Tuesday Night Supper Club

Tuesday, February 1, 2011

French Cut Green Beans with Hazelnut Butter


Finding a sumptuous side dish is not always easy.  Finding one that is quick, easy, delicious, and can be made ahead nearly impossible.  This recipe is the exception.  Every time I prepare these I get compliments, often from people who don't care for hazelnuts.  Toasting them and chopping them as finely as possible imparts a nutty flavor without an overpowering hazelnut taste, and adds a little extra crunch to the beans.

These can be made with green beans that have not been French cut (you'll need to cook them longer in this case -- 6 to 8 minutes), but I strongly suggest you give this little French cutting tool a try.  I found mine at the Viking store, but it is available from Amazon as well (click on image directly below to go to the page).  Never, I beg you, used canned or (horrors!) frozen green beans.  This is so quick and easy, not to mention actually fun to do.
Norpro French Bean Slicer


Snip the tip off of the fresh green bean using the cutting blade at the end.
Pull the green bean through the cutting blades to French cut.
It took me less than five minutes to French cut this entire pile of green beans.
Slice beans in half, or they'll be too unwieldy on the plate.
Combine first six ingredients in a small bowl.
Finely chop toasted hazelnuts, add to bowl, and stir together to make hazelnut butter.
Top cooked green beans with butter and allow it to melt into them.


French Cut Green Beans with Hazelnut Butter


2 tablespoons unsalted butter, room temperature
1 small shallot, finely chopped
1/4 teaspoon finely grated fresh lemon zest
1-1/2 teaspoons fresh lemon juice
1/2 teaspoon salt
1/4 teaspoon coarsely ground black pepper
1/4 cup hazelnuts, toasted and finely chopped
1/2 to 3/4 lb green beans, trimmed


Stir together butter, shallot, zest, lemon juice, salt, and pepper in a small bowl until combined. Add hazelnuts and stir until combined well.  Set aside.

Wash fresh greens beans, pat dry with a paper towel, snip off ends, and run through the green bean Frenching tool.  Cut French-cut beans in half.  Bring a medium saucepan of salted water to a boil and drop in green beans.  When water has returned to boiling, cook for 3-5 minutes until beans are tender.
Drain beans in a colander, then return hot beans to pot and toss with hazelnut butter.

This recipe can be made ahead.  You can blanch the green beans and refrigerate for up to two days.  The hazelnut butter can be made ahead as well and kept similarly for two days.

Makes 2 ample portions


This is linked to:


Tempt my Tummy Tuesdays