Showing posts with label vegetables. Show all posts

Thursday, October 24, 2024

Spinach Casserole with Four Cheeses

 
If you’re looking for something different to serve for Thanksgiving, or for a holiday brunch, this easy, make-ahead casserole just might be the answer. It’s certainly more nutritious than popular favorites like green bean casserole or corn pudding, but despite the high nutritional value it’s not lacking in flavor. My guess is that if you make it once, it will soon become a family favorite. If you have a hard time moving away from the French fried onions, those bits of crispy deliciousness found atop green bean casserole, you can sprinkle some on top of this one before baking.Spinach Casserole with Four Cheeses

 3 large eggs, beaten

1 16-oz. container small curd cottage cheese

1 16-oz. pkg. frozen chopped spinach, thawed and drained

1 4-oz. container crumbled feta

½ c. shredded cheddar

½ c. shredded Parmesan

1 Melissa’s shallot, minced

¼ c. melted butter

⅛ tsp. garlic powder

⅛ t. freshly grated nutmeg

Freshly ground black pepper

Lemon wedges, if desired

 Preheat oven to 350°F. Spray a 1½-qt. casserole dish with PAM; set aside.

Place all ingredients into a large bowl, and mix with a wooden spoon until combined; transfer to prepared baking dish.

Bake, uncovered, for 40-45 minutes or until the center is nearly set. If desired, sprinkle additional grated cheese on top during the last few minutes of baking, and bake until cheese has melted.

Let cool for 5-10 minutes. Serve with lemon wedges. The freshly squeezed juice really brightens this dish.

As an Amazon Associate I earn from qualifying purchases.

Monday, April 29, 2024

Garlic Butter with Fresh Herbs

 
It’s a rare day when I don’t have a crock of garlic butter in my fridge. I love to make it up fresh every week, finding multiple uses for it as the days progress. It’s delicious on vegetables, makes garlic bread an easy fix, and when buried in the center of a patty of ground beef ready for the grill, adds flavor and yields a juicy burger. I think you will find that it will serve you well this summer, providing you with many uses throughout, making cooking less of a chore, while amping up the taste of a variety of foods.

Garlic Butter with Fresh Herbs

1 c. butter, softened,
2 large garlic cloves, minced
2 T. minced fresh parsley
1 T. minced fresh chives
1 T. freshly squeezed lemon juice

In a medium mixing bowl, beat together all ingredients with a hand mixer. Using a rubber spatula, scrape into a container, cover, and store in the fridge until ready for use.

To make garlic bread, cut a baguette on the diagonal in slices about 1 inch thick. Spread copious amounts of garlic butter on each slice, and top with a mound of cheese. Slide into the broiler until the cheese has melted, and then enjoy.

As an Amazon Associate I earn from qualifying purchases.


Friday, August 6, 2021

Broccoli and Basil Pesto

This post contains affiliate links.

Over the course of our lives, we all fall victim in one way or another to a good sale. I recently fell victim to a broccoli sale. Yes, you read that right, broccoli. What can I tell you? It was a great deal. Little did I realize how far that 2-pound bag of broccoli florets would take me. You are the winners here because I did end up with some unique and wonderful recipes that I would encourage you to try, although unlike me, not in four days of succession. We won’t even go there.

The first that I’m going to share makes use of fresh seasonal basil as well as broccoli. This is so good that I was, quite literally, eating it with a spoon. Who needs pasta when you have something this tasty? Aside from a quick blanch of your florets, this goes together in a flash.

Broccoli and Basil Pesto

1½ c. broccoli florets*
1 c. packed fresh basil leaves
2 T. freshly squeezed lemon juice
1 t. lemon zest
2 large garlic cloves
¼ c. Parmesan cheese
1/3 c. extra virgin olive oil
Freshly grated black pepper, be generous

Bring a rather large pot of boiling water of water to a boil and add florets. Allow water to return to the boil, and boil for 30 seconds. Immediately empty into a strainer to drain, and then flip into a waiting pan of ice water to chill in order to stop further cooking. Drain and place in a food processor. Add remaining ingredients, and process until smooth. If it’s too thick for your liking, add a little more olive oil, if it’s too thin, add a little more Parmesan cheese.

*These don’t have to be small, mine were large. Don’t trouble yourself to break them down into tiny bits.


Monday, August 24, 2020

Zucchini Porcini Lasagna

This post contains affiliate links.
I have tried to grow zucchini all of my life, and have never had any luck doing so. It’s probably because of this that I am obsessed with it. I absolutely love zucchini — roasted, baked, used in breads, you name it. The other day I was rummaging around the web looking for a new way in which to use one of my favorite vegetables when I came across a recipe for Zucchini Parmesan. Naturally, I had to try it, and knew I could make it so much better by adding more of the woodsy taste that I love in all vegetarian dishes attained through the use of wild mushrooms. Here is the result.
This is so good! I can’t believe how fast I wolfed it down. Using the best ingredients makes a difference and I must confess to using Fresh Tomato Marinara Sauce when putting this together. I had just harvested the last of my tomatoes and decided to put them to good use. It took the entire recipe of that marinara to make this casserole, but it was well worth it. I think this is one of the best, layered Italian dishes I have ever eaten, and between you me, it kicks Egg Plant Parmesan to the curb.
Zucchini Porcini Lasagna

1 3-oz. pkg.
Melissa’s dried porcini mushrooms
2 medium zucchini, horizontally, thinly sliced*
Garlic salt and black pepper to taste
1 16-oz. jar marinara sauce**
½ c. Parmesan cheese
2/3 c. ricotta cheese
1 c. shredded mozzarella cheese

Hydrate mushrooms according to package directions; chop and set aside.

Preheat oven to 350°F. Spray an
8” x 8” baking dish with PAM; set aside.

Season both sides of zucchini slices with garlic salt and pepper. Put a small amount of butter into a 10- or 12-inch sauté pan and, over medium high heat, cook the zucchini slices until lightly browned, 2 to 3 minutes per side.

Spread 1/2-cup marinara sauce in the bottom of the prepared baking dish. Layer zucchini slices, overlapping slightly on top of the marinara. Top with half of the chopped porcini mushrooms. Spread 1/2-cup marinara sauce over zucchini and porcini layer, top with half of the ricotta cheese, half of the Parmesan cheese, and half of the mozzarella cheese.

Make another zucchini layer, top with remaining porcinis, remaining marinara, remaining Parmesan, remaining ricotta, and remaining mozzarella.

Bake until cheese is melted, 15 to 20 minutes. Allowed to set for 10 minutes before slicing and serving.

*I used a
mandolin.
**I used homemade.


Tuesday, January 21, 2020

Baked Zucchini and Feta Squares

This post contains affiliate links.
I’m sure I’m not alone in saying that I often buy things at the grocery store, come home with them, and then wonder what on earth my intention was with this purchase. Such was the case with a three-pack of rather large zucchini that were annoyingly taking up space in the vegetable bin of my fridge. After a while, I got tired of moving it around, so decided to actually do something with it. Zucchini, you might say to yourself, is not a problem. It is versatile, can be used for dishes both sweet and savory, and there are always many recipes to be found. It can easily be dealt with simply by sautéing it, grilling it, or broiling it. It be turned into carb-replacing noodles, or grated and folded into a batter to make flavorful quick breads or cake. The thing is, I had done all of that.

Fortunately, an issue of
Sweet Paul magazine was at my side wherein I discovered this toothsome recipe for zucchini squares. These are so good that I could have eaten the entire pan in one sitting. They are wonderful served warm from the oven accompanied by meat, fish, or chicken. They can be served at room temperature, so a great dish for a brunch or buffet. They can also be cut into smaller squares (or circles using a 1½” round biscuit cutter) to be used as appetizers. If you have vegetable haters in your family, this dish may just change their minds.
Baked Zucchini and Feta Squares

3 slices bacon, cut into small pieces
1
Melissa's shallot, finely chopped
1 garlic clove, finely chopped
2 scallions, thinly sliced
4 medium zucchini, grated
1 c. feta cheese, crumbled
½ c. Parmesan cheese, grated
½ c. whole milk
Salt and Pepper
6 eggs
½ cup flour

Preheat oven to 350ºF. Line a 9-inch x 9-inch baking dish with parchment paper.

In a 9” sauté pan, cook the bacon until crispy; remove and set aside. In the same pan in the bacon drippings, cook onion, garlic, and scallions until soft.

Place onion mixture into a large bowl and add cooked bacon, zucchini, feta, and Parmesan. Season with salt and pepper.
In a separate, bowl beat together milk, eggs, and flour. Stir into the zucchini mixture.

Pour into the prepared baking dish, use a spatula to smooth out the batter. Bake for 40 to 45 minutes or until set. Cool and cut into squares.
  
MAKES 12 SQUARES


Sunday, March 24, 2019

Fiesta Veggie Rice


If you read last week’s meal plan, you'll know that I made my Taco Meatloaf (always a winner) and Fiesta Veggie Rice from Abrams new cookbook Pescan, A Feel Good Cookbook by Abbie Cornish and Jacqueline King Schiller, to serve as a side. It is not nearly as much work as the recipe would make it appear, and it is so yummy! Each recipe in this book includes a note on what the authors call a "feel good" ingredient. The feel good ingredient in this recipe is oregano. Oregano, according to the book, is closely related to mint, so it has many of the same health benefits. It is a common digestive aid, and the essential oils in oregano have antibacterial and antifungal properties. As with most herbs it is extremely rich in antioxidants. It also provides a wonderful depth of flavor to this delicious rice dish. I have enough left over to freeze for later, and plan on having it as a main dish at some future point.
Fiesta Veggie Rice
from Pescan, A Feel Good Cookbook

2 tablespoons olive oil
½ onion, diced
1 cup
brown basmati rice, rinsed and drained well
½ (14.5-ounce) can diced tomatoes
1 carrot, thinly sliced into coins
2 celery stalks, thinly sliced
1¾ cups
vegetable broth
¾ teaspoon kosher sea salt
¾ teaspoon black pepper
½ teaspoon
ground cumin
½ teaspoon oregano
¼ teaspoon
smoked paprika
1 bay leaf
1 cup frozen peas
½ cup fresh cilantro, chopped


In a large pot with a tight-fitting lid, heat the oil over medium heat until hot, about one minute, then add the onion. Sauté until soft and translucent, about two minutes. Add the rice and stir continuously until the grains smell nutty and appear translucent and lightly toasted on the tips, about three minutes. Add the diced tomatoes and cook, stirring, until most of the liquid from the tomatoes evaporates, about three minutes more. Add the carrot and celery and stir.

Pour in the vegetable broth and add the salt, pepper, cumin, oregano, and paprika. Stir to dissolve the spices. Add the bay leaf and bring to a boil over medium-high heat, then lower the heat to maintain a simmer. Cover and cook for 45 minutes, or until the grains are tender and most of the water is absorbed. If there is excess water at 45 minutes, leave the lid off and cook for an additional 5 to 10 minutes. Turn off the heat and allow the rice to rest, covered, for 10 minutes.

While the rice cooks, placed the peas in a small bowl and cover with boiling water. Stir once and allow the water to cool.* When the rice is done resting, drain the peas and fold them into the rice, fluffing rice with a fork as needed. Remove the bay leaf. Garnish with the cilantro and serve immediately, or cool completely and store in an airtight container in the refrigerator for up to five days or three months in the freezer.

Serves 6.
 
*I found this step unnecessary. I thawed the peas while I was making this dish, and then stirred them in at the end, heating through. This worked just fine.
PRINT RECIPE

This post contains affiliate links.

Wednesday, January 23, 2019

Green Bean Artichoke Bake


My O-P used to lament over the paucity of vegetable recipes containing his favorite vegetable, the green bean. He’d look for them, but would always come up short after Green Beans Amandine, and the ubiquitous Green Bean Casserole. I got to thinking about this, wondering why it was the case. Then I started thinking about my Green Bean Salad, and wondered if I could come up with a hot version to use as a side dish, and thus the Green Bean Artichoke Bake was born. I swapped the tomatoes with red peppers, and croutons with Italian breadcrumbs, but it works! Overnight marinating makes the vegetables tender and flavorful, the topping gives it a pleasant crunch.
Green Bean Artichoke Bake

1 14.5-oz. can
green beans, drained
1 14-oz. can
artichoke hearts, drained and quartered
1/2 cup diced
Melissa’s Roasted Red Peppers
8 oz. Italian dressing, your choice
1/4 cup
Italian breadcrumbs
1/4 cup grated Parmesan cheese
1 T. Butter, cut in pieces

Toss together green beans, artichokes, and red peppers. Pour Italian dressing over all, stir to coat, cover, and place in the fridge to marinate overnight. The next day, drain liquid and place vegetables in an ovenproof baking dish (or individual ramekins). Sprinkle breadcrumbs and cheese on top, dot with butter. Bake at 350° for 30 to 40 minutes, or until hot. Serves 4, but can be doubled.

A crowd-pleasing green bean recipe for a crowd is Smothered Green Beans.


This post contains affiliate links.

Monday, August 13, 2018

Zippy Sweet Corn Pudding


It is corn season here in the heartland and, trust me when I tell you, it is plentiful! Supermarkets are selling it five and six ears for a dollar. A price like that is hard to resist, so I don’t even try. My dad, who is scouting out bargains at all of the local markets in his neighborhood, will often call me to tell me where I can get the most amount of corn for the least amount of money.

As I looked at my vegetable crisper this morning, laden with fresh ears of corn, to such an extent that I thought I heard the scallions gasping, I decided I needed to do something with it. I started rummaging around for recipes and I came up with one for sweet corn pudding. Just the sound of this recipe got me thinking about autumn leaves, crisp, juicy apples, a crackling fire in the fireplace, and cooler weather! 

This recipe looked so easy that I had to make it. While I was eating it, wishing for a larger spoon, I was thinking that even though it is way too early to start planning Thanksgiving dinner, this would be a perfect addition. There is absolutely nothing to it; everything gets thrown into the food processor and poured into a baking dish. It can then be refrigerated until you’re ready to bake. My friend, Linda, and says that my Smothered Green Beans are the best vegetable dish that she has ever tasted. Well, Linda, wait until you taste this! This is going to be a crowd pleaser, I guarantee, so you may want to make a bigger portion. Now, I think I may just need to stock up on some more of that fresh corn.

It’s not pretty, but it sure is good!
Zippy Sweet Corn Pudding
Slightly adapted from epicurious.com

4 cups fresh corn kernels
4 large eggs
1 Melissa’s pickled jalapeño, halved and seeded
1 cup whipping cream
1/2 cup whole milk
3 tablespoons sugar
1/4 cup (1/2 stick) butter, room temperature
2 tablespoons all purpose flour
2 teaspoons baking powder
1 teaspoon salt

Preheat oven to 350°F. Butter an 8x8x2-inch glass baking dish, or similarly sized casserole dish. Place all ingredients in a food processor and pulse until almost smooth. Pour batter into prepared dish. Bake pudding until golden brown and center is just set, about 45 minutes. Cool 10 minutes; serve.

Another crowd-pleasing corn recipe is this Mexican Street Corn off the Cob.

This post is linked to:
This post contains affiliate links.

Saturday, March 10, 2018

Lemon Pepper Leeks & Mushrooms


I go green crazy on St. Patrick’s Day, and like my meal to have green in every course from beginning to end. I tend to favor leeks around this time of the year, and if you feel the same, you will love this recipe that can be on the table in 10 to 15 minutes. One of the reasons it’s such an easy dish to prepare is because Melissa‘s Produce has done all of the work for you by cleaning and slicing the leeks. You don’t have to worry about storing unwieldy leeks in your refrigerator, spend time cleaning out the sand and grit, deciding what part of the leek to use, and then spend even more time slicing it; all of that has been done for you. 

This dish is pretty much just dump, sauté, and serve. If you like, you can buy mushrooms that are already sliced and use those to speed things up even further. This is one of those dishes where the flavors are subtle, but unique, and people tend to go back for more. You may want to double the recipe to be on the safe side. Should you have any left over (you won’t), it makes an excellent filling for an omelet.
Lemon Pepper Leeks & Mushrooms

2 tablespoon butter
1 clove garlic, minced
4 ounces mushrooms, cubed
2 tablespoons dry white wine
1/8 teaspoon dried hot red pepper flakes, or to taste
1 1/2 teaspoons fresh lemon juice

Melt butter in a 9-inch sauté pan. Add leeks and garlic and sauté until soft.  Add mushrooms, wine, red pepper flakes, and lemon pepper seasoning. Sauté until mushrooms are soft. Finish with lemon juice and salt to taste. Serve immediately. Makes 4 side dish servings.


This post is linked to:

This post contains affiliate links.

Monday, June 12, 2017

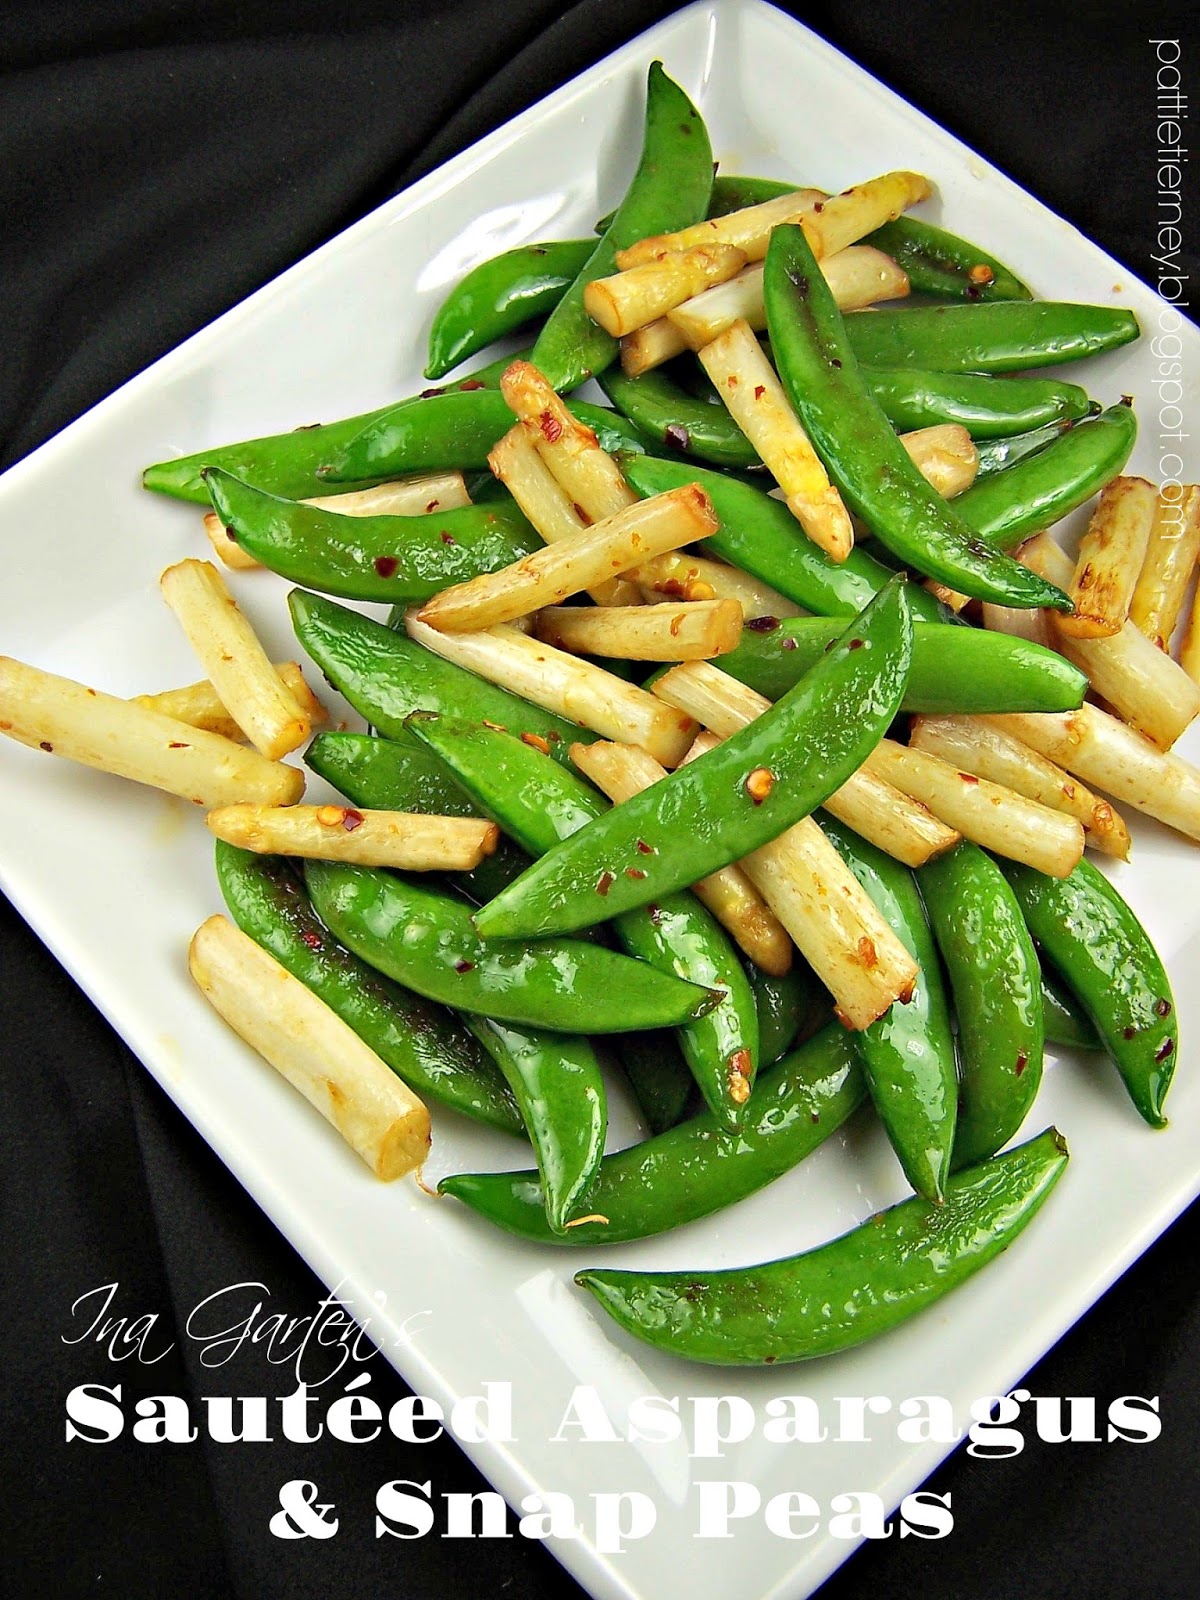
Ina Garten's Sautéed Asparagus and Snap Peas


Do any of you like Ina Garten? I suspect a good many of you do. I've been a fan of hers ever since I first saw her on Food Network. She has a new show now called Cook Like a Pro. I'm not sure if I like it better than her original show, Barefoot Contessa, or not, but I have been enjoying, and learning, from it. I have never had an Ina recipe fail. Never. I tend to stick with her simple recipes, and I'm always amazed at how good they turn out.

One of her easiest recipes is simply asparagus and sugar snap peas, sautéed together, seasoned, and served. It sounded almost ridiculous when I read it the first time. I mean, how can something this easy be any good? But it is. I changed up the recipe only slightly, by using white asparagus instead of green. I love white asparagus, but particularly here for the contrast in color, the white asparagus against the bright green peas. It's surprisingly delicious, not to mention super fast and easy. If you're looking for a wonderful side dish to go with this summer's grilled meats, this is the one.
 
Ina Garten's Sautéed Asparagus and Snap Peas

3/4-pound sugar snap peas
2 tablespoons good olive oil
Kosher salt
Freshly ground black pepper
Red pepper flakes, optional (But use them!)
Sea salt, for serving

Cut off the tough ends of the asparagus and slice the stalks diagonally into 2-inch pieces. Snap off the stem ends of the snap peas and pull the string down the length of the vegetable.

Warm the olive oil in a large sauté pan over a medium heat and add the asparagus and snap peas. Add the salt, pepper, and red pepper flakes, to taste, if desired. Cook for approximately 5 to10 minutes until al dente, tossing occasionally. Sprinkle with sea salt and serve hot.

This post is linked to: