Showing posts with label can be vegetarian. Show all posts

Tuesday, November 12, 2024

Creamy Corn Casserole

 
The cheesy corn casserole is something Midwesterners always enjoy, particularly alongside a plate of Kansas City barbecue. It is the ultimate in creamy, cheesy, comfort food. You can serve it as easily at a picnic as you can alongside something a little more high end at dinner, like I did with Pecan Crusted Salmon.  It can be vegetarian if you leave out the bacon, which is perfectly fine. I don’t know anybody who doesn’t like this; kids particularly seem to enjoy its creamy, corny goodness.
Creamy Corn Casserole

 1 T. olive oil
1 T.
Melissa’s minced garlic
2 14.5-oz. can corn
4 oz. cream cheese
2 T. butter
¾ c. whole milk
¼ t. kosher salt
1/8 t. freshly ground black pepper
¼ t.
smoked paprika
¼ t. Old Bay blackened seasoning
1½ c. shredded cheddar cheese, divided
4 slices bacon, cooked and crumbled, divided
¼ c. sliced green onions

Preheat oven to 350° F. In a large skillet, heat the oil over medium heat and warm the garlic for 30 to 45 seconds.

Stir in the corn, cream cheese, butter, and milk. Reduce the heat to medium low and cook until the ingredients are melted together, stirring occasionally, 5 to 7 minutes.

Stir in the salt, pepper, paprika, blackened seasoning, ¾ of the shredded cheddar, and half of the bacon. Pour into a
1½-quart baking dish and sprinkle with the remaining ¾-cup cheddar and bacon. Bake for 15 to 20 minutes until the top is golden and the edges are bubbly.

 As an Amazon Associate I earn from qualifying purchases.

Monday, March 25, 2024

Lemon Baked Ziti

 
I bought lemons, and when I say I bought lemons, I mean I REALLY bought lemons. What can I tell you? They were on sale, I had a hankering, one thing led to another, and I came home with about 5 pounds of them. Fortunately there are all kinds of things I can use them for from savory to sweet, salad dressing to beverages, even in soup. Lemons are quite versatile.

 The first thing I decided to do was to satisfy my curiosity by making a Giada DeLaurentis recipe. Her Lemon Baked Ziti has long intrigued me, so I thought I would give it a try.  It is excellent! I cut the recipe in half, and I used bacon instead of pancetta. When I make it next time, and there will be a next time, I am only going to use seven ounces of pasta rather than eight, because I would have liked this to have been a tiny bit saucier. Definitely drizzle the topping with the pancetta cooking juices in place of the olive oil. Give it a try. It is wonderful!

Lemon Baked Ziti

From Giada DeLaurentis

 Pasta:

Butter, for greasing the baking dish

Salt

1 lb. ziti pasta

1 T. extra-virgin olive oil

12-oz. pancetta, sliced into ¼” thick slices

 Sauce:

½ c. (1 stick) unsalted butter, room temperature

½ c. all-purpose flour

3½ c. whole milk, room temperature

Zesty of 2 large lemons 

¾ c. grated Parmesan

1 t. kosher salt

¼ t. freshly ground black pepper

1 c. chopped fresh basil

2 T. chopped fresh thyme

¼ c. fresh lemon juice (from 1 large lemon)

2 c. shredded mozzarella

Topping:

2/3 c. plain breadcrumbs*

1/3 c. grated Parmesan

Extra-virgin olive oil, for drizzling

For the pasta: Place an oven rack in the center of the oven. Preheat the oven to 350ºF. Butter a 13” x 9” x 2” baking dish.

 Bring a large pot of salted water to a boil over high heat. Add the pasta and cook until tender but still firm to the bite, stirring occasionally, 8 to 10 minutes.

 In a large nonstick skillet, heat the olive oil over medium-high heat. Add the pancetta and cook until brown and crispy, about 8 minutes. Using a slotted spoon, remove the pancetta and drain on paper towels.

 For the sauce: In a 2-quart saucepan, melt the butter over medium heat. Add the flour and whisk until smooth, about 2 minutes. Gradually add the milk, whisking constantly to prevent lumps. Add the lemon zest. Simmer over medium heat, whisking constantly, until the sauce thickens, about 10 minutes. Remove the pan from the heat and stir in the Parmesan, salt and pepper.

 In a large bowl, combine the cheese sauce, cooked pancetta, pasta, basil and thyme. Toss until the ingredients are coated. Stir in the lemon juice. Spoon the mixture into the prepared baking dish and sprinkle with the mozzarella.

For the topping: In a small bowl, combine the breadcrumbs and Parmesan.

 Sprinkle the topping over the pasta mixture. Drizzle the top with olive oil and bake until the top is golden brown, 25 minutes. Cool for 10 minutes and serve.

*Use panko here, and everywhere else where plain breadcrumbs are called for. Trust me on this.


As an Amazon Associate I earn from qualifying purchases.

Monday, October 30, 2023

Broccoli Pasta Salad with Bacon and Sunflower Seeds

 
I was experimenting in the kitchen over the weekend and ended up making this pasta salad. This is the first time, as well as I can remember, that I have ever added broccoli to pasta salad. It was so good that I could hardly stop eating it. My intention was to use it as a side dish, but I ended up tossing it with some grated pepper jack cheese, and had it as a meal. If you would prefer your pasta salad, be less creamy, then just use your favorite vinaigrette and toss it all together. I’m thinking that you’re probably going to like it either way.

 Broccoli Pasta Salad with Bacon and Sunflower Seeds

1/3 c. your favorite vinaigrette
½ c.
Duke’s mayonnaise
2 T. sour cream
1/8 t.
dry mustard
Seasoned salt, to taste
White pepper, to taste

6 oz. vegetable rotini pasta
2 c. chopped broccoli, florets
1 3-oz. pkg.
Melissa’s dried tart cherries
¼ c. dry roasted sunflower seeds
4 thick slices of bacon, cooked and crumbled

In a large bowl whisk together vinaigrette, mayonnaise, sour cream, dry mustard, and salt and pepper to taste; set aside.

In a large pot of boiling salted water, cook pasta according to package directions. Drain and rinse with cold water.

Add drained pasta, broccoli, red onion, dried cherries, sunflower seeds, and bacon to bowl with dressing, toss to combine. Refrigerate for one to four hours to allow flavors to meld before serving.

 As an Amazon Associate I earn from qualifying purchases.


Monday, February 20, 2023

Tuscan Vegetable Soup with Shells & White Beans

 
Some days I’m just in the mood for vegetables, all kinds. When I get in moods like this, I decide that the best way to enjoy these vegetables is in a big bowl of soup. I’m not going to lie, there is a lot of chopping involved in making this soup. I also feel obliged to tell you to take it easy here, because if you have too much of this stuff, you will feel as though you’re prepping for a colonoscopy. That said, it is delicious, nutritious, and, once made, one of the easiest things you will put on the table. Serve it with crusty rolls or garlic bread; for true Italian authenticity, pour yourself a glass of Chianti. Enjoy!

Tuscan Vegetable Soup with Shells & White Beans

 2 T. olive oil

1 large onion, finely chopped

1 t. dried thyme

1 t. dried basil

1 t. Italian seasoning

1 T. Melissa’s minced garlic

¼ head green cabbage, cut into ½” pieces

4 stalks celery, diced

3 large carrots, diced

10 cups chicken broth

1 T. chicken soup base

Parmesan cheese rind (optional)

15.5-oz. cans cannellini beans, rinsed and drained

14.5-oz. can chopped tomatoes, with juices

1 8-oz. can tomato sauce

2 c. chopped baby spinach

4 medium zucchini, cut into ½-inch pieces

½ c. small shell pasta

1 t. salt

½ t. freshly ground black pepper

1 t. granulated white sugar

1 c. grated fresh Parmesan cheese

 In a large pot, heat the olive oil over medium heat. Add the onion, thyme, basil, Italian seasoning, and garlic; sauté 5 minutes. Add the cabbage, celery, and carrots; sauté 10 minutes. Add the broth and soup base. Add the Parmesan cheese rind, if using. Bring to boil. Reduce heat; cover and simmer 1 hour.

 Add the beans, tomatoes, spinach, zucchini, pasta, salt, pepper, and sugar. Cover and simmer until the vegetables are tender, about 20 minutes longer.  

Just before serving, stir in the cheese, divide the soup among bowls. Top each serving with a sprinkle of more Parmesan, if desired.

 As an Amazon Associate I earn from qualifying purchases.


Tuesday, November 30, 2021

Greek Pasta Salad


I have found, amongst my friends and family anyway, that olives are like cilantro; you either really like them, or really don’t. I really like them. As a consequence, I look for ways in which to use them. A Greek pasta salad seemed like a great way to combine both green and Kalamata olives along with other crunchy vegetables, and a flavorful vinaigrette. This is a tasty and colorful salad that can be served cold or at room temperature, making it an excellent addition to any meal served buffet-style.

Greek Pasta Salad

 2 c. tri-color rotini

10 cherry tomatoes, halved

1/3 c. Greek pitted green olives

1/3 c. pitted Kalamata olives

1/3 c. diced Melissa’s roasted red peppers

1 green bell pepper, diced

½ cucumber, cubed

¼ c. diced red onion

½ c. cubed feta cheese

Julienne strips of salami*

 Dressing:

⅔ c. extra-virgin olive oil

¼ c. Greek red wine vinegar

1 T. freshly squeezed lemon juice

1 t. Melissa’s minced garlic

2 t. dried oregano

Pinch dried basil

 Kosher salt and freshly ground pepper, to taste

 Cook pasta according to package directions. Drain and set aside.

 While the pasta is cooking, Whisk together dressing ingredients; set aside.

 Combine remaining ingredients in a large bowl. Toss with pasta. Pour vinaigrette over all and stir to combine. Cover and chill at least three hours before serving.

 *This can be made vegetarian by illuminating the salami. Additionally, if you don’t have that on hand, consider strips of ham, or grilled chicken.


As an Amazon Associate I earn from qualifying purchases.


Thursday, April 8, 2021

Overnight Slow Cooked Pinto Beans and Rice

This post contains affiliate links.

 My pantry is a disaster; it’s really starting to irritate me. The other day I thought I’d split my lip when a big Tupperware container fell down from the top shelf and hit me in the face. I figured it was time to get serious about organization, so I started pulling things out to take stock of what I had. For whatever reason, I uncovered an embarrassingly large supply of dried pinto beans. Time to put them to use, I told myself.


  This recipe is a combination of the slow cooked pinto beans I made last year as well as red beans and rice that I made earlier this year (sans meat). It’s easy to put together and cooks while you sleep, so upon arising, it’s ready for whatever meal you plan to use it. 


  Replace the chicken stock with vegetable stock or water, and you have a vegetarian meal. It’s a great dish to eat on its own, as a side dish, or when use as an ingredients in burritos. It is versatile, nutritious, and freezes beautifully.


 Overnight Slow Cooked Pinto Beans and Rice

1 1-lb. bag dried pinto beans*
1 green pepper, diced
1 3-oz. pkg.
Melissa’s shallots, sliced
3 medium cloves garlic, minced
2 ½ t. Kosher salt
½ t. pepper
1 t.
garlic powder

1 T. chili powder
½ t. cumin
½ t. oregano

7-8 c. chicken stock**

½ c. uncooked basmati rice


Rinse and drain the beans, discard any dirt clumps or rocks. Place into a 5-quart slow cooker. Add the green pepper, shallots, garlic, salt, pepper, garlic powder, chili powder, cumin, and oregano. Cover beans with chicken stock to 2 inches above them. Cover and cook on low overnight (10-12 hours). Do not open the lid while they cook or they will not get tender.

When you get up in the morning, add the rice and cook for another hour.

Serve topped with garnishes of your choice such as sour cream, chopped jalapeños, chopped scallions, chopped tomatoes, or grated cheese.

Serve with
Honey Cornbread.

* There is no need to soak these, but I soaked mine.

 ** To make vegetarian replace chicken stock with vegetable stock or just use water.


Monday, February 22, 2021

Red Beans & Rice

Despite the fact that I have been blogging for more than a decade, and cooking nearly all of my life, I have yet to experience some of the simplest of foods. Case in point, prior to making them just the other day, I had never eaten red beans and rice. I kept thinking to myself…beans and rice? What can be so yummy about beans and rice? Well, I’ll tell you, they are 
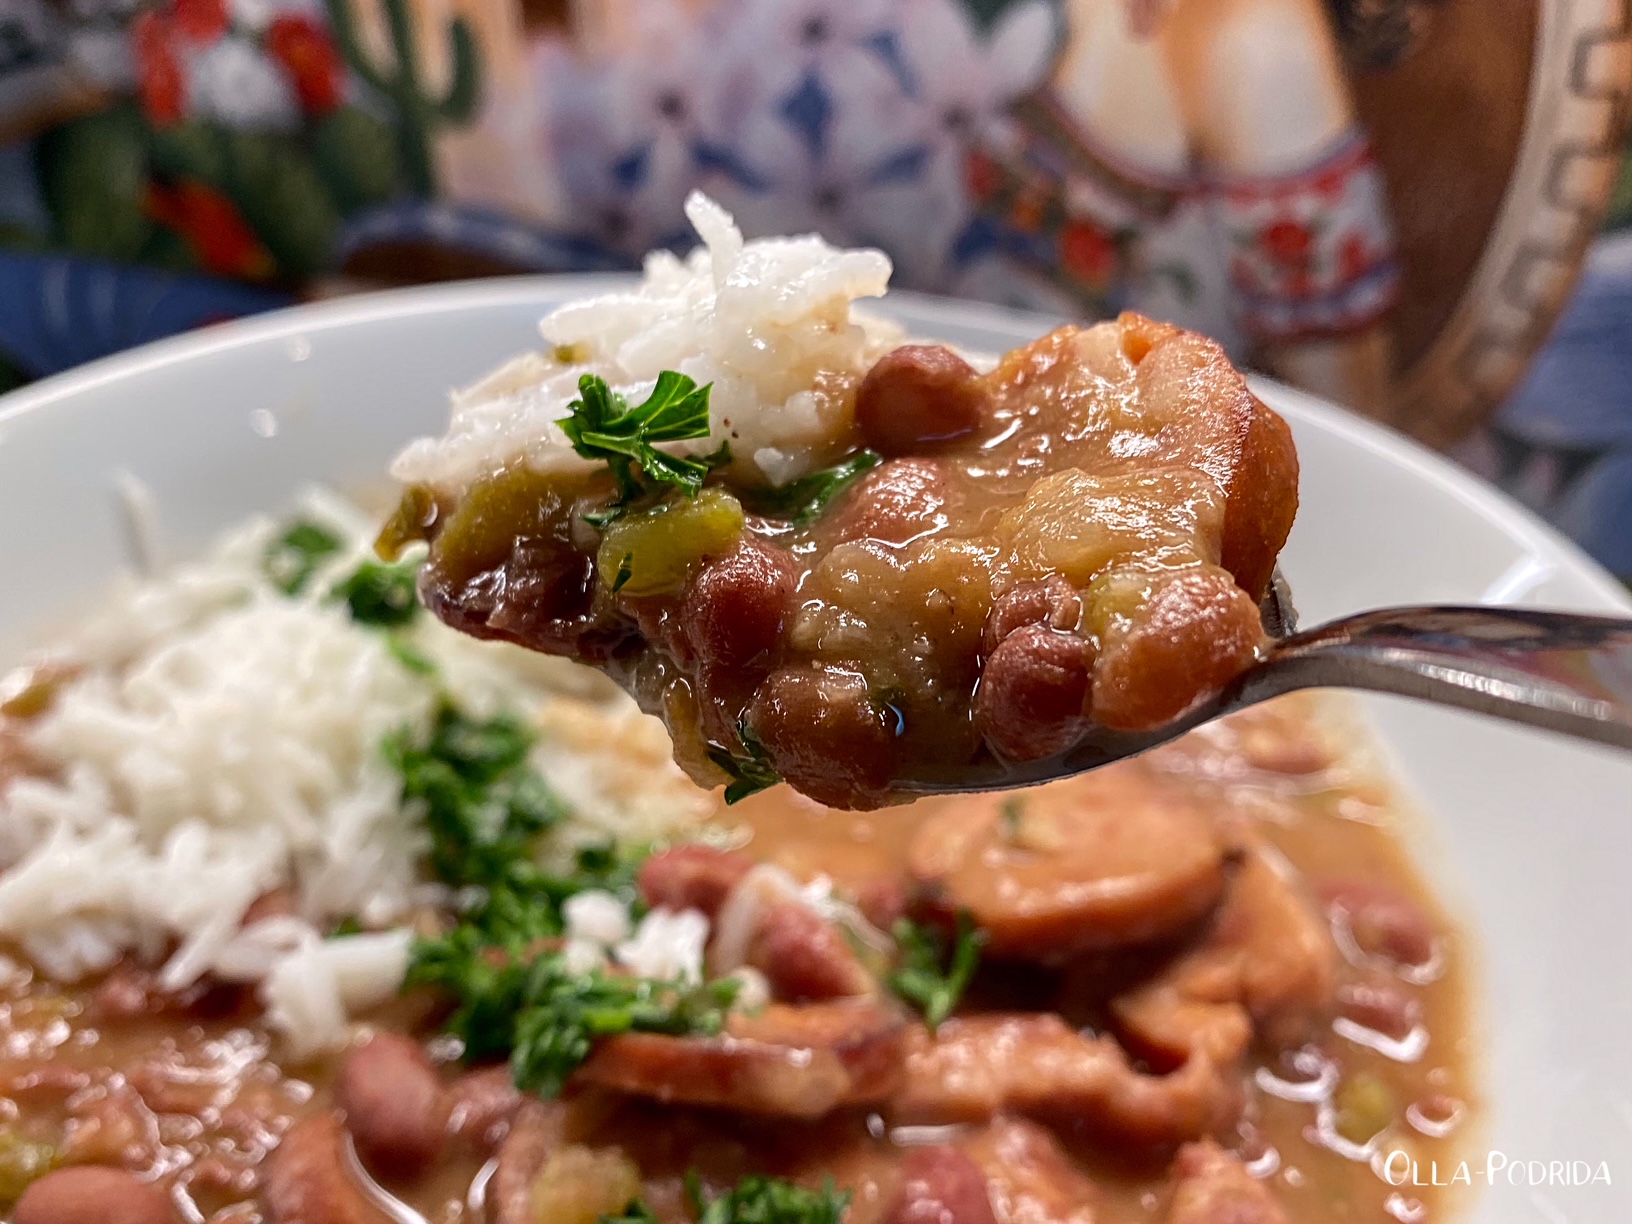
delicious! I did all of my chopping ahead of time, so it was absolutely no trouble to put this together. The house smelled wonderful while they were simmering on the stove, and once I took my first delicious, smoky, spicy bite, I could hardly put the spoon down.

 Red Beans & Rice

Adapted from Damn Delicious

 1 c. long grain basmati rice

1 T. olive oil

1 (12.8-oz.) pkg. smoked andouille sausage, thinly sliced

1 3-oz. pkg. Melissa’s shallots, diced

1 green bell pepper, diced

2 celery ribs, diced

2 T. tomato paste

3 cloves garlic, minced

1½ t. Cajun seasoning

3 (15-oz.) cans red beans, drained and rinsed

3 c. chicken stock

1 t. Crystal hot sauce

1 bay leaf

Kosher salt and freshly ground black pepper, to taste

2 T. chopped fresh parsley leaves

 Cook rice according to package instructions; set aside.

 Heat oil in a large stockpot or Dutch oven over medium heat. Working in batches, add sausage, and cook, stirring frequently, until sausage is lightly browned, about 3-4 minutes; set aside on a paper-towel-lined plate

 Add shallots, bell pepper, and celery. Cook, stirring occasionally, until tender, about 3-4 minutes.

 Stir in tomato paste, garlic, and Cajun seasoning until fragrant, about 1 minute.

 Stir in red beans, chicken stock, hot sauce, bay leaf, and sausage. Bring to a boil; cover, reduce heat and simmer for 15 minutes. Uncover; continue to simmer until reduced, an additional 15 minutes.

 Using an avocado masher (an invaluable tool, in my opinion), mash beans until slightly thickened, if desired; season with salt and pepper, to taste.

 Serve topped with rice and garnished with parsley, and a bottle of hot sauce on the side.


Friday, March 13, 2020

Asparagus with Bacon and Hard-Boiled Eggs

This post contains affiliate links.
Fresh asparagus really says “spring” to me, and this is a lovely way to enjoy it. All of the components can be made ahead of time, from cooking the asparagus, to hard boiling the eggs, even making this fabulous dressing one or two days prior, so it assembles in a flash. I had it for breakfast, but if you want to have it for lunch and make it a bit heartier, consider serving it over toast points. It is crisp, fresh, tangy, and delicious. It’s a wonderful addition to a brunch buffet (consider this for Easter), a light lunch, served along with a crusty rolls (think about Mother’s Day), or makes a wonderful first course for dinner. The dressing can also be heated, and tossed with spinach, to make a wonderful wilted spinach salad. 
Asparagus with Bacon and Hard-Boiled Eggs
Adapted from Bon Appétit July 2014

2 slices bacon
1 bunch Melissa’s white asparagus, trimmed, ends peeled if thick
Kosher salt
½ Melissa’s shallot, finely chopped
2 T. olive oil
1 T. reserved bacon drippings
Freshly ground black pepper
2 hard-boiled lg. eggs, whites and yolks separated, chopped
2 T. chopped fresh chives

Cook bacon in a large skillet over medium heat, turning once, until browned and crisp, 5-8 minutes. Transfer to paper towels to drain; let cool, then crumble. Reserve 1 T. of the drippings.

Meanwhile, cook asparagus in a large pot of boiling salted water until crisp-tender, 3-5 minutes, depending upon thickness. Drain and transfer to a large bowl of ice water to cool. Drain and pat dry.

Whisk shallot, vinegar, maple syrup, and mustard in a medium bowl. Gradually whisk in olive oil until emulsified, then whisk in vegetable oil; season with salt and pepper.

Serve asparagus drizzled with vinaigrette and topped with eggs, herbs, and bacon.

Do Ahead: Vinaigrette can be made 2 days ahead; cover and chill. Asparagus can be cooked 1 day ahead. Cover and chill.

Makes 4 side servings or 2 main dish servings.


Monday, December 31, 2018

Easy Frito Pie Casserole


This is a little post-holiday gift for you, to combat all of the gooey sweetness than seems to pummel us at this time of the year. It is a stupidly easy, 10-minute-to-prepare casserole, that is comforting, satisfying, delicious, and a very pleasant break from all of the season’s rich foods. You probably have the ingredients on hand, namely a can of chili, a bag of corn chips or taco chips, and cheese. I call this a Frito Pie because I make it in a pie pan, and use Fritos as the base, but you could just as easily call it Tortilla Pie by using tortilla chips for the base (or a combination of both).

I used a can of
Wolf Chili with Meat, but you can make this vegetarian by adding chili without meat. You can go crazy with the toppings, or leave it simple. Want more vegetables? Shred some lettuce, mound it on top, and sprinkle on some chunks of tomato. You can use cheddar cheese, or whatever you happen to have on hand, or a combination of everything that you have on hand. Seriously, nothing can be easier, and it is so good!
Easy Frito Pie Casserole

5 cups
Fritos corn chips
1 15-oz. can chili with or without meat, your choice
1 cup shredded Cheddar cheese
1 2.25-oz. can
sliced black olives
1/2 cup salsa (I used Paul Newman’s Black Bean)
1/4 cup sour cream

Preheat the oven to 350°.

Place chips in the bottom of a 9-inch deep dish pie plate. Pour chili straight from the can over the chips. Sprinkle shredded cheese over all, and then top with black olives. Bake for 20 to 25 minutes until chili is bubbling. Top with
lettuce, tomato, avocado, sour cream, salsa, or anything else you can think of, and serve.

If you have any leftover Fritos, you may want to try this recipe for Fritos Brittle. Super yum!

 
This post contains affiliate links.