Showing posts with label appetizer. Show all posts

Monday, June 2, 2025

Fresh and Zesty Pico de Gallo

 
I could make a meal out of pico de gallo, I love it that much. Despite my love, I tend to only have it during the summer when the ingredients are the freshest. This summer, I am growing all of the ingredients in my little deck garden and look forward to every fresh, crisp bite. If you are looking for a vibrant, fresh salsa to enhance your taco night or add a burst of flavor to your chips, my version is your answer. Packed with juicy tomatoes, crisp cucumbers, zesty lime, and a kick of jalapeño, this homemade salsa is a crowd-pleaser. It’s simple to make, ready in minutes, and perfect for any occasion—whether it’s a summer barbecue, game day, or a quick snack. Be sure to serve it in a colorful Talavera bowl.
Fresh and Zesty Pico de Gallo

1 c. finely chopped red onion
1 jalapeño pepper, seeded and finely chopped
2 limes, juiced
2½ c. tomatoes, seeded and chopped
1
Melissa’s mini cucumber, seeded and chopped
½ c. chopped fresh cilantro
½ tsp. salt
½ tsp.
Melissa’s Pico de Gallo Seasoning

In a medium bowl, combine all ingredients: red onion, jalapeño, lime juice, tomatoes, cucumber, cilantro, salt, and Pico de Gallo seasoning.

Stir gently to mix thoroughly.

Let the mixture sit for 15 minutes to allow the flavors to meld.

Serve with tortilla chips, tacos, grilled meats, or as a topping for your favorite dishs.

Tips:
- Adjust the jalapeño quantity for your preferred spice level.
- For extra freshness, chill the salsa before serving.
- Store leftovers in an airtight container in the
fridge for up to 2 days.

 
As an Amazon Associate I earn from qualifying purchases.

Friday, August 23, 2024

Bacon Tomato Bites

 
This is a recipe of my late mother’s. She made these as far back as I can remember. They were always a huge hit, with everyone asking for the recipe. Everyone, that is, except me because I always thought they looked way too fiddly for my man hands. I got to thinking about these the other day when I was thinking about my mother because I still associate the two, and I thought I would give it a whirl. I used Melissa’s baby heirloom tomatoes because they are larger than cherry tomatoes, and the perfect size to use with the small end of a melon baller, making the cleaning out much less difficult than I anticipated.
 
The filling can be made ahead and refrigerated for stuffing tomatoes within a day or two. The tomatoes can be stuffed and stored in the refrigerator overnight; you decide which you prefer. They work equally well at a brunch as they do at luncheon, picnic, or dinner. I guarantee all who consume these are going to ask for the recipe. As an aside, these little rascals do tend to roll, so serving them in an olive dish just may not be a bad idea.
Bacon Tomato Bites

24 Melissa’s baby heirloom tomatoes
1 lb. bacon, cooked and crumbled
½ c. finely chopped scallions
2 T. grated Parmesan cheese
½ c.
Duke’s mayonnaise
Freshly ground black pepper

Remove stems from tomatoes and, using a sharp knife, cut a thin portion of the top off. Carefully hollow out tomatoes using a small spoon, grapefruit spoon, or the small end of a melon baller, as I did,
leaving a 1/8-inch thick shell. Invert the tomatoes onto a paper towel-lined plate, and allow to drain while you make the filling.

 In a medium bowl combine bacon, scallions, cheese, and mayonnaise; stir until well blended. Fill tomatoes with bacon mixture, top with freshly ground black pepper, and refrigerate for a number of hours before serving.

As an Amazon Associate I earn from qualifying purchases.

Monday, July 29, 2024

Dijon Potato Soup


Yesterday I reviewed the unique and fascinating Food to Die For, Recipes and Stories from America’s Most Legendary Haunted Places cookbook. Today I am sharing a recipe from that cookbook. This recipe was adapted from Tastes and Treasures: A Storytelling Cookbook of Historic Arizona produced by the Historical League, Inc., a nonprofit fundraising arm of the Arizona Historical Society, published in 2007, featuring modern recipes from historical places for today’s cooks. It’s an easy soup to make, creamy and delicious, with a lot of complexity to the taste. 

   Potato Dijon Soup

1 yellow onion, chopped,
2 leeks, cleaned and sliced*
3 oz. pancetta, diced
6 c.
chicken broth
3 russet potatoes, peeled and diced
2 T.
Dijon mustard
1 c. heavy cream or half-and-half
Salt and freshly ground black pepper, to taste
Fresh chives, and/or parsley, chopped, for garnish.

In a
large stockpot over medium heat, cook the onion, leeks, and pancetta until the vegetables are soft and pancetta is rendered, about 10 minutes.

Add the broth and potatoes, and bring the mixture to a boil. Cook over medium heat for 15 minutes, or until the potatoes are tender. Add the mustard, and simmer for five minutes.

Purée the soup using an immersion blender, or in batches in a stand blender. Add the cream or half-and-half, and then simmer until hot. Add the salt and pepper to taste, and garnish with fresh herbs.

* I made it easy on myself and used 2 6-ounce packages of
Melissa’s cleaned and sliced leeks.

As an Amazon Associate I earn from qualifying purchases.

Friday, February 9, 2024

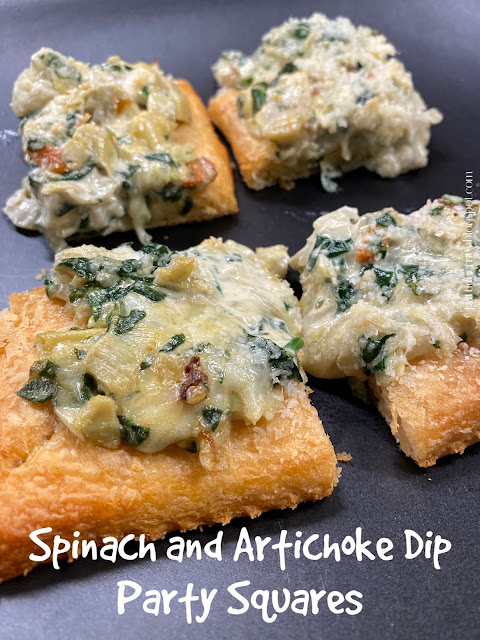
Spinach and Artichoke Dip Party Squares

 
I love “party food.” That’s how my family refers to a meal that consists of starters and appetizers. Back in the day, my aunt used to host Christmas Eve dinner. The whole family would go to church for the 5:30 Christmas Eve service, and then head to my aunt’s for dinner and gifts. Sometimes she would bake a ham, but the most memorable times she served party food, and her party food was legendary.
 
Invariably the buffet would start with a meat tray (remember those?) from a local deli that was always a huge hit. Then there were the meatballs in gravy that were served with those little tiny buns, crab puffs, mini pigs in blankets, mini ravioli, spinach squares, and a green salad to be virtuous. Don't get me started on her phenomenal cookie trays! It was an incredible spread. When I saw this recipe, I thought of those Christmas Eve gatherings, and had to make them. They are really delicious, and the nice thing about them is that they are equally tasty whether they are served hot, warm, room temperature, or even cold directly from the fridge.Spinach and Artichoke Dip Party Squares
Adapted from thekitchenismyplayground.com

 2 packages crescent rolls

 1 (1.4 oz.) envelope Knorr Vegetable Soup & Recipe Mix

½ c. Duke’s mayonnaise

½ c. sour cream

1 10-oz. pkg. frozen chopped spinach, thawed and drained

1 12-oz. jar marinated artichoke hearts, drained & chopped

1 8-oz. can water chestnuts, finely chopped

  1 t. Melissa’s minced garlic

2 c. grated Monterey Jack cheese

½ c. grated Parmesan cheese

Freshly ground black pepper

Preheat oven to 357°F.

In a mixing bowl combine soup mix, mayonnaise, and sour cream; set aside for soup mix to soften while you prepare the remaining ingredients.

Unroll crescent rolls and fit into a lightly greased jelly roll pan or rimmed cookie sheet; press seams together to form a crust. Bake for 10-12 minutes or until very light golden brown. 

Add garlic, spinach, artichokes, water chestnuts, and Monterey Jack cheese to soup mixture. Stir well to combine.

Spread soup mixture over partially-baked crust. Sprinkle Parmesan evenly over the top. Grate pepper over all. Bake for an additional 10-12 minutes until heated through.

Cut into squares and serve.


As an Amazon Associate I earn from qualifying purchases.

Monday, January 29, 2024

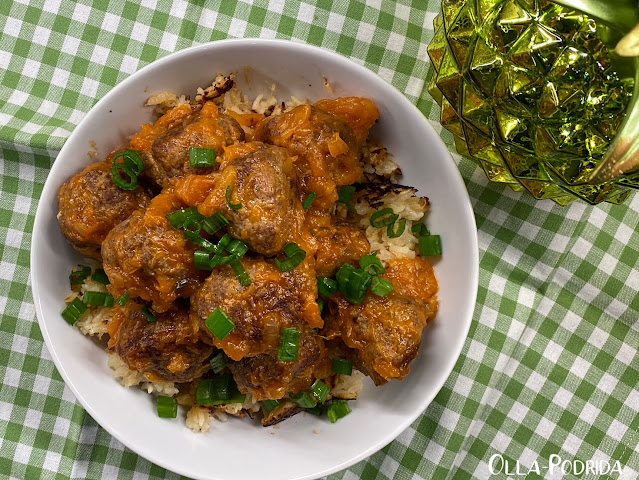
Pineapple Meatballs

 
Who doesn’t love a good meatball? Whether they’re served as a main dish or an appetizer, meatballs always seem to be crowd pleasers. I like them so well that, with the posting of this recipe, I will have an even dozen different varieties featured on this blog. These pineapple meatballs are unique in that pineapple is a key ingredient, making them tangy and delicious. I served these as a main dish on top of Hawaiian sticky rice with a side of peas, and it was a delicious meal. Pineapple Meatballs


1 lb. ground chuck

½ c. plain bread crumbs

1 extra large egg

1 T. dried minced onions

1 t. hot sauce

¼ c. whole milk

½ t. salt

¼ t. freshly ground black pepper

 ¼ t. freshly grated nutmeg

 For the Sauce:

1 T. oil

1/3 c. finely chopped onion

½ green bell pepper, chopped

½ t. salt

1/3 c. ketchup

2 T. cider vinegar

½ t. cornstarch

1 8-oz. can crushed pineapple in syrup (reserve syrup)

 For the Meatballs:

Preheat oven to 350°F. 
 
Mix all meatball ingredients together in a large bowl. Form into small meatballs according to your size preference. Place meatballs on a foil or Silpat-lined balking sheet and bake for 40 minutes if large, or 20 minutes if small.

In a large skillet, heat oil. Add onion, green pepper, and salt. Cook until tender.  In a small bowl, combine ketchup and vinegar, mix well. Add to skillet. In another small bowl, whisk together reserved pineapple syrup and cornstarch. Add to skillet and cook for 3-5 minutes, or until mixture thickens. Stir in crushed pineapple, and simmer for 3 minutes.


Tuesday, January 2, 2024

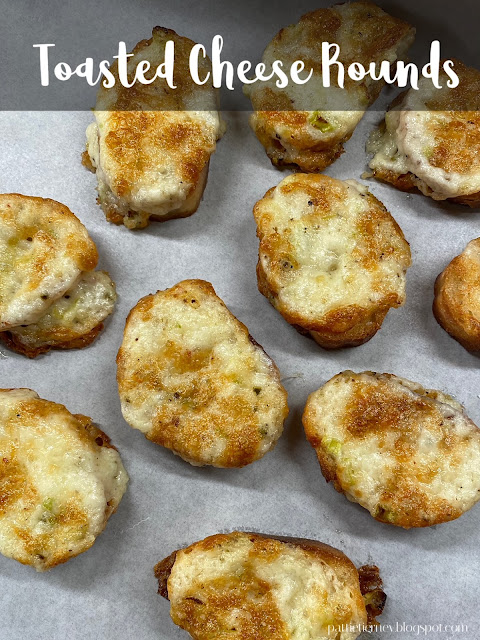
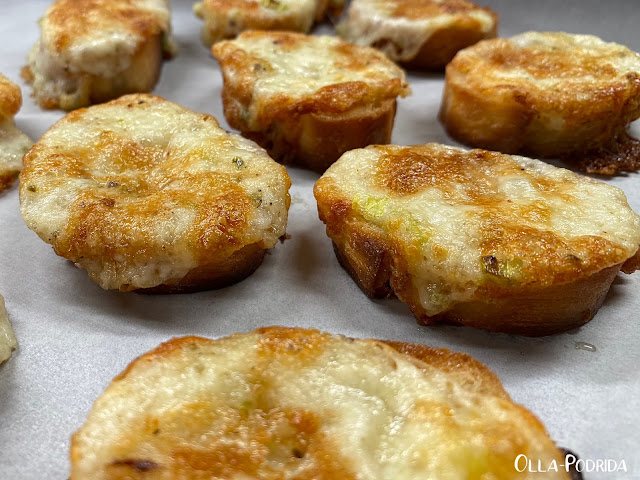
Toasted Cheese Rounds

 
If you are in need of a last-minute appetizer, would like to plan for some point in the future, or are looking for a wonderful accompaniment to soup or salad, these toasted cheese rounds are your answer. They are simple to put together, contain ingredients that you likely already have on hand, and are golden bits of cheesy deliciousness.  Guests will love them, and gobble up these cheesy comestibles like there’s no tomorrow. You just may want to make a double batch.


Toasted Cheese Rounds

1 c. Duke's mayonnaise

1 c. grated mozzarella

1 c. grated sharp cheddar

1/3 c. grated Parmesan cheese

Pinch of garlic powder

Pinch of dry mustard

Freshly ground black pepper, to taste

4 scallions, minced

40 ½" thick slices of French baguette

 Preheat the oven to 350°F. Line a baking tray with parchment or a Silpat; set aside.

Place all ingredients (except the bread) into a medium bowl, and mix to combine.

 Dollop a bit of a generous amount of cheese mixture onto one side of each slice of the bread rounds, place cheese side up on your prepared baking sheet, and bake for 15 minutes until bubbling and golden brown.

 NOTE: These can be prepared ahead of time and frozen for use at some point in the future. Freeze them on a baking tray until solid. Then remove from breaking tray and place in a zipper top freezer bag to until ready to use. To bake from frozen add five minutes to baking time.

As an Amazon Associate I earn from qualifying purchases.


Tuesday, January 10, 2023

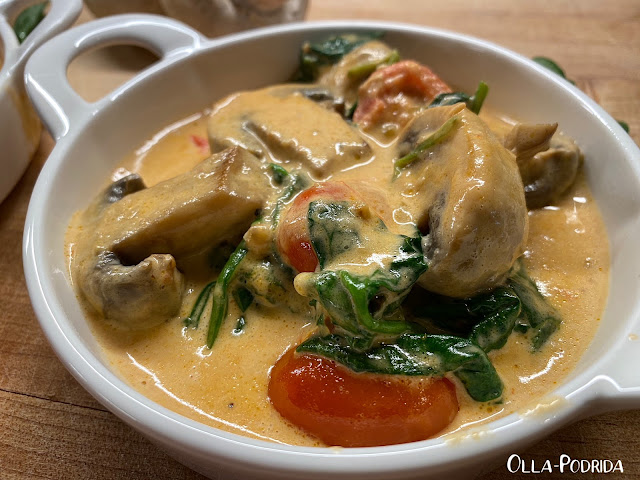
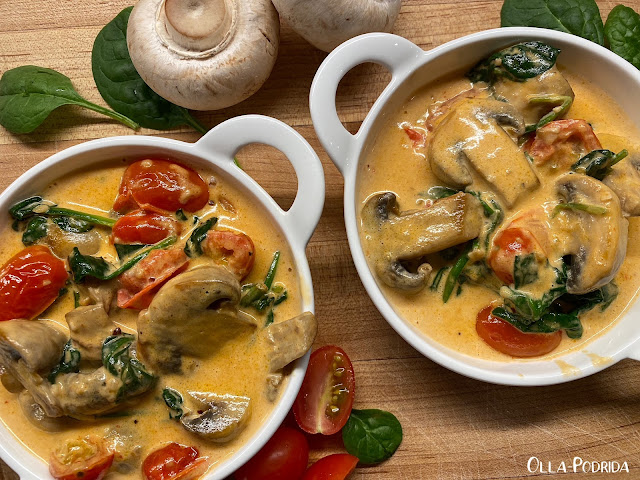
Tuscan Butter Mushrooms

 I love mushrooms, all types, and I’m always looking for a new way to use them. When I spotted this recipe, I knew that it was one I needed to try. Unique and different, it makes a wonderful starter or side dish for any meal. With the addition of tomatoes and fresh spinach, the colors are such that it would be perfect for a holiday table. I’m going to be making this again in the summer using my own homegrown produce that will certainly enhance the flavors. You’ll want to eat this one with a spoon so that you don’t miss a drop of the wonderfully tasty sauce.

Tuscan Butter Mushrooms
Adapted from delish.com

4 T. butter
1½ t.
Melissa’s minced garlic
1 T. tomato paste
1 lb. mushrooms, cleaned
1 c. cherry tomatoes, halved
¾ c. heavy cream
¼ c. freshly grated Parmesan cheese
Kosher salt
Freshly ground black pepper
Pinch crushed red pepper flakes
3 c. fresh spinach

In a large skillet over medium heat, melt butter. Add garlic and tomato paste, and cook until fragrant, 1 minute. Add mushrooms and tomatoes, and cook until mushrooms are tender and tomatoes are starting to burst, 5 minutes.

Add heavy cream and Parmesan and season with salt, pepper, and a pinch of red pepper flakes, and then bring to a simmer. Add spinach and cook until sauce is thickened and spinach is wilted, five minutes.

Yield: 4 servings


As an Amazon Associate I earn from qualifying purchases.


Monday, December 19, 2022

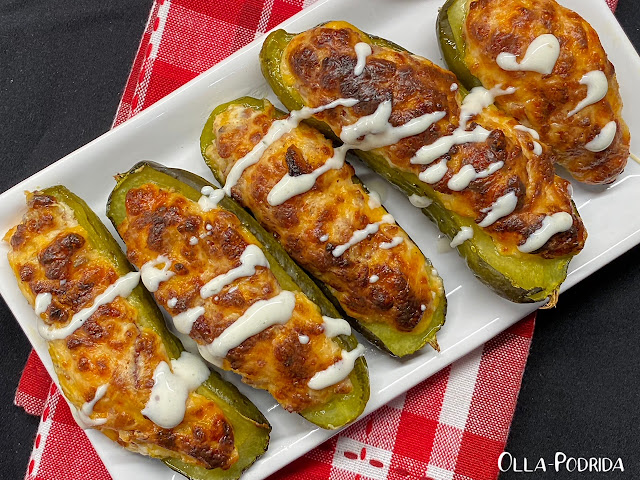
Stuffed Pickles


Some time ago I found a recipe for stuffed pickles online and kept it in the back of my mind. Part of me thought they would be really good, the other part of me thought they might be downright appalling. This week, armed with a huge jar of pickles (That, in my attempt to open, I flung across the room, watched it carom off one of the cabinets, hit the floor, and roll right back, landing at my feet, unbroken. Whew!) I decided to give it a try. They were really good! I like pickles, but I’m not an over-the-top lover of pickles, and I really enjoyed these. If you have friends who are pickle fanatics, they will be forever in your debt. The filling can be made ahead, as well as the slicing and hollowing out of the pickles. Store them covered, in the refrigerator, cut side down on a paper towel until ready to stuff.

Stuffed Pickles

4 large
whole dill pickles
4 oz. cream cheese, softened
½ c. grated sharp cheddar cheese
½ t.
dry ranch dressing mix
2 thick slices bacon, cooked and crumbled
Freshly ground black pepper

Slice pickles in half lengthwise and, using a
grapefruit spoon or something similar, hollow out the insides.

Place cream cheese, cheddar cheese, ranch dressing mix, bacon, and lots of pepper into a medium mixing bowl. With a hand mixer, beat until creamy. Generously stuff each hollowed out pickle and place into the basket of an air fryer. Air fry for eight minutes at 400°F. Serve warm with ranch dressing on the side, or drizzle a bit over the tops.

As an Amazon Associate I earn from qualifying purchases.


Monday, November 28, 2022

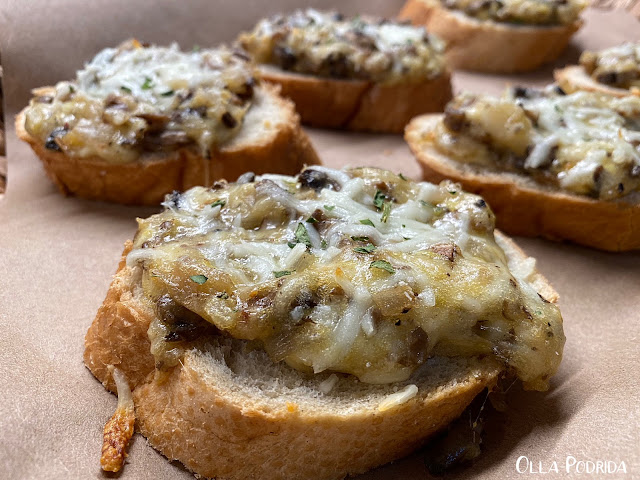
Cheesy Mushroom Toasts


It’s the “party food” time of the year! I love making it, and I love eating it. You are going to love this fabulous mushroom topping; it is excellent on slices of baguette, as I have done here. You can cut big slices out of your baguette by cutting on the diagonal, or small rounds by cutting it straight across. This works well as a main dish for lunch, an appetizer before dinner, or a wonderful side for soups and salads. It’s also excellent on top of a pizza crust, and baked until bubbly. This is a “must make” for the holiday season!

Cheesy Mushroom Toasts

 1½ T. unsalted butter

1 large Melissa’s shallot, chopped

1 c. mushrooms, chopped

½ c. mozzarella cheese shredded, plus extra for the top

¼ c. Parmesan cheese, shredded

1 large egg, beaten

1/8 t. oregano

¼ t. Montreal Steak Seasoning

¼ t. kosher salt

¼ t. freshly ground black pepper

1 baguette, sliced on ¾” diagonals

Parsley, chopped, for garnish

 Preheat oven to 350°F. Line rimmed baking sheet with silicone baking mat or parchment paper.

 Slice baguette into ¾ inch slices; set aside.

 In a large skillet melt butter. Add mushrooms and shallot, cooking until mushrooms have released their juices and shallots are transparent.

 Add oregano, salt, and pepper to the skillet; stir to combine. Add mozzarella cheese, Parmesan cheese, and egg; stir to combine. Remove the skillet from the heat.

 Place baguette slices on baking sheet, topping each with mushroom mixture. Add a pinch of shredded mozzarella cheese on top of each. Drizzle with olive oil if desired.

 Bake for 12-15 minutes until the cheese is melted and mushroom mixture heated through. Garnish with chopped parsley. This recipe can easily be doubled.

 As an Amazon Associate I earn from qualifying purchases.


Monday, October 10, 2022

Olive Cheese Bread

You may have noticed that I have recently been sharing numerous recipes for bread spreads. Previously, for example, I shared Cheesy Garlic Bread, Cauliflower Toast, and Artichoke Bread. These scrumptious topped breads make such great accompaniments to soups and salads. Sliced into sections, they also make wonderful appetizers. Here’s one for you olive lovers.

 
Olive Cheese Bread

Adapted from bellyful.net

1 loaf Ciabatta bread*

½ c. Duke’s mayonnaise

½ c. butter, room temperature

1½ t. Sriracha

1 6-oz. pimiento-stuffed green olives, drained and halved

½ c. Kalamata olives, drained and halved

8 oz. shredded Monterey Jack cheese

2 green onions, sliced

Preheat oven to 350°F.

 Slice the loaf of bread in half, lengthwise. Scoop out some of the surface, making a shallow well. Place on a baking sheet.

In a medium bowl, mix together the mayonnaise, butter, and Sriracha until combined and smooth. Fold in both types of olives, cheese, and scallions.

Divide and spread the filling evenly between the two bread halves

Bake for 25-30 minutes or until cheese is melted and starting to brown.

Cut into 2-inch portions across and serve as an appetizer.

 *I make the filling up ahead of time and store it in the fridge. Then, I will spread it on individual slices of rustic bread using it as an accompaniment to soup or salad.

 As an Amazon Associate I earn from qualifying purchases.