Thursday, October 31, 2024

Happy Halloween! My Card for 2024

 
I think that I probably enjoy making and sending Halloween cards more than any other card that I send throughout the year. Don’t get me wrong, I enjoy sending Christmas cards as well, but there is something about Halloween that makes creating cards fun. I don’t have to limit myself to the holiday exactly; I can choose anything that I consider suitably spooky to share by way of my card. I have found so many strange, unusual, and downright bizarre things over the course of the past couple of years that I have my Halloween cards planned out for the next decade.These cards went into the mail over the weekend, and I’m pretty pleased with this one. When you first look at the front of it, my guess is that most if not all of you would not have the painter Vincent van Gogh popping your head first thing. But it should, and now it probably will, because this is an early work by van Gogh. I loved doing the research on this, the details of which are contained on the interior of the card.The envelopes are something I enjoy doing as well. Truth be told, it is a rare day that an envelope goes out of this house without some sort of embellishment, even if I’m paying the tax man. I just can’t let a plain envelope go. As a consequence, I have accumulated a lot (an embarrassing amount) of Halloween rubber stamps, largely those produced by Tim Holtz, because his are among the finest, cleverest, easiest Stamps to work with. 

Those that I used on the envelopes include:

Framed Frights

Unraveled

Sketch Manor

Mini Blueprints #7

I was disappointed that the post office didn’t come out with a stamp with a Halloween theme this year, so I had to stick to those from years past. I know that with each passing year, it gets more and more expensive to mail things, but that’s not going to stop me. I love doing it, and I do believe the recipients are pleased as well.

Happy Halloween!

 As an Amazon Associate I earn from qualifying purchases.


Tuesday, October 29, 2024

Frost on the Pumpkin Spice Cookies

 
I have always lamented the fact that Christmas cookies are only available at Christmas time. I get it; Christmas cookies are special, that’s the point, but what if I want a Christmas cookie at some other time of the year? What about that? I was thinking about snowball cookies the other day (that just happen to be one of my favorite Christmas cookies), and decided that I wanted them now. But to make them more socially acceptable, I decided to make a pumpkin spice version, making them much more suitable for this time of the year. Because I hate working with anything fiddly, and that includes rolling cookie dough into balls, I lost myself for a moment, thinking I was rolling meatballs, so mine tended to be a bit large. No complaints from me, the bigger, the better, right? You, however, may want to make yours a little smaller.
Frost on the Pumpkin Spice Cookies

 Cookies:

1 c. butter, room temperature

¾ c. powdered sugar, divided

1 t. vanilla extract

2¼ c. flour

½ t. salt

1 T. cinnamon

1 t. nutmeg

½ t. ginger

½ t. allspice

½ t. cloves

1/8 t. cardamom

¾ c. chopped pecans    

 In the work bowl of a stand mixer, beat butter, sugar, and vanilla until fluffy, 2 to 3 minutes.

 In a medium bowl whisk together flour, salt, cinnamon, nutmeg, allspice, cloves, and cardamom.

 Add dry ingredients to creamed mixture, beating just until the dough comes together. Fold in nuts. Gather the dough into a ball, wrap in plastic, and refrigerate overnight to allow the spices to intensify.

 When ready to bake, remove from refrigerator, and allow setting at room temperature for 30 minutes.

 While dough is coming to temperature, whisk together 1 cup powdered sugar, 2 teaspoons pumpkin pie spice, and 1 teaspoon cinnamon; set aside.

  parchment paper or a Silpat; set aside.

 Roll about a tablespoon measure of dough into balls and place on prepared baking sheets. Bake for 14 to 15 minutes. Remove from oven, and cool for a few minutes. As soon as you are able to handle them, roll each cookie in the spiced powdered sugar mixture, and place on a rack to cool. When cooled, roll a second time in the spiced powdered sugar and return to the rack.

Store in an airtight container, or freeze.

As an Amazon Associate I earn from qualifying purchases.

Monday, October 28, 2024

Mustard and Bourbon Glazed Salmon

 
I’ve been cooking with bourbon lately, using it recently to plump raisins for oatmeal raisin cookies, then to plump raisins to include in pumpkin muffins, so I decided to give it a try on salmon. This week’s fish dish is a wonderful fillet of Coho salmon glazed with this mustard bourbon sauce and baked. It is flavorful and delicious, company worthy, and nothing could be easier.Mustard and Bourbon Glazed Salmon

 2 T. Maille Old Style mustard*

1 T. dark brown sugar

1 T. bourbon

1/8 t. grated Melissa’s fresh ginger

Salt and pepper

2 Coho salmon fillets

 Preheat oven to 400°F. Put a piece of heavy-duty foil on top of a baking sheet and spray with PAM; set aside.

In a small bowl mix together mustard, brown sugar, bourbon, and ginger. Salt and pepper salmon fillets. Place skin side down on prepared baking sheet, and slather the tops with the mustard/brown sugar/bourbon glaze. Slide onto the top rack of your oven, and roast for 12 to 15 until the fish flakes nicely. Serve immediately.

 Serves 2.

*This is the brand that I use. You can use the brand of your choice, just as long as you select mustard that is heavily laden with mustard seeds.

 As an Amazon Associate I earn from qualifying purchases.


Friday, October 25, 2024

Ginger Cemetery Cookies

 
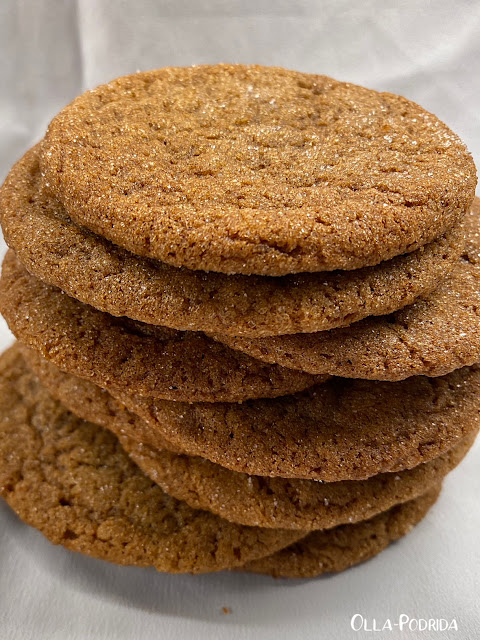
This recipe, from Baking in the American South that I reviewed here, seemed appropriate for the month of October because of the name. But, in truth, there is nothing scary about these cookies at all. The recipe was submitted for inclusion in a 2004 publication, Food to Die For, a fundraising cookbook to aid restoration efforts of the 26-acre Old City Cemetery in Lynchburg, Virginia. The cemetery, now a landmark, is the resting place for Civil War soldiers from over 14 states. The cookies were served at so many cemetery fundraisers, hence the name.Ginger Cemetery Cookies

 12 T. (1 1/2 sticks) unsalted butter, room temperature

1 c. granulated sugar, plus ¼ c. for rolling

1 large egg

¼ c. molasses

2 c. all-purpose flour

2 t. baking soda

1 t. ground cinnamon

1 t. ground cloves

½ t. ground ginger

½ t. kosher salt

 Place the butter and the 1 cup sugar in a large bowl and beat with an electric mixer on medium speed until light and fluffy, 2 to 3 minutes. Scrape down the sides of the bowl with a rubber spatula. Add the egg and molasses and beat until just combined, 30 seconds. Scrape down the bowl and set aside.

 Sift together the flour, baking soda, cinnamon, cloves, ginger, and salt in a medium bowl. Add half of the flour mixture to the butter and sugar mixture, beating on low speed until just combined. Add the remaining flour mixture and beat until just combined. Scrape down the sides of the bowl and stir until smooth. Cover the bowl with plastic wrap and chill for at least 3 hours or preferably overnight.

 When you are ready to bake, heat the oven to 325ºF, with a rack in the middle. Put the 1/4 cup sugar in a small bowl. Roll the dough into 1-inch balls and roll in the sugar. Place 2 to 3 inches apart on 12-by-17-inch ungreased baking sheets and flatten to 1/4-inch thickness with the bottom of a glass.*

Bake, one pan at a time, until firm and crisp, 10 to 14 minutes. Immediately remove from the pan to cool on a wire rack. Repeat with the remaining dough, cooling the pan between batches. Let the cookies cool to room temperature, 15 minutes, before serving. Store in an airtight container for up to 2 weeks.

*I didn’t find that it was at all necessary to add the final step of flattening with a glass. As you can see from my results, they flattened out just fine. Why go to the extra trouble?

 As an Amazon Associate I earn from qualifying purchases.


Thursday, October 24, 2024

Spinach Casserole with Four Cheeses

 
If you’re looking for something different to serve for Thanksgiving, or for a holiday brunch, this easy, make-ahead casserole just might be the answer. It’s certainly more nutritious than popular favorites like green bean casserole or corn pudding, but despite the high nutritional value it’s not lacking in flavor. My guess is that if you make it once, it will soon become a family favorite. If you have a hard time moving away from the French fried onions, those bits of crispy deliciousness found atop green bean casserole, you can sprinkle some on top of this one before baking.Spinach Casserole with Four Cheeses

 3 large eggs, beaten

1 16-oz. container small curd cottage cheese

1 16-oz. pkg. frozen chopped spinach, thawed and drained

1 4-oz. container crumbled feta

½ c. shredded cheddar

½ c. shredded Parmesan

1 Melissa’s shallot, minced

¼ c. melted butter

⅛ tsp. garlic powder

⅛ t. freshly grated nutmeg

Freshly ground black pepper

Lemon wedges, if desired

 Preheat oven to 350°F. Spray a 1½-qt. casserole dish with PAM; set aside.

Place all ingredients into a large bowl, and mix with a wooden spoon until combined; transfer to prepared baking dish.

Bake, uncovered, for 40-45 minutes or until the center is nearly set. If desired, sprinkle additional grated cheese on top during the last few minutes of baking, and bake until cheese has melted.

Let cool for 5-10 minutes. Serve with lemon wedges. The freshly squeezed juice really brightens this dish.

As an Amazon Associate I earn from qualifying purchases.

Tuesday, October 22, 2024

Jalapeño Popper Soup

 
We had our first frost earlier this month, coincidentally on the exact same day that we had our first frost last year. It also marked my day of switching from the air conditioning to heating. I have a rule around here that it must get to 59° in the house before I turn on the heat. That morning, it did. Such days call for something warm and spicy, and this soup seemed just the ticket.Jalapeño Popper Soup

1 12-oz. pkg. bacon, chopped

4 Melissa’s pickled jalapeños, seeded and diced*

½ c. chopped onion

2 t. Melissa’s minced garlic

½ c. flour

6 c. chicken stock

1 T. pickled jalapeño juice    

1½ c. whole milk

1½ c. heavy cream

1 1.5 lb. pkg. Melissa’s Baby Dutch Yellow Potatoes, cut into 1” dice

8 oz. cream cheese, softened and cut into pieces

2 c. shredded sharp cheddar cheese

Kosher salt, to taste

Freshly ground black pepper, to taste

Place bacon into a medium stockpot and cook over medium-high heat until crisp. Add jalapeños and onions, and cook until tender, 3-4 minutes. Stir in garlic and cook an additional 30 seconds.

Sprinkle the flour over all, and stir to incorporate. Continue to cook, stirring for 1-2 minutes. Pour in the chicken stock, milk, and cream.

Add potatoes and bring the soup to a boil over medium-high heat. Reduce the heat to medium-low and simmer until the potatoes are fork-tender, 25-30 minutes, stirring occasionally.

Remove the pot from the heat and add the cream cheese and shredded cheddar, stirring until the cheeses are melted and combined.

Salt, pepper, or Slap Ya Mama, to taste; garnish as desired. 


As an Amazon Associate I earn from qualifying purchases.


Monday, October 21, 2024

Organizing My Pantry

 
So… I did a thing. Anyone who knows me knows that I absolutely despise housecleaning. I cannot tell you how much this upset my mother, because she was one of those people who loved cleaning so much that she even cleaned her light switches with Q-tips damped with alcohol to make sure she got into every nook and cranny. Me? I blow on the furniture and call it a day.

There is a strange sort of phenomenon, however, that comes over me in spring and fall that makes me actually want to clean and organize, so a couple of weekends ago I organized my pantry. It took me the entire weekend, and I am talking day and night, but this is the result. I found things I didn’t realize that I had, as well as spices that dated back to the year 2009. Clearly, I don’t do this often enough.

 
 What got me interested in doing this were these pantry containers (as well as these) that I got on Amazon. I got three sets of them, using my rewards dollars, washed them all by hand, and let them air dry overnight before I started filling them. As a result of organizing my pasta alone, I filled my trashcan up a third of the way with empty pasta boxes. Now I actually know what I have. I was able to combine ‘like’ pastas into one container instead of having boxes in various parts of the pantry. The pantry was such a mess that, because I couldn’t find things, I would just buy more.  That’s not a good idea; counterproductive one might say. 
The over-the-door spice rack can be found here. Once I started going through all of the spices, I found that so many had long expired and needed tossing, that it freed up space on the bottom racks for canned goods. (The stackable can rack organizer on the top shelf can be found here.)The labels and marker that came with this set of storage containers was abysmal, so I bought these labels, and this marker, and found they worked wonderfully. The sense of satisfaction that I got from cleaning my pantry cannot be measured; I was floating on air. I opened my pantry door to anyone who came into the house, including various service people. Yes, I was that proud. 
If you have long wanted to clean out your pantry (or cabinets, or any place else in the house that really needs seeing to), I hope this will serve as an inspiration to you.  Winter is coming, let’s get organized!

This post is inked to Metamorphosis Monday.

As an Amazon Associate I earn from qualifying purchases.


Thursday, October 17, 2024

Make Way for Halloween Tablescape

 
I received two things for my birthday that warranted my doing a rather spooky table for Halloween; one was an adorable frog pitcher that I got from my aunt, the second was the absolutely glorious bouquet of flowers that I got from an admirer.
In my search for a suitably spooky vase to use for the flowers (instead of the glass vase in which they came) I found this Skeleton cookie jar that I believe I got from Pier One six or seven years ago. It worked perfectly!


A velvety black tablecloth seemed appropriate here, and because I wanted to use a witch image, I thought pops of green called for employing the use of both green placemats and green napkins that were simply knotted and set to the side of the plate.

I used tin chargers that I got from a local shop, square black plates, and topped the black plates with a witch image that I found online, enlarged, cut out, thought suitably spooky, and set beneath small Duralex dinner plates.  I love those plates; you can make a table any theme by simply placing a printed design beneath the glass.
 
Mikasa ‘Opulent hammered flatware, gave it a bit of sparkle, as well as the wonderful vintage wine glasses with the raven stem. 
 
I added a bit of whimsy by placing a sugar skull into the soup spoon. You can easily make these yourself using this mold. 
Green water glasses were just the ticket here as well as deep green taper candles in wrought iron candleholders. I think I’m ready for Halloween.
 
This post is linked to: Tablescape Thursday
As an Amazon Associate I earn from qualifying purchases.