Tuesday, July 20, 2021

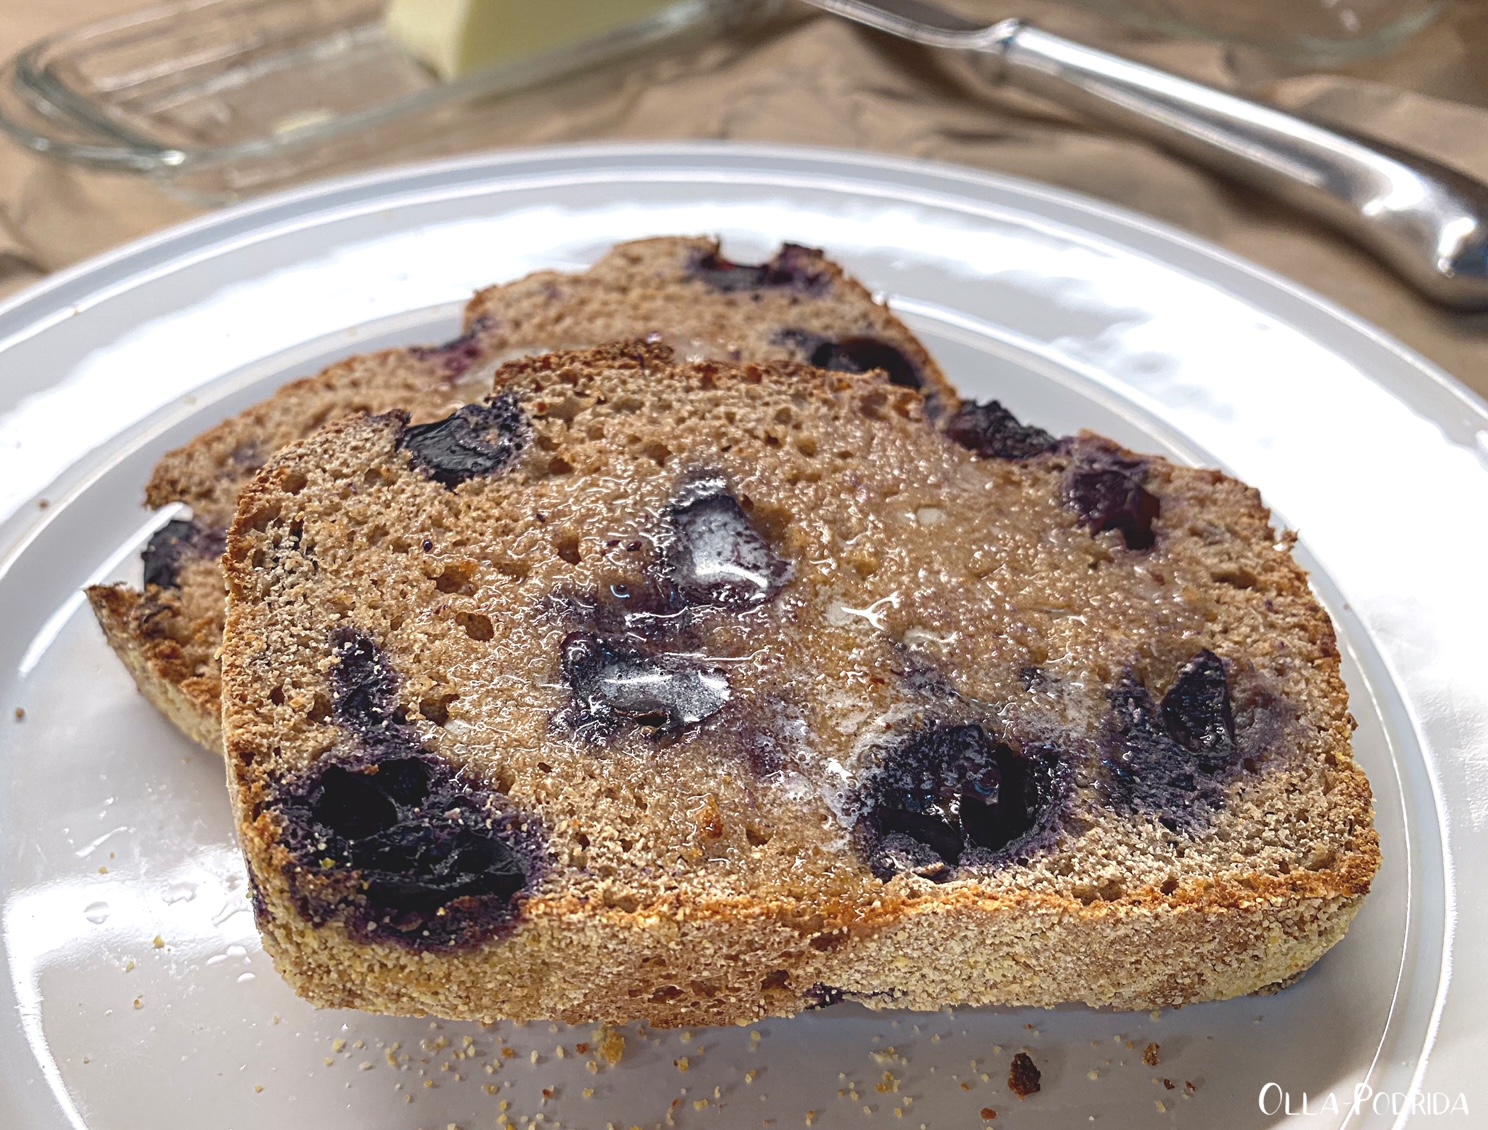
Blueberry English Muffin Bread

 This post contains affiliate links.

 I found this recipe on Twitter, of all places. Generally, I don’t hang out very much on Twitter, but the other day, plagued with weariness, I decided to scroll through. I saw a picture of this bread and thought it sounded tasty. It had been tweeted by Red Star Yeast; I find that, generally, companies only back recipes that are good, and this theory was proven right.


I am not a big baker of bread although I do love it. This seemed easy, required no kneading or special equipment, and it was sunny, warm, and humid, so I put my loaf outside to rise. This was my first experience making English muffin bread, and it certainly won’t be my last. I loved the crispy exterior and the tender interior. I also loved that this was touched with just a hint of sweetness, no more, so goes perfectly well on its own at breakfast, or alongside bacon and eggs. I found it to be particularly delicious when toasted and topped with grapefruit marmalade.

Blueberry English Muffin Bread
From A Kitchen Addiction

1½ c. bread flour
1 c. whole wheat flour
1½ t. cinnamon
½ t. nutmeg*
1½ t. salt
¼ t. baking soda
1 pkg. (2½ t.) Red Star baking yeast
1 c. milk, warmed to 120°- 130° F
6 T. maple syrup
¾ c. fresh blueberries, washed and dried
Cornmeal (for dusting pan)

Lightly spray a 9”x5” loaf pan with nonstick cooking spray. Sprinkle and coat bottom and sides of loaf pan with cornmeal.

In the bowl of a stand mixer, combine flours, cinnamon, nutmeg, salt, baking soda, and yeast.

With mixer on low, slowly add warmed milk and maple syrup. Increase speed to medium, and beat until the dough and pulls away from the side of the bowl. It will be soft and sticky; gently fold in blueberries.

Gently spread out into prepared loaf pan. Cover with a clean towel and allow us to rise in a warm, draft-free spot until doubled in size, about an hour (this could take up to 1½ to 2 hours depending upon the temperature of your house.)

Preheat oven to 400° F. Bake for 25 minutes or until golden brown and internal temperature reaches 195°- 200° F. Allow cooling in pan for 10 minutes before removing to a wire rack to cool completely.

* I grated fresh nutmeg.


Monday, July 19, 2021

Vegetarian Casserole

This post contains affiliate links.

I’ve mentioned before, and it’s nothing that you don’t already know, that the 70s was the decade of the casserole. Women were rapidly entering the workforce -- in many cases still expected to fix dinner --  and needed something that would go together easily, be shoved into the oven, and come out hot and ready to serve a hungry family or crowd. This recipe is a throwback to that time, something that I think you will no doubt realize when you see some of the ingredients. That should not deter you from making it exactly as written. What I’m saying here is use the condensed soup and the Velveeta, it makes all the difference.

I found this little gem amongst my mother’s recipes, and decided to give it a try. I enjoyed it as a meatless main dish; you can do the same, or serve it as a side. This makes a lot, so is excellent for a brunch or buffet because you can make it the day before baking.

Happy Meatless Monday!

Vegetarian Casserole

1 medium onion, thinly sliced
½ c. (1 stick) butter
2 c. cooked, drained, chopped broccoli (can use frozen)
2 c. prepared
Uncle Ben’s Long Grain & Wild Rice
½ c. sliced water chestnuts
½ c. canned sliced mushrooms
8 oz. Velveeta, cubed
1 can cream of mushroom soup
½ c. milk
Freshly ground pepper to taste
Crushed
Cheez-Its
Sliced almonds

Preheat oven to 350° F. Spray a 9” x 13” casserole dish with PAM; set aside.

Sauté onion in butter; empty into a large bowl. Add broccoli, rice, water chestnuts, and sliced mushrooms; set aside. Place Velveeta, condensed soup, and milk in a small saucepan. Heat, stirring occasionally, until Velveeta has melted. Pour soup/cheese mixture over your bowl of vegetables and pepper generously. Fold ingredients together, and turn into a prepared casserole dish. Place in preheated oven and bake for 20 minutes. Top with crushed Cheez-Its and almonds and bake an additional 10 minutes.


Friday, July 16, 2021

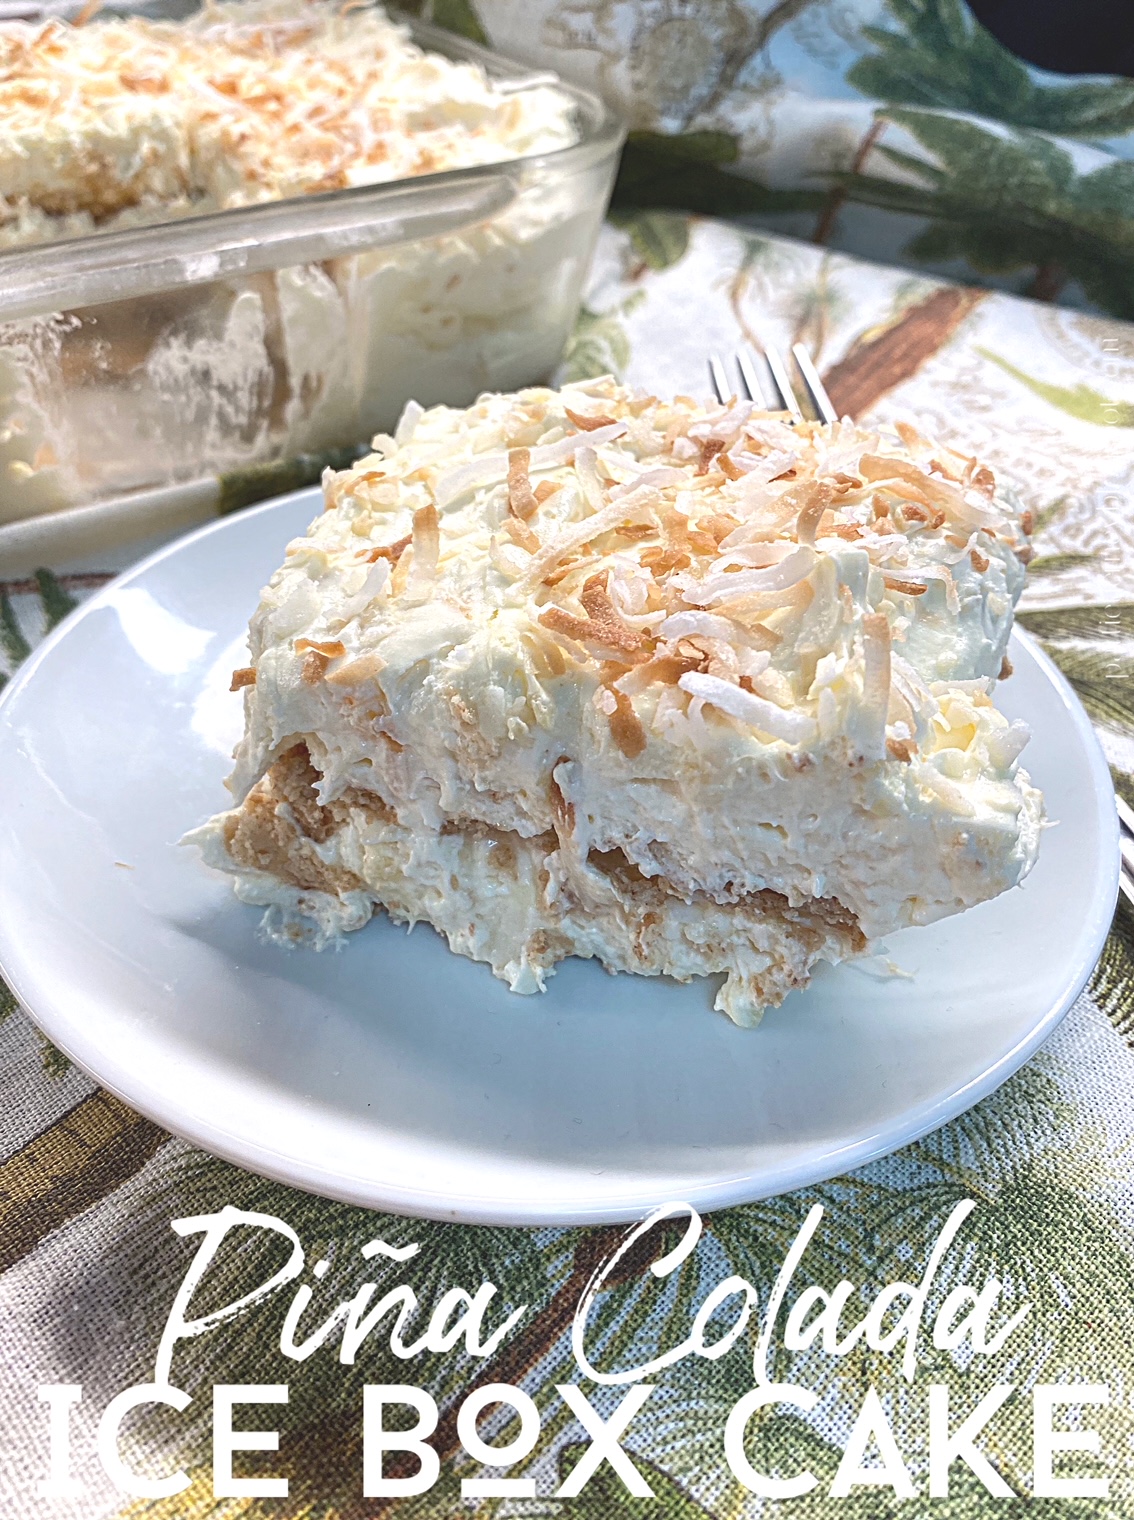
Piña Colada Icebox Cake

This post contains affiliate links.


I learned at an early age that “fluff” desserts were synonymous with summer. I can still see my mother icing those thin and crispy Famous Chocolate Wafers with sweetened whipped cream, stacking them in little columns to eventually be topped with a maraschino cherry. When I saw her making those, I knew that it was going to be a good day. Icebox cakes were another favorite of this fan of fluff. Here’s one for those of you who are fond of the piña colada. I adapted it from a recipe that I found in Taste of Home, to give it more punch.

Piña Colada Icebox Cake

1 8-oz. pkg. cream cheese, room temperature
½ c. confectioners’ sugar
1 t. rum extract
½ t. coconut extract
1 13.66-oz. can coconut milk, divided
1 3.4-oz. pkg. instant French vanilla pudding mix
1 8-oz. container Cool Whip, thawed
14-15 whole graham crackers
1 20-oz. can crushed pineapple, drained
1 c. sweetened shredded coconut, divided

In a large mixing bowl beat together cream cheese, sugar, and extracts until smooth and creamy. Gradually beat in one-cup coconut milk. Add pudding mix, and beat on low speed until smooth. Fold in Cool Whip and pineapple.

Pour remaining coconut milk into a shallow bowl. Dip half of the graham crackers into the milk and arrange in a single layer on the bottom of a 9” x 9” baking dish, breaking to fit as needed. Layer with half layer with half of the cream cheese mixture and 1/3 of the coconut. Repeat the layers (graham crackers, cream mixture, and 1/3 of the coconut). Toast the remaining third of the coconut and sprinkle on top. Refrigerate, covered, for four hours before serving.


Wednesday, July 14, 2021

Caramelized Chicken Wings

This post contains affiliate links.


 I rarely eat chicken wings. I enjoy them, and one time we made them at home. This was back in the day when my son was working in a restaurant. We made them restaurant style, double frying them, tossing them in Frank’s red hot sauce and melted butter in between flash frying, then finished them off in the oven. They were phenomenal! They were also a lot of trouble, a huge mess, and I was the one cleaning up afterwards. The late Mr. O-P used to order them at an area restaurant known for their wings. I never bothered, although I did look longingly at his plate of them.

This recipe, adapted from one I found online, is easy and delicious. Honestly, there is nothing to this. You just put everything in a pan, stir it together, and simmer. The cooking takes a while, but it’s well worth the wait.

 Caramelized Chicken Wings

Adapted from Allrecipes.com

1 c. water

1/3 c. white sugar

1/3 c. soy sauce

2 T. peanut butter

1 T. honey

2 t. sherry vinegar

1 T. Melissa’s minced garlic

12 large chicken wings, tips removed and wings cut in half at joint

1 t. sesame seed (for garnish)


 In a 12-inch skillet over medium heat, whisk together water, sugar, soy sauce, peanut butter, honey, sherry vinegar, and minced garlic, until smooth and the sugar has dissolved. Place the wings into the sauce, cover, and simmer for 35 minutes. Uncover and simmer until the wings are tender and the sauce is thickened, about 35 more minutes, spooning sauce over wings occasionally. Sprinkle with sesame seeds.

NOTE: Be sure to keep an eye on these during the last 10 minutes of simmering. The sauce can cook down before you know it, and you can end up fusing these to your pan. Don’t ask me how I know.


Monday, July 12, 2021

Blue Cheese Spread

This post contains affiliate links.

I am a fan of blue-veined cheese: Gorgonzola, Stilton, Danish bleu, any cheese of that ilk blows my skirt up big time. I like to use it in as many ways as possible, and started adding it to my Homemade Boursin Cheese (the recipe of which you can find here). It occurred to me that it would probably make a decent spread all on its own, and here is the result. It’s an excellent spread for crackers, to use with crudities (I love filling snow peas and celery with this), I’ve even used it with Bugles, and it works wonderfully, and, enjoying it this way, I have to admit, is a heck of a lot of fun. But don’t stop there, it’s super delish when spread on a toasted bagel half or English muffin at breakfast, a dollop does a wonderful thing to a baked potato, and enhances a steak when a small amount is put on top immediately upon removal from the grill. Versatile and delicious, who doesn’t love that? 

Blue Cheese Spread

1 5-oz. container blue cheese crumbles, room temperature
1 8-oz. pkg. cream cheese, room temperature
1/8 c. (2 T.) sour cream
½ t.
Worcestershire sauce
¼ t. freshly squeezed lemon juice
5-6 gratings
black pepper
½ T. chopped parsley (for garnish)
Additional blue cheese crumbles (for garnish)*

Place all ingredients into a medium mixing bowl, and beat, at high speed, until thoroughly combined, 2 to 3 minutes. Turn out into your favorite bowl, garnish with crumbled bacon and chopped chives, and served with crudités or crackers. Refrigerate leftovers.

*You can also cook and crumble a slice of bacon to use as a garnish. Or, stir it in; I’m not your mom. You can do what you like.


Friday, July 9, 2021

Shrimp Pasta Salad

 This post contains affiliate links.

I LOVE chopping things; I know, that’s unusual. As a consequence, I often end up chopping way more things that I actually need. Such was the case when I made shrimp salad earlier in the week. There was no way that I was going to let any of those ingredients, including that lovely fresh dill, go to waste, so I decided to put them together with more shrimp and add pasta, thereby creating a shrimp macaroni salad. If you love shrimp salad, you are going to love this. It kicks all other pasta salads right to the curb…or should I say shore?

Shrimp Pasta Salad

Salad:
6 oz. medium shell pasta
6 oz. shrimp, cooked and cooled
½ c. celery, finely diced
¼ c. red onion, finely diced
¼ c. Melissa’s fresh dill, chopped fine
1 T. capers, drained
½ cup frozen peas, thawed

Dressing:
¾ c. Duke’s mayonnaise
1 t. Dijon mustard
1 t. cocktail sauce
½ t. Worcestershire sauce
¼ t. Old Bay
Salt and pepper to taste

Cook pasta according to package directions; drain and cool. In a large mixing bowl, toss together all salad ingredients.

In a small bowl, whisk together all dressing ingredients. Pour dressing over salad, and fold together until coated. Refrigerate for at least one hour before serving.


Wednesday, July 7, 2021

The Happy Sandwich by Jason Goldstein, Reviewed

 This post contains affiliate links.

"For better or for worse, but not for lunch," is what my mother used to say. This was her not so subtle way of letting my dad know that she didn’t appreciate his showing up, unexpectedly, for lunch in. My dad didn’t make a habit of this, mind you, he worked in the city and we lived in the county, but he did it often enough so that my mother caught on, and would make a point to be out of the house at lunchtime. Dad, who for a time, was raised in the back of an ice cream parlour, would end up making himself a malt using a Hamilton Beach malt mixer from the 40s; I still have it, and it still works.

Lunch fare often stymies me. Sure, there are soups to be had, salads to be made, and sandwiches to be consumed, but day in, day out, week in, week out, year after year, it all seems the same. That’s why I was delighted with this wonderful book by Jason Goldstein of Chop Happy,
The Happy Sandwich: Scrumptious Sandwiches To Make You Smile. If this book doesn’t get the wheels turning and mouthwatering, nothing will.

The book is divided into six chapters: slow cooker sandwiches; sheet pan sandwiches; grilled cheese sandwiches; no cook sandwiches; no bread sandwiches; and condiments. I have tried a number of these, and each one has been wonderful.

A diehard fan of grilled cheese sandwiches, I plan to work my way through all 10 offerings beginning with spinach and artichoke grilled cheese and ending with brie and apricot jam grilled cheese. The latter I intend to make this week.

I did make, from the no cook sandwich chapter, the garlic dill shrimp salad. I adapted the recipe a bit, and you can find it here. Refreshing and wonderful, it made me long for our travels along the eastern seaboard and all of the fresh seafood. Slow cooker sandwiches run the gamut from an eggplant Parmesan sandwich to the ever popular French dip, to a Thai curry meatball sub. Each one looks delicious, doable, and mouthwatering.

There is much to like about this book. When I particularly loved was the what easy-to-read recipes with the list of ingredients running down one side and the instructions on the other. This book is written in a clear and concise manner so that even the most inexperienced cook will be able to shine. Photos are plentiful and mouthwatering. The variety is wide, including an Open-Faced French onion Soup Sandwich.

The chapter on sheet pan sandwiches is perfect for the busy cook who may not have a lot of time, and wants to make a number of sandwiches at once. Many sandwiches are vegetarian, but there is plenty for carnivores. The chapter on condiments is invaluable.

It lacks an index, but page numbers of all of the recipes contained within are in the table of contents.

I haven’t been as excited about a cookbook as I am about this one in quite some time. Suitable for all levels of experience, culinary interests, older and younger alike. It has my heartiest recommendation. You can buy a copy here.

Disclaimer: Thanks to Melissa’s Produce who provided me with a copy of this book for review.