

The week before last we had a little bit of spooky fun with a skull-shaped
cheese ball. This week the skulls are of a smaller size and part of a Caprese
salad. You have probably seen this online as it seems to be quite popular this
year. It’s easy to put together, and quite tasty, working equally well as a
side dish, or as a part of a charcuterie tray. The skull molds are a breeze to
use (I got them here), and you can even mess things up and still come out
just fine. The directions call for you to soften the cheese in the oven, and
then press it lightly with a paper towel into the mold. I was busy the
day that I made these, left them in the oven too long, and the cheese melted.
Not to worry, I put them right into the fridge, and after 30 minutes popped them
right out. Are they perfect? No. Do they look just fine? They certainly do, and
have the added benefit of looking as though they’ve rotted away a bit.
Great fun for Halloween.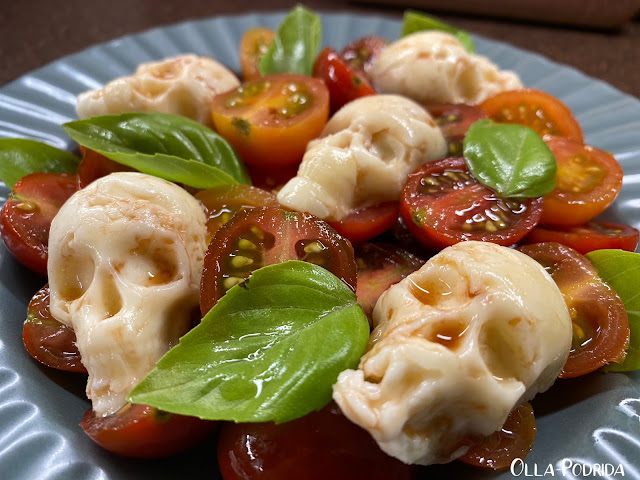 Halloween Caprese Salad
 Halloween Caprese Salad
8 oz. fresh mozzarella balls
1 pt. Melissa’s organic heirloom tomatoes
2 T. balsamic vinegar
2 T. good olive oil
¼ c. fresh basil leaves
Salt and freshly ground black pepper, to taste
Make the mozzarella skulls:
Preheat the oven to 350ºF. Place the silicon
molds onto a rimmed
baking sheet for
stability. Lightly spray the interiors of the skull molds with PAM. Add a ball of mozzarella to
each skull cavity. Bake for 6-8 minutes to soften the cheese. Use a folded
paper towel to press the softened cheese into the molds (the paper towel will
absorb the liquid that is released from the mozzarella). Transfer the molds to
the refrigerator and let chill for 8-10 minutes, then remove from the mold and
repeat with remaining cheese until all the mozzarella is formed into skulls.
Slice the cherry tomatoes in half and then toss
the tomatoes and mozzarella skulls, with the balsamic and olive oil. Scatter
basil leaves over top and sprinkle with salt and pepper before serving.

Happy Halloween, everybody!.PNG)
As an Amazon Associate I earn from qualifying purchases.


.PNG)
.PNG)
.PNG)
.PNG)


.PNG)
.PNG)


.PNG)


