Showing posts with label canning. Show all posts

Tuesday, June 20, 2017

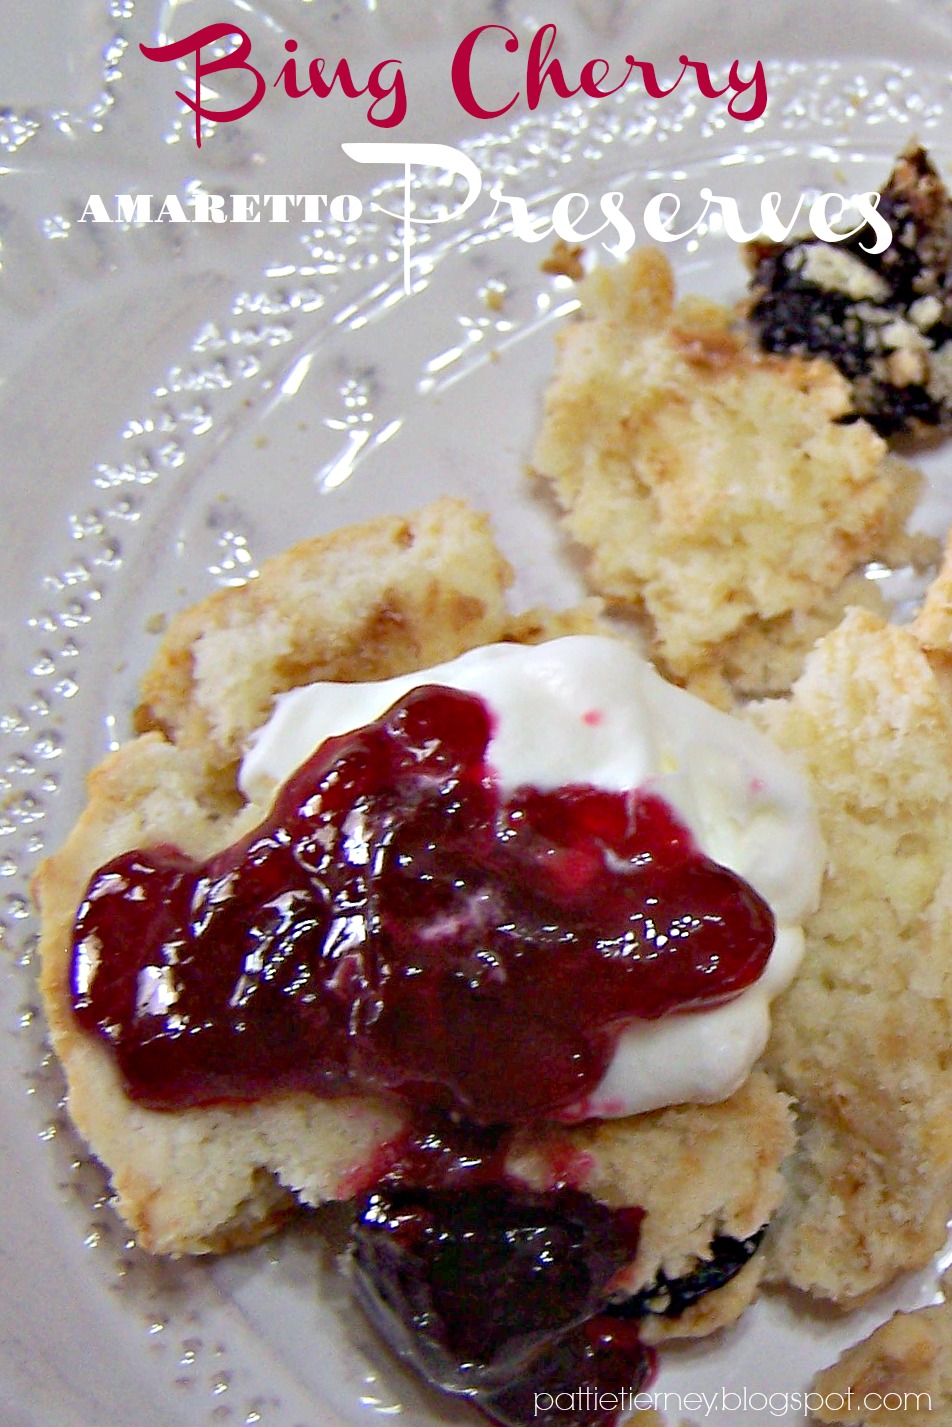
Bing Cherry Amaretto Preserves


Cherry season is one of my favorite times of the year because I absolutely LOVE cherries! I’d received a nice big bag of Bing cherries, courtesy of Melissa's Produce and, seriously, could have eaten the entire thing until I made myself sick, that's how much I love them. Instead, I started thinking about my grandmother, remembering her climbing up into the cherry tree that grew in her backyard, alongside an apple and peach. When I think back on those moments, it makes me realize, now more than it ever did back then, just how truly amazing she was. Not quite five feet tall, and rounder than she should have been, she would climb up into the cherry tree -- wearing a housedress no less -- gathering cherries in her apron to use in making preserves. Aha! I thought to myself, that's what I'll do; I'll make some cherry preserves.

My grandmother used to use an equal amount of fruit to sugar, but these cherries are so sweet that I thought that would be too much, so I cut back on the sugar. I also got to thinking about how cherries are often paired with almond flavoring, so in addition to a little hint of almond flavoring I decided to add a bigger hint of Amaretto Liqueur. Boy, is this good.
 Bing Cherry Amaretto Preserves

5 cups stemmed and pitted Bing cherries (I used
Melissa's)
2 tablespoons fresh lemon juice
1 box of Sure Gel fruit pectin
4 cups sugar
1/4 teaspoon almond extract
1/4 cup Amaretto

If you plan on storing your preserves, have your jars warm and sterilized, and your boiling water canner ready.

Into a 6- to 8-quart saucepan, place cherries, lemon juice, and pectin. Stir together to combine. Bring mixture to a full rolling boil, i.e., a boil that doesn't stop bubbling when stirred, over high heat, stirring constantly. Stir in sugar and almond extract. Return to a full rolling boil, and boil exactly 1 minute stirring constantly. Remove from heat and stir in Amaretto. Skim off any foam that may have gathered on top with a metal spoon.

Ladle into prepared jars, wipe rims and threads, place lids on and screw them down tightly. If you plan on processing the preserves, be sure to do so for at least 10 minutes.


This post is linked to:


Tuesday, July 2, 2013

Strawberry Hot Pepper Jam


I’ve been having quite a bit of luck with jam and jelly making these days, and these various successes have me experimenting.  The Strawberry Margarita Jam was such a big hit, and I love Green Pepper Jelly, so I decided to come up with a combination of the two to provide a spicy eye-opening kick for my toast or bagel in the morning.  This recipe is a winner! Richly fruity with an underlying taste of pepper, and a kick that you can set from mild to medium, to hot, hot, hot, just by increasing the amount of hot sauce. I found this recipe to be perfect for morning, but when I make it again to pour over a brick of cream cheese and serve with crackers, I’m going to double the hot sauce.  Yeehaw!

Strawberry Hot Pepper Jam

4 cups crushed strawberries
2 jalapeño peppers, seeded and minced
1/4 cup Meyer lemon juice
4 ounces pectin (recommended: Certo)
6 cups white sugar

Place the crushed strawberries, minced jalapeño peppers, lemon juice, and hot sauce into a large saucepan, and bring to a rolling boil over high heat. Once simmering, stir in the sugar until dissolved, return to a rolling boil, and cook for 1 minute.

Remove from heat, stir in pectin, and pour into sterilized jars and seal*.

*Cook's Note: Follow USDA guidelines for proper sterilization and canning procedures.

This post is linked to:

Saturday, May 4, 2013

Rhubarb Ginger Jam

 Whether we realize it or not, food connects us to significant events in our lives, dating back to our very beginnings. I still remember the chocolate-covered graham crackers that I would dip into milk as reward for eating all of my vegetables at dinner. The chocolate was waxy and the crackers insipid, but, oh what a treat for this vegetable-eating eight-year-old. When I reached double digits, cream of tomato soup and grilled cheese was my go-to comfort food.  I shudder now when I think of the boxes of Velveeta that I consumed in the going.  I sought solace in casseroles during the seventies, and got my first taste of ethnic food in the eighties (introduced to exotic cuisines by Mr. O-P whom I didn't marry until twenty years hence). What we consume changes us. It educates our palates, expands our horizons, and leaves us with the enthusiasm for more. 

If you've lasted this long, you're probably wondering what all of this is leading up to. One word: rhubarb. As a kid rhubarb scared me. It looked like celery. Big. Weird. Red. Celery. My grandmother tended to cook it a lot. It was not pretty. Stringy and, frankly, frightening, I tried it when I was six, and never ate it again.  So, ever interested in expanding my horizons in my continuing effort to stave off Alzheimer's, I thought that it was probably time to try it again. 

Well, I'm a convert. This simple, easy-to-make Rhubarb Ginger Jam, a compilation of four unique recipes, has me convinced. Rhubarb. Is. Yummy. All I can think of now, as I eat it straight from the jar saving the biscuits for later is, why didn't I try this years ago?

I wish I could share it with my mom.

Rhubarb Ginger Jam

2 pounds
fresh rhubarb, cleaned, sliced into 3/4" chunks
2 ounces
candied ginger, finely chopped
1 heaping cup granulated sugar
1 teaspoon fresh orange peel

Combine all ingredients in heavy medium saucepan. Stir constantly over medium-high heat until sugar dissolves. Continue stirring as you bring to a boil. Reduce heat to medium and simmer until jam thickens and mounds on spoon, stirring often to prevent scorching, about 25-40 minutes. Transfer to jars. Cover and keep chilled, or can and process.


This post is linked to:

Monday, April 1, 2013

Meyer Lemon and Vanilla Bean Marmalade

After the great success that I had making the Seville Orange Marmalade, I was more than ready to tackle another variety. With a fruit bin full of Meyer Lemons (Thank you Melissa's!), I started searching for various ways in which to use them. I was delighted to have stumbled across this recipe for Meyer Lemon Vanilla Bean Marmalade on Epicurious.com and could not wait to try it.  Am I ever glad that I did. This is absolutely the BEST marmalade that I have ever eaten. It is also the easiest to make. As with the orange variety, it is a two-day process, so make sure that you can allow a bit of time two days in a row before you begin.

I followed this very easy recipe exactly EXCEPT I used a mandoline to slice the lemons. For me, this was a much more efficient way to go than to slice them with a knife, plus I wanted the slices very thin. Because they were so thin, I did not have to cut them in half. The downside is that, using this method, there is a tendency to slice seeds as well, and it can be a bit painstaking to fish them out, but I'd certainly do it again. I liked the ease, speed, and uniformity.  When the marmalade was finished, I removed the vanilla bean and broke it into pieces, placing one in each jar. Cute, no? I also processed mine using the traditional canning method. I wanted to be able to give some as gifts and not worry about it being improperly stored.

This marmalade is delicious, as expected, when used on toast, biscuits, or scones (swoonably good on the gingerbread variety), but it is also excellent when warmed and served atop pancakes or waffles.


Meyer Lemon and Vanilla Bean Marmalade

1 1/4 pounds Meyer lemons
5 cups water

5 1/2 cups (about) sugar
1 vanilla bean, split lengthwise
Pinch of salt

Working on large plate to catch juice, cut lemons in half lengthwise, then very thinly crosswise. 


Discard seeds. Pack enough lemons and any juice to measure 2 1/2 cups. Transfer to large nonreactive pot. Add 5 cups water; bring to boil. Reduce heat to medium; simmer 10 minutes. Remove from heat; let stand uncovered overnight.


Measure lemon mixture (there should be about 5 1/2 cups). Return to same pot. Add equal amount of sugar (about 5 1/2 cups). Scrape in seeds from vanilla bean; add bean. Add pinch of salt. Bring to boil, 
stirring until sugar dissolves. Attach clip-on candy thermometer. Maintaining active boil and adjusting heat to prevent boiling over, cook until temperature reaches 230°F, stirring occasionally, about 30 minutes. Cool to room temperature. Transfer to jars. Cover and chill. (Can be made 2 weeks ahead. Keep refrigerated. Bring to room temperature before serving.)

Look at all of the wonderful vanilla bean flecks.


This post is linked to:


Monday, March 18, 2013

Seville Orange Marmalade


I have been remiss in posting this recipe for Seville Orange Marmalade. I feel badly about this because, alas, Seville Orange season is over. These bitter, made-for-marmalade oranges are only in season during the winter, and only a brief part of the winter, namely late December through early February. On the plus side, you now have time to plan for marmalade making next year. If you like authentic orange marmalade, this recipe by David Lebowitz, from his book, Ready for Dessert: My Best Recipes, is definitely the one to use. One bite and you'll be transported to Scotland.


Winter is generally considered the off season for canning and preserving, something I love to do, so having found this recipe along with another soon to be shared one for lemon marmalade, I can see myself making jams and jellies all year long.

The best way to tell you how to make marmalade is to show you how with this photo tutorial and Lebowitz's text. It is not difficult, and the work may be spread out over the course of two days.

Seville Orange Marmalade
David Lebowitz

1 navel orange
10 cups water
pinch of salt
8 cups sugar
1 tablespoon Scotch (optional)

Wash oranges and wipe them dry. 

Cut each Seville orange in half, crosswise around the equator. 

Set a non-reactive mesh strainer over a bowl and squeeze the orange halves to remove the seeds, assisting with your fingers to remove any stubborn ones tucked deep within. (NOTE: I have a juicer and found this a quick and easy way to juice the oranges and separate seeds and pulp.)

Tie the seeds up in cheesecloth or muslin very securely.

Cut each rind into 3 pieces and use a sharp chef’s knife to cut the rinds into slices or cubes as thin as possible. Each piece shouldn’t be too large (no more than a centimeter, or 1/3-inch in length.) Cut the navel orange into similar-sized pieces.

In a large (10-12 quart/liter) stockpot, add the orange slices, seed pouch, water, and salt, as well as the juice from the Seville oranges from step #1. Bring to a boil, then reduce to a simmer, and cook until the peels are translucent, about 20 to 30 minutes.

(At this point, sometimes I’ll remove it from the heat after cooking them and let the mixture stand overnight, to help the seeds release any additional pectin.)

Stir the sugar into the mixture and bring the mixture to a full boil again, then reduce heat to a gentle boil. Stir occasionally while cooking to make sure it does not burn on the bottom. Midway during cooking, remove the seed pouch and discard.

Continue cooking until it has reached the jelling point, about 220F degrees, if using a candy thermometer. To test the marmalade, turn off the heat and put a small amount on a plate that has been chilled in the freezer and briefly return it to the freezer. Check it in a few minutes; it should be slightly jelled and will wrinkle just a bit when you slide your finger through it. If not, continue to cook until it is.

Remove from heat, stir in the Scotch, and ladle the mixture into clean jars.

This post is linked to:


Friday, August 3, 2012

Peach Melba Preserves


I am on a real jam and jelly making tear these days with a week of chutney just ahead, taking advantage of as much fresh produce as I can.  The kitchen is hot, but it smells heavenly, and the piles of produce are proving to be quite an inspiration.  In looking at what I had, and thinking about what I like, I decided to combine peaches and raspberries just to see if I could make a preserve that tasted half as good as the Peach Melba dessert that I love.  Success!  This is so delicious that, honestly, who needs toast?  Just grab a spoon and dig in.  To be further decadent, I warmed some of it and poured it over a scoop of vanilla ice cream.  Heaven!  So I urge you to give this a try.  You’ll have a delicious spread for breakfast and a tasty dessert sauce, readily at hand, that will have people coming back for more.

Peach Melba Preserves

3 cups diced, peeled peaches (I used Melissa's)
2 6-oz. packages fresh raspberries
3 cups sugar
2 teaspoons key lime juice

Combine all ingredients in a Dutch oven and cook over low heat, stirring occasionally until sugar is melted and mixture has come to a low boil, about 10 minutes.  Bring to a full, rolling boil, and boil for 15 minutes, stirring constantly.  Remove from heat and skim off any existing foam.  Carefully ladle into hot, sterilized half-pint jars, leaving ¼” headspace.  Ruin a knife around the side to release any air bubbles.  Wipe rims and adjust lids; process for 15 minutes in a boiling water canner.
 For more delicious jam and jelly recipes, I highly recommend this book:
This post is linked to:


Saturday, July 28, 2012

Plum Butter


My grandmother used to be the queen of jams, jellies, and preserves.  There were very few days in midsummer when I would walk into her kitchen and not see a big pot of sugar and fruit bubbling away on the stove, or jewel-toned jars of preserves lined up on the wooden farm table waiting to be topped with liquid paraffin.  What remained in the bottom of the pot after the jars were filled was poured into a heavy ceramic bowl and placed on the table next to a big pile of warm biscuits.  I could not wait to dig in!

When she passed away and I inherited her cookbook, I immediately paged through looking for her recipes.  Largely, all I found was one lowly recipe calling for equal parts of sugar and fruit, cooked until done.  It was because of this lack of information, I think, that I set out to collect as many recipes for jams and jellies that I could, always envisioning my own kitchen smelling of hot fruit, and jars filled with the literal fruits of my labor.  This past week I finally decided to try one of them, choosing a recipe that I know my grandmother had never made.  She was an ace at apple butter, but plum butter?  Never!  Her plums were reserved for pies and coffeecakes.

This recipe is from a July 2001 issue of Gourmet magazine (yes, I have been saving them for a long time!).  It’s easy to do, just be sure not to overcook it (as I did the first time) or you’ll end up with something tasty, but akin to a gummy candy.

Plum Butter

1 vanilla bean, halved lengthwise
4 lbs. Melissa’s Plumcots, cut into 1/2-inch wedges
3 cups sugar
1/4 cup fresh lemon juice

Special equipment: 5 (1/2-pint) canning jars with lids and screw bands; a food mill fitted with fine disk

Sterilize jars and lids.

Freeze several small plates to use for testing butter.

Scrape seeds from vanilla bean into a 5- to 6-quart heavy pot. Add pod and stir in remaining ingredients. Slowly bring to a rolling boil over moderate heat (this will take about 15 minutes), stirring frequently. Boil, uncovered, stirring frequently, until plums are tender, about 5 minutes.
Discard pod. Purée plums with liquid in batches in food mill set over a bowl. Transfer purée to pot and simmer over low heat, stirring and scraping bottom of pan frequently, until very thick, about 1 1/2 to 2 hours. (To test for doneness, drop a spoonful of plum butter on a chilled plate, then tilt; the mixture should not be runny. It should be about as thick as jam.)

Drain jars upside down on a clean kitchen towel 1 minute, then invert. Ladle plum butter into jars, leaving 1/4 inch of space at top, then run a thin knife between plum butter and jar to eliminate air bubbles.
Seal, process, and store filled jars, boiling plum butter in jars 10 minutes.

Let plum butter stand in jars at least 1 day for flavors to develop.

This post is linked to: