Showing posts with label home canning. Show all posts

Tuesday, July 21, 2015

Peach-Pepper Preserves


Raise your hand if you're with me in thinking that a holiday should be declared on the day that fresh peaches come into season. They are so alluring with their sweet juiciness and heady aroma that they must be purchased in quantities as great as can be managed, and turned into as many delicious dishes as possible. Peach pies, crisps, crumbles, and cobblers are definitely in my future, but I began my peach season cooking with this incredibly delicious Peach-Pepper Preserves.

It's funny how I ended up with this recipe. Mr. O-P had gone to the doctor for a checkup and found an old (August 2011) issue of Southern Living magazine in the waiting area. He found a recipe that he knew would interest me, so he announced that he was taking this issue home, adding that they really should get some new, current issues.  As it turned out, the recipe that he thought I'd like didn't interest me at all, but this one really did. I made it over the weekend and, oh momma, is it good!
I am in love with the microwave preparation, although no way did I have a 4-quart microwave safe dish in which to use. I ended up using a 2-quart Pyrex measuring bowl and adding about ten additional minutes to the cooking time. It bubbled over a tiny bit, but not enough to cause any worry. I watched it as it started to reach the top of the dish, and then would pause the microwave and give it a stir.

I wanted some major kick, so left some jalapeno seeds in instead of removing them. For me, this was just perfect. The peaches were fresh from the farm, and I'm sure this made a big difference in the taste because the peach taste was strong, as I'd hoped it would be.

Sensational on corn bread, an amazing substitute for sweet and sour sauce (so whip out your wontons and get dipping!), you should also pair it with coconut fried shrimp, chicken quesadillas, or ham and fontina panini.
Peach-Pepper Preserves

4-1/2 cups peeled and diced peaches (about 2-1/2 lb.)
1 jalapeno pepper, minced
1/2 red bell pepper, finely chopped
1 1/2 cups sugar
3 tablespoons fresh lime juice
1 (1.75-oz.) package powdered fruit pectin

Stir together all ingredients in a 4-qt. microwave-safe glass bowl.
Microwave at HIGH 8 minutes (mixture will boil). Stir mixture, and microwave at HIGH 8 to 10 minutes or until thickened. (You're going for the viscosity of pancake syrup here. The mixture will thicken to soft-set preserves after it cools and chills.) Cool mixture completely (about 2 hours). Serve immediately, or cover and chill preserves in an airtight container until ready to serve. Store in refrigerator up to 3 weeks.
This post is linked to:

Friday, August 3, 2012

Peach Melba Preserves


I am on a real jam and jelly making tear these days with a week of chutney just ahead, taking advantage of as much fresh produce as I can.  The kitchen is hot, but it smells heavenly, and the piles of produce are proving to be quite an inspiration.  In looking at what I had, and thinking about what I like, I decided to combine peaches and raspberries just to see if I could make a preserve that tasted half as good as the Peach Melba dessert that I love.  Success!  This is so delicious that, honestly, who needs toast?  Just grab a spoon and dig in.  To be further decadent, I warmed some of it and poured it over a scoop of vanilla ice cream.  Heaven!  So I urge you to give this a try.  You’ll have a delicious spread for breakfast and a tasty dessert sauce, readily at hand, that will have people coming back for more.

Peach Melba Preserves

3 cups diced, peeled peaches (I used Melissa's)
2 6-oz. packages fresh raspberries
3 cups sugar
2 teaspoons key lime juice

Combine all ingredients in a Dutch oven and cook over low heat, stirring occasionally until sugar is melted and mixture has come to a low boil, about 10 minutes.  Bring to a full, rolling boil, and boil for 15 minutes, stirring constantly.  Remove from heat and skim off any existing foam.  Carefully ladle into hot, sterilized half-pint jars, leaving ¼” headspace.  Ruin a knife around the side to release any air bubbles.  Wipe rims and adjust lids; process for 15 minutes in a boiling water canner.
 For more delicious jam and jelly recipes, I highly recommend this book:
This post is linked to:


Sunday, August 7, 2011

Homemade Dill Pickles

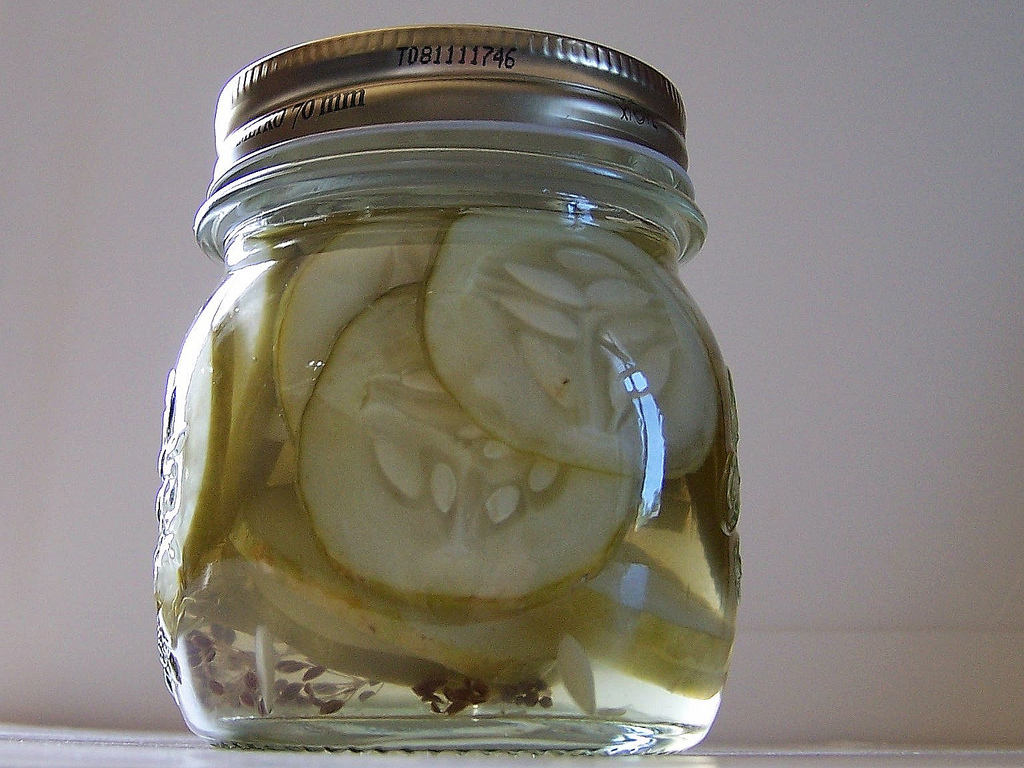
See the little dill head at the bottom of the jar?  I grew that too (she said proudly).  The cute little canning jars are Italian and on sale at Tuesday Morning.
Cucumbers abound at our house and it has been a lot of fun trying all sorts of new recipes.  The cucumber recipe du jour was dill pickles.  I love making these because they are so easy, and allow for a bit of creativity when it comes to additional flavor-making ingredients.

EASY DILL PICKLES

8-10 small pickling cucumbers (about 3 pounds)
2 cups white vinegar
2 cups water
2 tablespoons pickling salt
1/4 teaspoon sugar
4 heads fresh dill or 4 teaspoons dill seeds
4 small cloves garlic

Place your sterilized jars into the canner and bring the water to a simmer.  Keep them warm while you slice the cucumbers and prepare the pickling solution.

Cut a thin slice from the ends of each cucumber.  Slice into chips about 1/8 inch thick.  A mandolin works great for this as long as your cucumbers are crisp and fresh.  Set aside.

Combine vinegar, water, salt, and sugar in a saucepan and bring to a boil.  If you prefer a pickle more to the sour side, eliminate the sugar.

Carefully remove hot jars from canner. Place them open side up on a towel on the counter to keep them steady.  Here's where the fun comes in.  You can get very creative with the pickles.  For a basic garlic dill, place 1 head fresh dill or 1 tsp dill seeds and 1 clove garlic into each jar; pack in cucumbers.

You can also try the following additions (when I make pickles, each jar is different):

1-3 slices of Jalapeno peppers
1-2 pearl onions
1/4 teaspoon pickling spice
Sprig of dill weed
2-3 peppercorns

Pour boiling vinegar mixture over cucumbers to within 1/2 inch of the rim of the jar. Screw on cap and lid.  Process 10 minutes for pint jars and 15 minutes for quart jars.  Allow to cool on the counter and be sure to listen for the popping noise that indicates that you've gotten a good seal.  Store for 2 weeks to allow for the infusion of flavors.

This post is linked to:


Seasonal Sunday, Metamorphosis Monday, Made by You Monday, On the Menu Monday, This Week in My Garden, Outdoor Wednesdays and 
Tuesday Garden Party

Norpro 2478367600456 7-Piece Home Canning Set

Friday, May 13, 2011

Green Pepper Jelly

I love the jewel tone of the green pepper jelly. I've been passing out jars to friends, all of whom are as amazed as I am at the zesty flavor.
Summertime brings with it an entirely new way of cooking, and while it isn't summer here yet, the record high temperatures make it feel as if it were.  So I look for easy recipes that make use of local produce and healthy, but satisfying snacks.  In order for a snack to satisfy me it has to have a lot of taste.  So today I decided to give Paula Deen's recipe for green pepper jelly a try.  This is a product that I generally buy at the store and always have on hand because of its versatility.  I mean, what is easier when people drop in unexpectedly than opening a jar, unwrapping a brick of cream cheese, and pairing these with a box of Wheat Thins?

I was STUNNED at how easy to make and delicious this was, and this is high praise from a jelly-making rookie like me.  It is a real no-fail recipe, so don't hesitate to give it a try.  I can hardly wait for my pepper plants to begin bearing because I'm going to make more of this.  Lots more!


Green Pepper Jelly by Paula Deen

3/4 cup chopped green bell pepper
1/4 cup chopped fresh hot green pepper, such as Jalapeno or serrano
1 1/2 cups apple cider vinegar
6 cups sugar
4 ounces pectin (recommended: Certo)
4 drops green food coloring
Special Equipment: 6 (1/2-pint) canning jars with lids

Process bell pepper and hot pepper in a food processor until finely minced. Combine pepper mixture, vinegar, and sugar in a saucepan and bring to a rolling boil. Remove from heat and add pectin and food coloring. Pour into sterilized jars and seal*.

*Cook's Note: Follow USDA guidelines for proper sterilization and canning procedures.

I couldn't wait for it to cool to try it and found it is seriously better than any I've ever bought at the store.

This is linked to:


Paula Deen Celebrity Cook Along 
Happier Than a Pig in Mud
and
The Tablescaper for
Seasonal Sundays