Showing posts with label turkey. Show all posts

Thursday, November 16, 2023

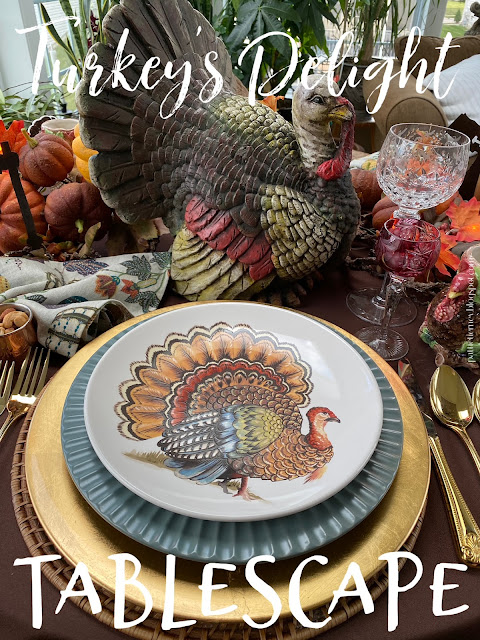
Turkey's Delight Tablescape

 
Over the course of the past two weeks, I went from not hosting Thanksgiving to hosting Thanksgiving. I’m not unhappy about doing it, because there will just be a few of us, but all of a sudden I am thrown into party planning mode. I’ve decided to do a Cajun Thanksgiving, so will largely be trying all new recipes. The only thing I’m sure about thus far is the table. While this is just a table for two, it will translate into a table for four quite easily.
  
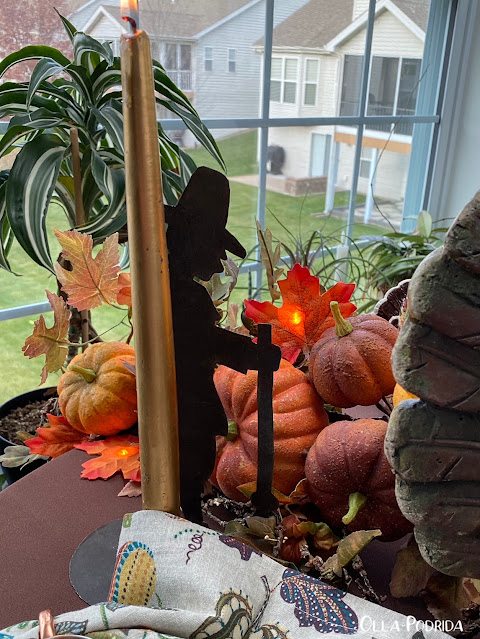
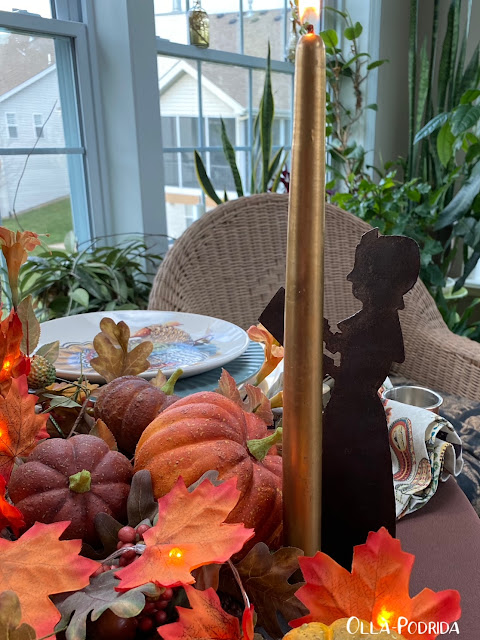
A chocolate brown tablecloth provided the base for this table setting. The turkey at center was my inspiration for all of the colors that I used. It, and the garland, I purchased as a part of a store display many years ago. To add a bit of sparkle, I intertwined lighted maple leaves.

 
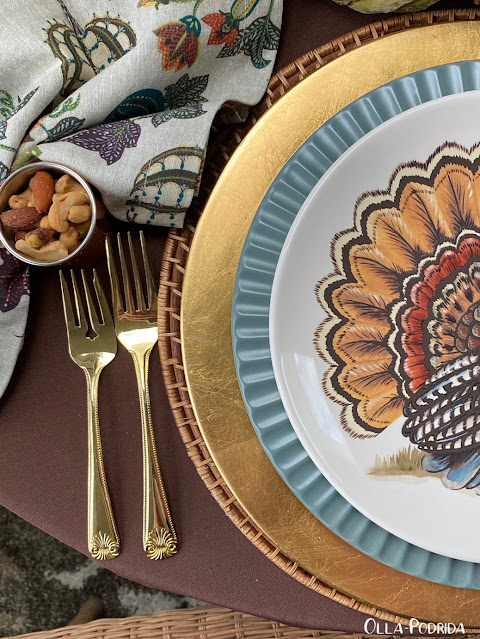
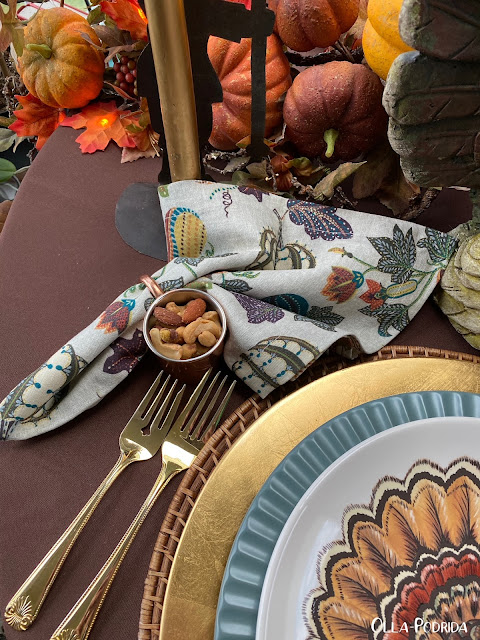
I started off with woven placemats topped with gold chargers. From there I chose richly colored gray stoneware plates with a fluted edge. They are by Stone Lain and are the “Lusso” pattern. The turkey plates are from Pottery Barn purchased years ago.

 
I chose gold flatware to give the table a bit of a metallic look, and to complement the chargers. I carried the gold into the lighting at the table, placing metallic gold candles into rustic metal pilgrim candle holders that I purchased in a country shop about 20 years ago. I love mixing old with new.

 
The napkins and mini copper mugs filled with mixed nuts I got from Pottery Barn last year. That way I can rightly claim that I am serving everything from soup to nuts.
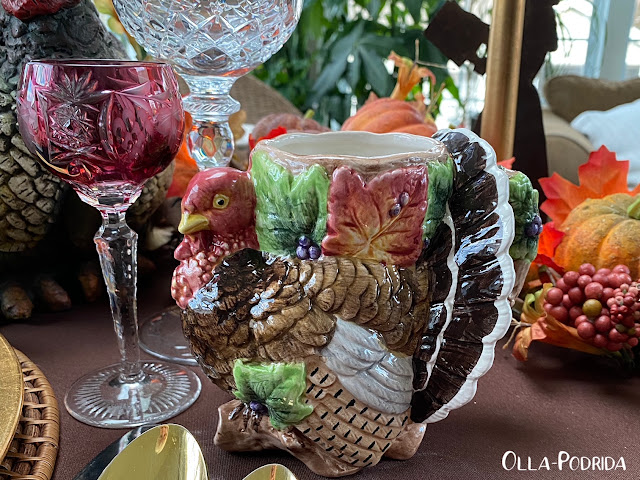
The whimsical turkey mugs are completely impractical, but I have loved these now for 25 years. I bought them at a local florist.

 
The wine glasses “Gallia” by Rogaska, I inherited from my mother. The colored liqueur glasses are by Val St. Lambert Crystal - Berncastel Cut, and will be used for serving homemade cranberry liqueur.

 
If any of my new recipes come out well, I’ll be sure to share them with you. I will say that I’m starting our Cajun Thanksgiving dinner with a cup of gumbo, the recipe of which you can find here.

 
Happy Thanksgiving, everybody!

 As an Amazon Associate I earn from qualifying purchases.

 This post is linked to: Tablescape Thursday


Wednesday, December 4, 2019

Make Ahead Turkey Gravy

This post contains affiliate links.
Year after year I tell myself that I am going to make Thanksgiving simpler, but I have yet to actually do that. This year, I did help myself out a bit by relieving myself of what is probably the most stressful item in my entire Thanksgiving repertoire...the gravy. When that turkey comes out of the oven, and I have to cook down those juices, and stir in seasonings, and make a roux, I totally freak out. Then I end up with gravy that’s clumpy, needs straining, and slowly cools off, all while I look a strainer. You get the picture.

This year, I decided to search for a make-ahead recipe, and this one, with my changes, is a winner. Making it in advance means it can be done so in a relaxed state, tasted, seasoned to perfection, and then frozen until it’s removed from the freezer the night before. On the day of serving, all it takes is a simmer on top of the stove, and it’s ready.

If you are serving turkey for Christmas this year, do give this recipe a try, once you have, you will never make turkey gravy any other way.
Make Ahead Turkey Gravy

6 turkey wings
2 medium onions, peeled and quartered
¾ c. flour
2 quarts chicken broth, divided
¾ c. chopped carrots
½ c. chopped celery
½ t. dried thyme
Pinch of rubbed sage
Pinch of poultry seasoning
Salt, to taste
¼ t. freshly ground black pepper
½ c. heavy cream

Preheat oven to 400° F. Arrange a single layer of turkey wings in a large roasting pan. Scatter onions over the top of the wings. Roast for 1¼ hours or until wings are browned.

Place browned wings and onions into a
5-quart stockpot. Place roasting pan over medium heat, and sprinkle flour over all. Whisk continually until a roux forms. Add 1-2 cups broth to roasting pan and continue to whisk, scraping up any browned bits on the bottom of the pan. Pour this mixture into the stockpot. Stir in remaining broth, carrots, celery, and seasonings. Bring to a boil. Reduce heat to medium low and simmer, uncovered, for 1½ hours.

Remove wings from the pot to a cutting board; set aside to cool. When the wings are cool, pull off the skin and meat. Discard the skin and save the meat for another use. Strain contents of stockpot through a large strainer into a
3-quart saucepan. Press on the vegetables to extract any remaining liquid; discard vegetables. Bring the contents of the pot to a gentle boil.

Stir in the cream, and season to taste, if necessary. Serve immediately or pour into containers and refrigerate or freeze.


Friday, December 14, 2018

Prosperity Sandwiches


I am happy to say that the Meal Plan I set out for myself at the beginning of the week worked exceptionally well, so I plan to continue this. One of the things I found curious was the number of you who asked me about the Prosperity Sandwich. I suppose when you grow up with something it never occurs to you that that something may be a regional dish that no one else has heard of. So, growing up with pork steaks, toasted ravioli, and gooey butter cake, it never once occurred to me that these were all St. Louis things, as is the Prosperity Sandwich. It dates back to the 1920s with origins at the Mayfair Hotel in St. Louis. The recipe was published years ago in the St. Louis Post-Dispatch, and has long been enjoyed by people in the area.

I remember my mother making this a lot in the 70s. It is a wonderfully satisfying hot sandwich, perfect for serving to a group of ladies at a luncheon because everything can be made ahead. The sauce can be made the day before and reheated, the bread can be toasted ahead of time, the tomatoes sliced, the meats sorted, and bacon (my mother’s addition) can be made a day ahead and then placed on top of each serving prior to sliding it under the broiler. Rustic bread works the best, but in a pinch it can be served over sandwich bread toast points. This knife and fork sandwich is also a hearty meal, so you won’t need to serve anything else with it.
Prosperity Sandwiches
 As appeared in the St. Louis Post-Dispatch
Serves 4

5 tablespoons unsalted butter
8 oz. white mushrooms, trimmed and sliced thin
1
Melissa’s shallot, minced
½ teaspoon salt

¼ cup flour
2 cups whole milk
8 oz. cheddar cheese, shredded (2 cups)
2 teaspoons Dijon mustard
2 teaspoons Worcestershire sauce
½ teaspoon pepper
4 (3/4-inch-thick) slices rustic white bread
8 ounces thinly sliced roast turkey
8 ounces thinly sliced deli ham
2 tomatoes, cored, cut into 8 (1/4-inch-thick) slices, and patted dry

Melt 1 tablespoon butter in large saucepan over medium-high heat. Add mushrooms, shallot, and salt and cook, stirring occasionally, until well browned, 5 to 7 minutes. Transfer to bowl.

Melt remaining 4 tablespoons butter in now-empty saucepan over medium heat. Stir in flour and cook for 1 minute. Slowly whisk in milk and bring to simmer. Reduce heat to low and cook, stirring occasionally, until thickened, 4 to 6 minutes. Off heat, stir in 1/2-cup cheddar, mustard, Worcestershire, and pepper; set aside.

Adjust oven rack 5 inches from broiler element and heat broiler. Line rimmed baking sheet with aluminum foil and spray with vegetable oil spray. Arrange bread slices on prepared baking sheet and broil until toasted, 1 to 2 minutes per side.

Place bread slices into individual au gratin dishes. Divide mushroom mixture among toasted bread slices. Arrange 2 ounces turkey, 2 ounces ham, and 2 slices tomato over mushrooms on each slice of toast. Spoon 1/2-cup cheese sauce evenly over each sandwich and sprinkle with remaining 1 1/2 cups cheddar. Broil until cheddar is browned, 3 to 5 minutes. Let cool for 5 minutes. Serve.

Another crowd-pleasing hot ham sandwich is this Open Faced Ham Sandwich.


This post contains affiliate links.

Thursday, August 31, 2017

Slow Cooker Turkey Breast


A couple of days ago Williams-Sonoma had a 40% off pastry sale. As a cardholder, not only did I get the 40% off, but I got free shipping as well. The thought of having a freshly baked cinnamon roll scenting the house in the morning along with my brewing coffee was too tempting to resist, so I bought a box. You're probably wondering what that has to do with turkey, so I'll tell you. My freezer is positively jammed full with other sale items from Williams-Sonoma, not to mention specials from Omaha Steaks. I'm not complaining, mind you, I'm going to have some mighty good eating this winter, but my freezer space was at an absolute minimum. This includes not only the upright freezer, but also the freezer compartments of the both refrigerators. Obviously something had to go. While rummaging through everything I spotted a turkey breast that I had bought last season and figured it was high time that I make it.

I had never made a turkey breast before so I went online to look for a recipe. When I spotted one that was made in the crockpot, with the only ingredient being a packet of dry onion soup mix, I knew I had to try it. I didn't follow the recipe exactly, as you knew I wouldn't, but nonetheless it was very easy to put together, the house smelled like Thanksgiving, and the turkey was succulent.
Here's what I did:

Slow Cooker Turkey Breast

1 turkey breast (mine was 5.3 pounds)
1 package Lipton dry onion soup mix
Handful of baby carrots
3 ribs celery, broken into thirds


Aromatics:
½  lemon
½  medium onion
Leafy tops of celery
Sprig of rosemary

Poultry seasoning
Freshly ground black pepper

1 tablespoon butter, cut into pieces

Place baby carrots and celery in the bottom of a 6-quart slow cooker.

Remove turkey from packaging, rinse and pat dry. Rub turkey with onion soup mix both inside and out. Add aromatics to the cavity of the turkey, and sprinkle with pepper and poultry seasoning. Place (and I have to laugh at this because I didn't place my turkey I jammed it in) turkey breast into the slow cooker and dot with butter. Put a lid on the slow cooker (placing a heavy book on top, if need be, to hold the lid in place -- yep, did that, too), and turn to High. Allow to cook one hour on the High setting, and then reduce temperature to Low and cook seven additional hours. When turkey is finished remove to a plate and tent with foil if you plan to make gravy out of the drippings, or place on a cutting board, slice and serve.


This post is linked to:

This post contains affiliate links.

Sunday, November 29, 2015

Giving Thanks, a Thanksgiving Tablescape


I know that none of you probably want to see a Thanksgiving table after the fact, but you're going to anyway. Considering that I had absolutely no idea just how I was going to set it as close as the very day before, I thought it turned out beautifully.
It was largely due to our good friend and dinner-and-baseball bud, Lennie, who was not able to join us, but sent a lovely little flower arrangement instead. It was a bit small for our table, so I surrounded it with some faux pumpkins and the result was quite pleasing, I think.

Then, I thought I'd do something really different with the napkins this year, so folded them into turkeys!
While they are more pretty than practical (because each diner has to deal with not only two napkins, but a securing pin and piece of foil), everyone enjoyed them and they were amazingly easy to do.
The best way to learn is to watch this video. I find that it really helps to fold them on an ironing board, and iron between each step. Also, do starch your napkin that will be used for the feathers.
I hope you all had a lovely Thanksgiving. Here's what we had for dinner (and this took me THREE DAYS to prepare!) that probably tasted better than it looks.
Even two days hence, I am still recovering from it!
Now...on to Christmas!

Plates – Johnson Brothers “His Majesty”
Placemats – World Market
Tablecloth - Williams-Sonoma
Brown Napkins – World Market
Indian Corn Napkins – Made by my mother
Stemware – Gift from my dad

This post is linked to:

Wednesday, November 13, 2013

Setting Your Thanksgiving Table

 If you're like me, you are already pondering the centerpiece and potential layout for your Thanksgiving table. Will you go with simplicity, or be over the top?  I may just opt for the simplicity of gourds, grasses, and candles this year. Then again, I may just change my mind. If you're in a quandary, here is a little eye candy from years past to help spur your creative juices. 
 A Thanksgiving table need not be fancy or make use of your best china. This table makes use of my every day Fiestaware, along with a special autumn pattern, and multicolored, fringed placemats. I just used a favorite pumpkin tureen and some berries as the centerpiece. Easy, colorful, and fun. 
 With an October birthday and a tradition of hosting the Thanksgiving meal I have acquired a lot of autumn dinnerware over the years, and I love it! This cozy house always makes a colorful splash no matter the setting. 
 Here it is shown on rustic placemats against a boldly patterned fabric used as a table covering. 
 Yellow-handled flatware and matching chalices as water glasses make this table really pop.
 A busy table cover and dinnerware calls for a simple centerpiece.  This lantern does the trick.
The same, simple pumpkin tureen from the first picture makes quite a showy centerpiece here. I arranged the flowers myself using four inexpensive bouquets from Sam's. I filled in with herbs and cuttings from both indoor and outdoor plants.
 One of the easiest ways to decorate a table is with a cornucopia. I found this one for a couple of dollars on clearance at Michael's. A trip to the produce section of my local market and the job was done. 
Tom Turkey makes an appearance every now and again, along with a harvest swag in which I intersperse gourds and little turkey candleholders. 


However you set your holiday table, whether simple, elegant, or over the top, remember to make it festive and fun.