Showing posts with label Thanksgiving food. Show all posts

Friday, November 1, 2024

Pumpkin Muffins with Bourbon Raisins

 
It just wouldn’t be fall without my whipping up a batch of pumpkin muffins. Every year I try to use a different recipe, or add a bit of variety to existing recipes, by switching or swapping out an ingredient or two. This year I decided that different ingredient was going to be bourbon. These are phenomenal! If you don’t like bourbon, it doesn’t matter, it is not overt, it just adds to the overall deliciousness, while enhancing the flavor of the pumpkin. The raisins are plump and fabulous here, particularly considering that I used two different kinds. I guarantee that these are going to be a part of my Thanksgiving table. I believe that I can also guarantee they will disappear in a flash.

Pumpkin Muffins with B0urbon Raisins
½ c. raisins

½ c. golden raisins

½ c. bourbon

2 large eggs

1 c. pumpkin purée

1¼ c. sugar

¾ t. ground cloves

¾ t. cinnamon

½ t. salt

 1/3 c. canola oil

1¾ c. flour

1½ t. baking powder

½ t. baking soda 

The night before, soak the raisins in the bourbon, do not drain.

  12-well cupcake pan with paper liners; set aside.

 In a large mixing bowl, beat the eggs until foamy, stir in the pumpkin, sugar, cloves, cinnamon, and salt.  Add the canola oil and mix well.  In a separate bowl, stir together the flour, baking powder, and baking soda.  Add the dry mixture to the pumpkin mixture with half of the raisin-water mixture.  Mix well, add remaining raisin mixture; stir to mix.  Fill greased muffin pans 2/3 full.  Bake until the top springs back when pressed with fingers, about 25 minutes.

Dust with powdered sugar when they have cooled.

 
This recipe makes 12 to 16 standard size muffins.

 As an Amazon Associate I earn from qualifying purchases.


Thursday, November 30, 2023

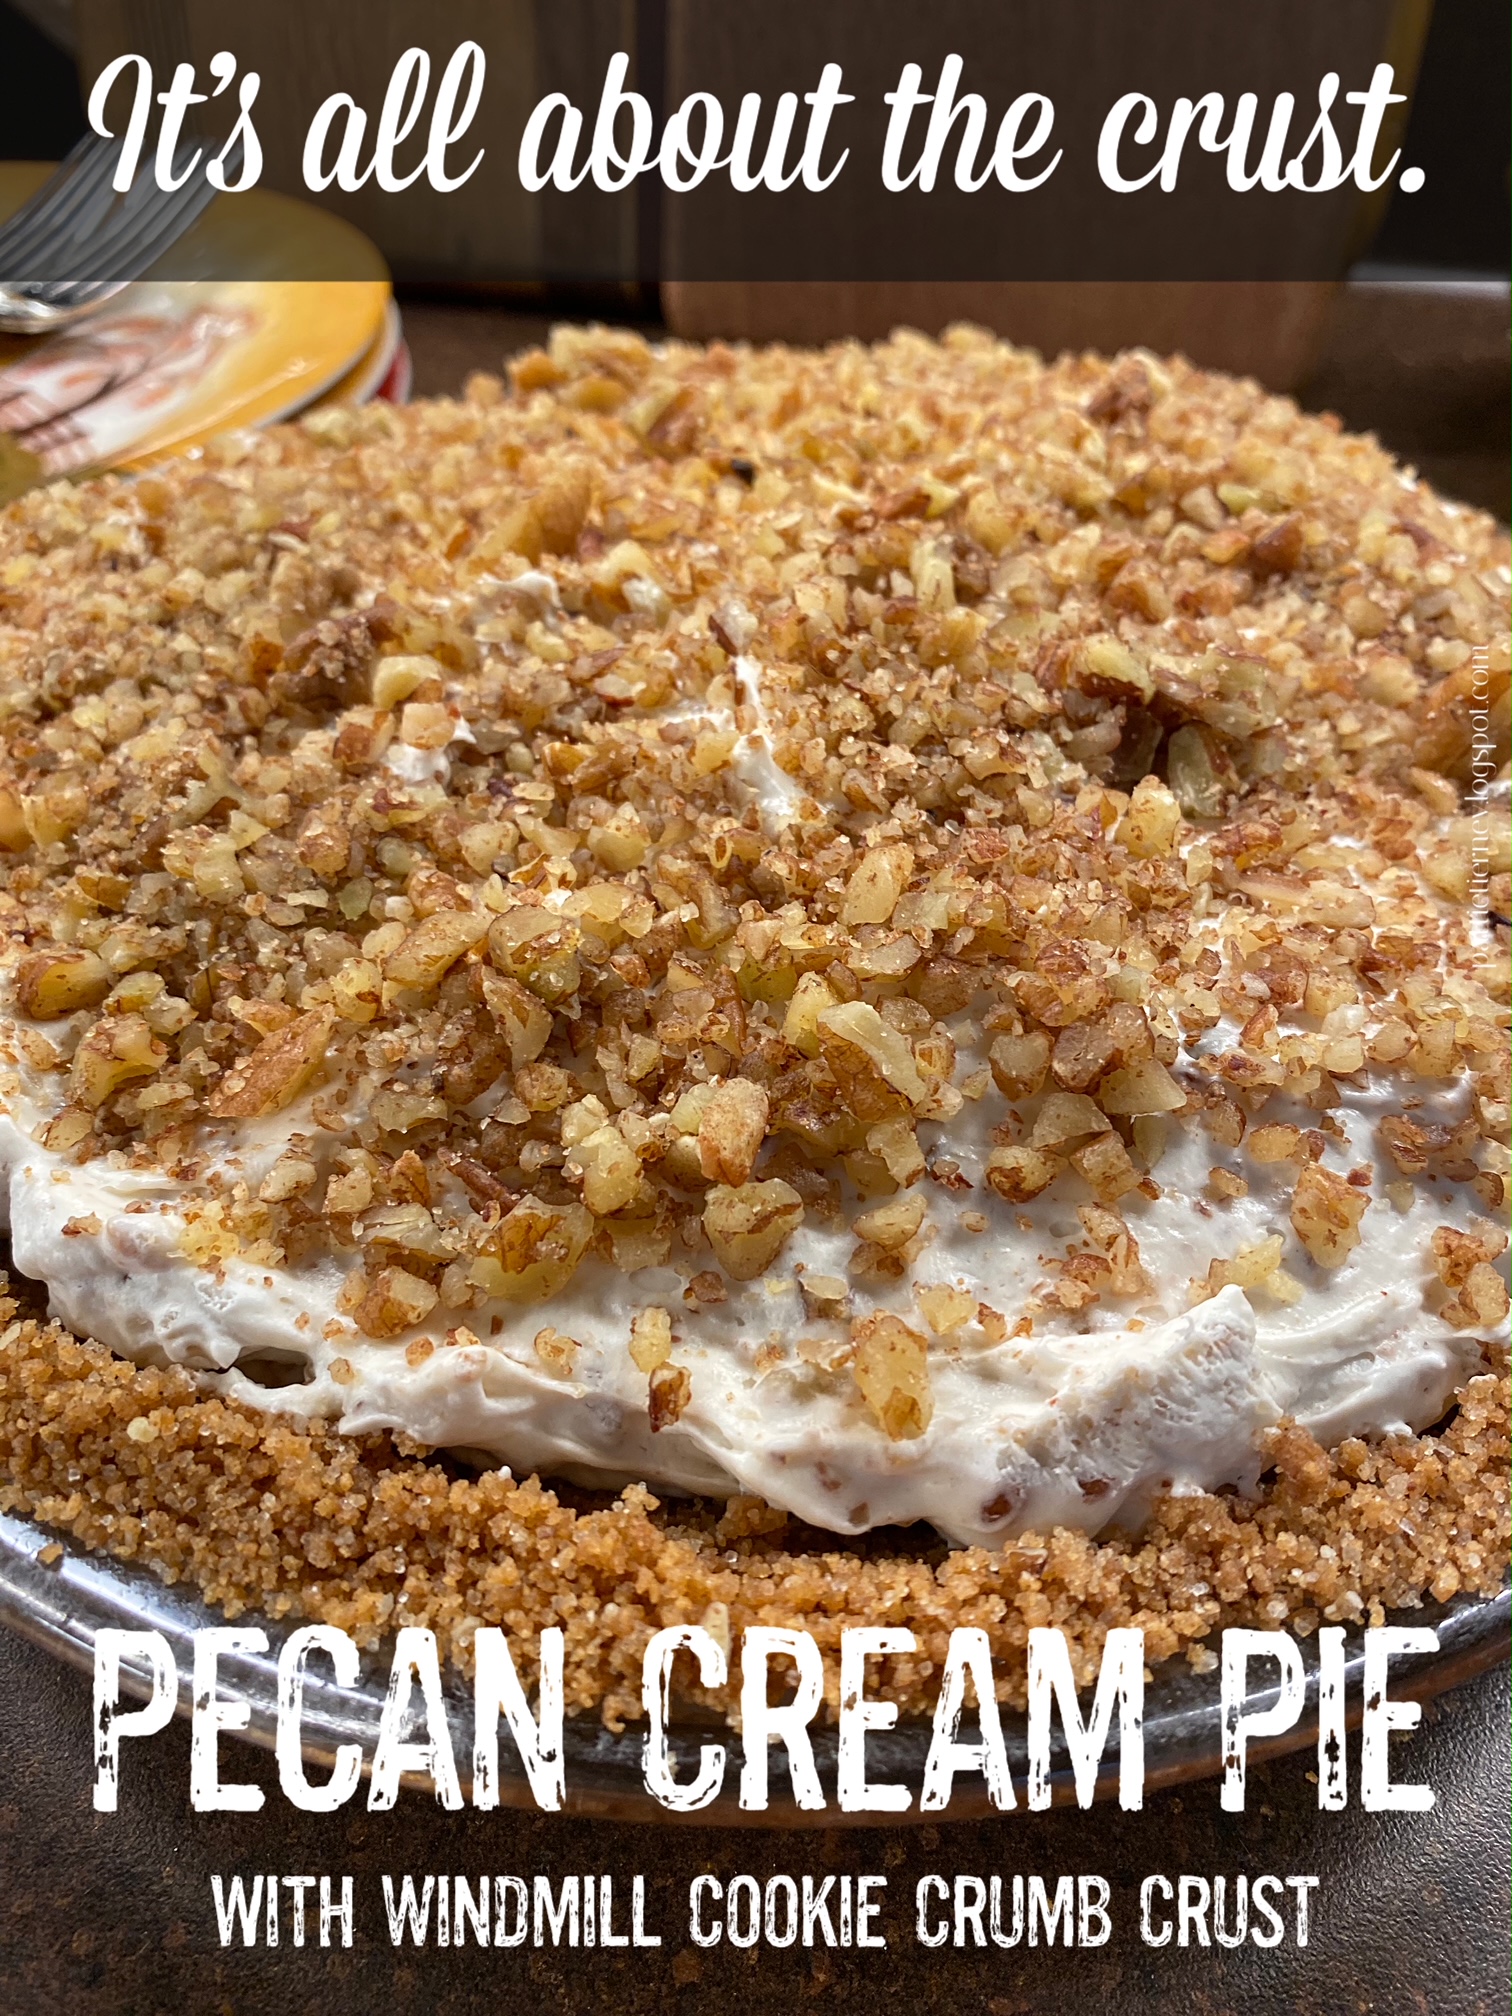
Pecan Cream Pie with Windmill Cookie Crumb Crust

 
This is another recipe from Thanksgiving, and you’re going to need to refer to my posting for Monday of this week to understand why the photos aren’t the best. Essentially I was frantic, I had company, and this was the best I could do.
 
I am not a fan of pie of any kind, so instead of sticking with the traditional pumpkin (I don’t like it at all) or pecan (my late dad’s favorite and one I’ll tolerate), I decided to go in a completely different direction and make a pecan cream pie. It was very good. But, this is less about the pie than it is about the crust.  I decided that I wanted to make a graham cracker crust not realizing that I didn’t have graham crackers. What I did have, however, was a package of those windmill cookies. I love those things and have done since my youth. So this pie has a windmill cookie crust. My son loved it so much that he said he will never make a graham cracker crust again. Here’s the recipe for both pie and crust.  You can make any kind of filling that you want, but you MUST make this crust!

 Pecan Cream Pie with Windmill Cookie Crumb Crust

 Pie

 1 recipe Windmill Cookie Crumb Crust

1 c. heavy whipping cream

¼ c. powdered sugar

2 8-oz. pkgs. cream cheesesoftened

½ c. light brown sugar

¼ c. pure maple syrup

1½ c. finely chopped pecans, divided

¼ t. salt

Make pie crust according to recipe (below). Chill before adding the cream pie filling.

 In the work bowl of your stand mixer, place heavy whipping cream and powdered sugar. Beat until stiff peaks form.

 In a separate mixing bowl place softened cream cheese, brown sugar, and pure maple syrup. Beat together until combined and creamy.

 Fold the whipped cream into the cream cheese mixture until combined. Stir in 1 cup of the chopped pecans. Spread the filling mixture into the pie crust. Sprinkle the remaining pecans (½ c.) on top of the pie.

 Cover the pie with a lid or plastic wrap and refrigerate for 8 hours, or overnight, before serving.

 Crust

 1½ c. Windmill Cookie crumbs

⅓ c. granulated sugar

½ c. salted butter, melted

 Pulse the cookies in a food processor or place them in a Ziploc bag and crush them with a rolling pin until they form a fine, even crumb. Add the granulated sugar and combine evenly.

Melt the butter in a heatproof bowl in the microwave. Pour the melted butter into the crumb mixture and pulse until combined.

 Press the graham cracker mixture evenly across the bottom and up the sides of a 9-inch pie plate.

Use your fingers or the flat bottom of a measuring cup to pack the crust tightly and evenly into the pie plate.

 Chill in the freezer for 10 to 15 minutes before filling with a no-bake pie filling.

 Alternately, bake in a 350°F oven for 6 to 8 minutes or until the crust is lightly browned. Allow to cool completely before adding pie filling.


As an Amazon Associate I earn from qualifying purchases.


Monday, November 27, 2023

Spinach Madeleine

 
Putting a Thanksgiving dinner on the table is a lot of work. When you factor in anxiety based upon trying all new recipes, it doesn’t allow much breathing space to take photos of the food. As a consequence, I’m asking you to forgive the quality of photos here, but this is a recipe I had to share because it was so good.

I decided to have Cajun Thanksgiving this year; my menu was as follows:

 Cup of Gumbo

Cajun Turkey Breast

Dressing

Bourbon, Bacon, Mac & Cheese

Spinach Madeleine

Cajun Deviled Eggs

Spirited Cranberry Sauce

Cornbread

Pecan Cream Pie
 
  It’s not often that I try all new recipes for a meal, but because I was serving a small number of people who are very tolerant of what I do, I decided to go for it. Never before had any of us had mac and cheese as a part of a Thanksgiving dinner, nor had we had deviled eggs. The deviled eggs were so good that they are going to return for Christmas. Everything was a big success, but what we all particularly enjoyed was the spinach. It was so easy to put together, make ahead, and one of those things that sent us back for seconds.

The recipe, as far as I know, first appeared in a 1959 Junior League Cookbook, River Road Recipes: The Textbook of Louisiana Cuisine. It is now prepared at The Gregory Restaurant in Baton Rouge as a part of their Cajun Thanksgiving menu. The only thing I changed here was to use Panko instead of breadcrumbs, and we all loved the added crunch.

Spinach Madeleine

 2 10-oz. pkg. frozen, chopped spinach

4 T. butter

½ c. evaporated milk

3 T. flour

½ c. reserved spinach liquid

2 T. chopped Melissa’s shallot

1 t. Melissa’s minced garlic

6 oz. jalapeno jack cheese

1 t. Worcestershire sauce

½ t. freshly ground black pepper

½ t. garlic powder

Salt to taste

½ c. Panko breadcrumbs

¼ c. melted butter

 Preheat the oven to 375°F. Spray a 1½-quart casserole with PAM; set aside.

 Cook spinach according to package directions. Drain the cooking liquid off the spinach, and reserve.

 In a medium saucepan over low heat, melt butter. When butter has melted add the flour, stirring the mixture until it is blended and smooth without being brown. Stir in the shallots, and cook them just until soft. Pour in the evaporated milk and the ½ cup reserved spinach liquid, stirring constantly. Continue cooking and stirring the mixture until it is smooth and thick.

 Add the cheese, Worcestershire sauce, and all the seasonings to the mix. Continue stirring until the cheese is completely melted; stir in spinach. Pour the mixture into prepared baking dish. (At this point, you can put the mixture into the refrigerator if you make it ahead of time. When you’re ready to bake it, bring the casserole to room temperature beforehand.) Combine the breadcrumbs and melted butter. Sprinkle the breadcrumbs on top. Pop the dish into the oven just long enough to make it bubbly and golden.

As an Amazon Associate I earn from qualifying purchases.


Tuesday, November 21, 2023

Garlic Parmesan Roasted Carrots

Funny thing about these carrots; I made a lot of them at once, because I am the kind of person who tends to reheat vegetables and have them on subsequent days to save myself some trouble. What I found is that while I enjoyed them on the first day, I really liked them better on the second day, warmed up in the microwave. They just seemed sweeter and more flavorful. However you want to make these, they are super simple, can be prepped beforehand, covered, and held in the refrigerator until you’re ready to roast, and pair with almost any main dish.
   Garlic Parmesan Roasted Carrots

Adapted from Diethood

2 lbs. carrots, peeled, scrubbed, cut into 3” pieces

4 T. butter, melted

1 T. Melissa’s minced garlic

1 t. dried thyme

1/3 c. grated Parmesan cheese

2 T. fresh parsley, minced

Aromat Seasoning, to taste

Kosher salt and freshly ground pepper, to taste

 Preheat oven to 425°F. Line a baking sheet with foil; set aside.

Pour melted butter to a large bowl, then add garlic, thyme, Aromat, salt, and pepper, and stir to combine.

 Add carrots and toss to coat. Add Parmesan and toss once more.

 Spread carrots out on prepared baking sheet. Bake until tender, about 25 minutes, stirring once halfway through. Adjust seasoning as needed and sprinkle with parsley.

As an Amazon Associate I earn from qualifying purchases.


Monday, November 11, 2019

Rum Raisin Sweet Potato Bread

This post may contain affiliate links.
 
Perhaps undeservedly, I consider sweet potatoes to be a seasonal food and, as such, only work with them once a year. I am not one for sweet potato fries or baked sweet potatoes, but because I understand their value and nutrition, decided to try something new. This is the time of the month when I experiment with possible Thanksgiving dishes, so thought that perhaps working yams into a bread, rather than the usual side dish, might be a welcome change. This flavorful, mildly sweet quick bread with rum-soaked raisins will be most appreciated by your guests, young and old. Serve it warm with cinnamon butter at brunch or dinner. Delish! 
Rum Raisin Sweet Potato Bread

11-lb. pkg. Melissa’s Baby Garnet Yams
2 T. dark rum
½ c. golden raisins
1 ½ c. flour
2 t. baking powder
¼ t. salt
1 T.
pumpkin pie spice
1 c. granulated sugar
2 large eggs
½ c. vegetable oil
1 c. chopped pecans

Preheat oven to 400°F. Bake baby garnet yams for 45 minutes or until they test done with a fork; remove and cool slightly before mashing and measuring out one cup.

While yams are baking, soak raisins in rum -- the longer the better, seriously, go read a book.

Decrease heat on oven to 325° F. Spray a 9” x 4” loaf pan with Baker’s Joy.

In a medium bowl, stir together flour, baking powder, salt, pumpkin pie spice, and sugar. Beat in eggs and oil until well blended. Stir in the mashed yams, pecans, and golden raisin/rum mixture. Pour batter into prepared pan. (I sprinkled a little bit of cinnamon sugar on top to give it a hint of sparkle.) Bake for 70 minutes, or until a toothpick inserted into the center comes out clean. Allow bread to cool in the pan at least 15 minutes before removing.

For best flavor, store overnight before serving. This is delicious served with
cinnamon butter or pumpkin cream cheese.


Monday, November 26, 2018

Sausage and Chestnut Dressing


It’s hard to get creative with Thanksgiving food, because so much of it is traditional. I have also come to learn that people want what people want, and I am determined to give it to them. This year, I did mix things up a bit by making a new kind of dressing. I read a lot of recipes, investigated a variety of techniques, and ended up with this one. It was unique in that the vegetables are puréed and sautéed before being mixed in with the other ingredients. For that, I give a nod to Tyler Florence, as that was part of his recipe. For the rest, I wandered off on my own, using components from my mother’s dressing, and tossing in some chestnuts on my own. The result was such that this is going to be my "go to" dressing for the future. It’s also nice because it can be made the day prior, and baked the day of, during those 30 minutes or so when the turkey has just come out of the oven, and is settling itself prior to carving.

I hope all of you had a wonderful Thanksgiving, full of friends, fun, and good food, and that you didn’t exhaust yourself on Black Friday. Here’s my recipe, yes after the fact, but this goes equally well, deliciously so, with roast chicken. So make meals fancy by making dressing all year long, don’t just save it for Thanksgiving.

Sausage and Chestnut Dressing

1 medium carrot, peeled and quartered
1 medium onion, cut into chunks
2 stalks celery, quartered
1 small bunch fresh sage (about 1/3 c. chopped)
Extra-virgin olive oil
1 pound sausage (I used Bob Evans)
Kosher salt and freshly ground black pepper
5 cups cubed (or torn, I tear) rustic bread
½ cup chopped fresh parsley
½ cup chopped scallions (white and green parts)
¾ cup heavy cream
1 large egg

Preheat the oven to 375°F. Spray a 9” x 13” baking dish with PAM; set aside.

In a food processor, puree the carrot, onion, celery, and sage until you have a fine pulp. Place a 10” skillet over medium-high heat and cook the sausage, until done but not dark brown. Use a slotted spoon to remove the sausage to a paper towel-lined plate to allow it to drain; place in a large mixing bowl. Add the vegetable pulp to the pan in which you had cooked the sausage, and sauté until most of the moisture has evaporated; season with salt and pepper. Add to the mixing bowl with the sausage. Add bread cubes, parsley, scallions, and chestnuts; toss to mix.

In a medium mixing bowl, whisk together chicken stock, cream, and egg. Pour this wet mixture over the dressing mix. Season again, if needed, and fold everything together. Turn out into the prepared baking dish and bake for 30 to 35 minutes until golden brown on the top (if it gets too brown before the 30 minutes is up, tent with foil).

*Next year I will use more

If you’re new to chestnuts, and would like to try something simpler, you will love these Haricots Verts with Bacon & Chestnuts.


This post contains affiliate links.

Thursday, October 25, 2018

Yvette van Boven’s Home Made Christmas & Brussels Sprouts à la Carbonara

When it comes to reviewing cookbooks, I try to look at each one of them with an unbiased eye. I tried very hard to do that with Yvette van Boven’s Home Made Christmas, but it just wasn’t possible. I am a big fan of Yvette’s other cookbooks (that you can find here, here, and here), and I knew before I opened this one that I was going to love it; I wasn’t wrong.
This, like others of van Boven’s cookbooks, is a feast for the senses. From the whimsically illustrated divider and end pages, to the pictures so mouthwatering you want to lick the page, to the wide array of tempting recipes, this cookbook has everything you need to make your Christmas merry.

In addition to the recipes, and charming photos — many of them with a personal touch — the early part of the book features Christmas stress-relief tips (and don’t we all need those), while the end includes comprehensive indexes not just by ingredients and recipe type, but also by course. There are a wide variety of menus as well in order to guide you in planning holiday gatherings. Whether you are a fan of meals that are vegetarian, a fan of breakfast and brunches, a server of cocktails and small plates, or someone who prefers a grand five-course meal, these menus will guide you.

The recipes go from the very simple to the complex. You don’t have to have a well-stocked pantry, or knowledge of a host of cooking techniques in order to prepare anything from this book. Another plus is that there are recipes for the basics including beef stock, chicken stock, vegetable broth, a classic vinaigrette, créme anglais, and custard. Throughout the book there are charming illustrations, a picture guide to cheeses, and photos to reflect every single recipe.

There are a few photos of the author, looking quite comfortable in her well-stocked Amsterdam kitchen. Whether you buy cookbooks to use or admire, this one will appeal on both counts. If you’re planning to give a cookbook as a gift this season, this should be one of them.

It was truly hard to decide what recipe to make from this book. Christmas generally brings sweet treats to mind; on the other hand, I’m currently planning Thanksgiving so the brussels sprouts were calling my name. These were super delicious, and tasted like they took so much longer to prepare than they did. I liked them so much that, in addition to serving them as a dinner side dish, I had them the next day for lunch served atop a scoop of cilantro lime rice.

Give this delightful book a look, buy a couple for gifts, and then treat yourself. You will love it.
Brussels Sprouts à la Carbonara
As seen in Home Made Christmas by Yvette van Boven

Sea salt

2¼ pounds Melissa’s brussels sprouts, cleaned and halved
  5 ¼ ounces bacon, diced
2 small cloves garlic, minced
1 cup heavy cream
½ cup grated Parmesan cheese
Freshly ground black pepper
One small bunch fresh parsley, chopped

Bring a large saucepan of salted water to a boil. Add the brussels sprouts and cook them for 10 minutes. Drain, rinse with cold water, and let stand to drain.

Fry the bacon in the skillet. Add the garlic at the last moment and fry for two minutes. Combine with the brussels sprouts.


Mix the cream and cheese and season with pepper. Set
everything aside until ready to serve.

Heat the cream mixture in a skillet. Stir in the brussels sprouts mixture and cook to heat through. Sprinkle with the parsley and serve.

Serves 6 to 8


This post is linked to:
This post contains affiliate links.

Disclaimer: I was provided with a complimentary copy of this book by Abram Publishers in exchange for an honest review.

Tuesday, January 23, 2018

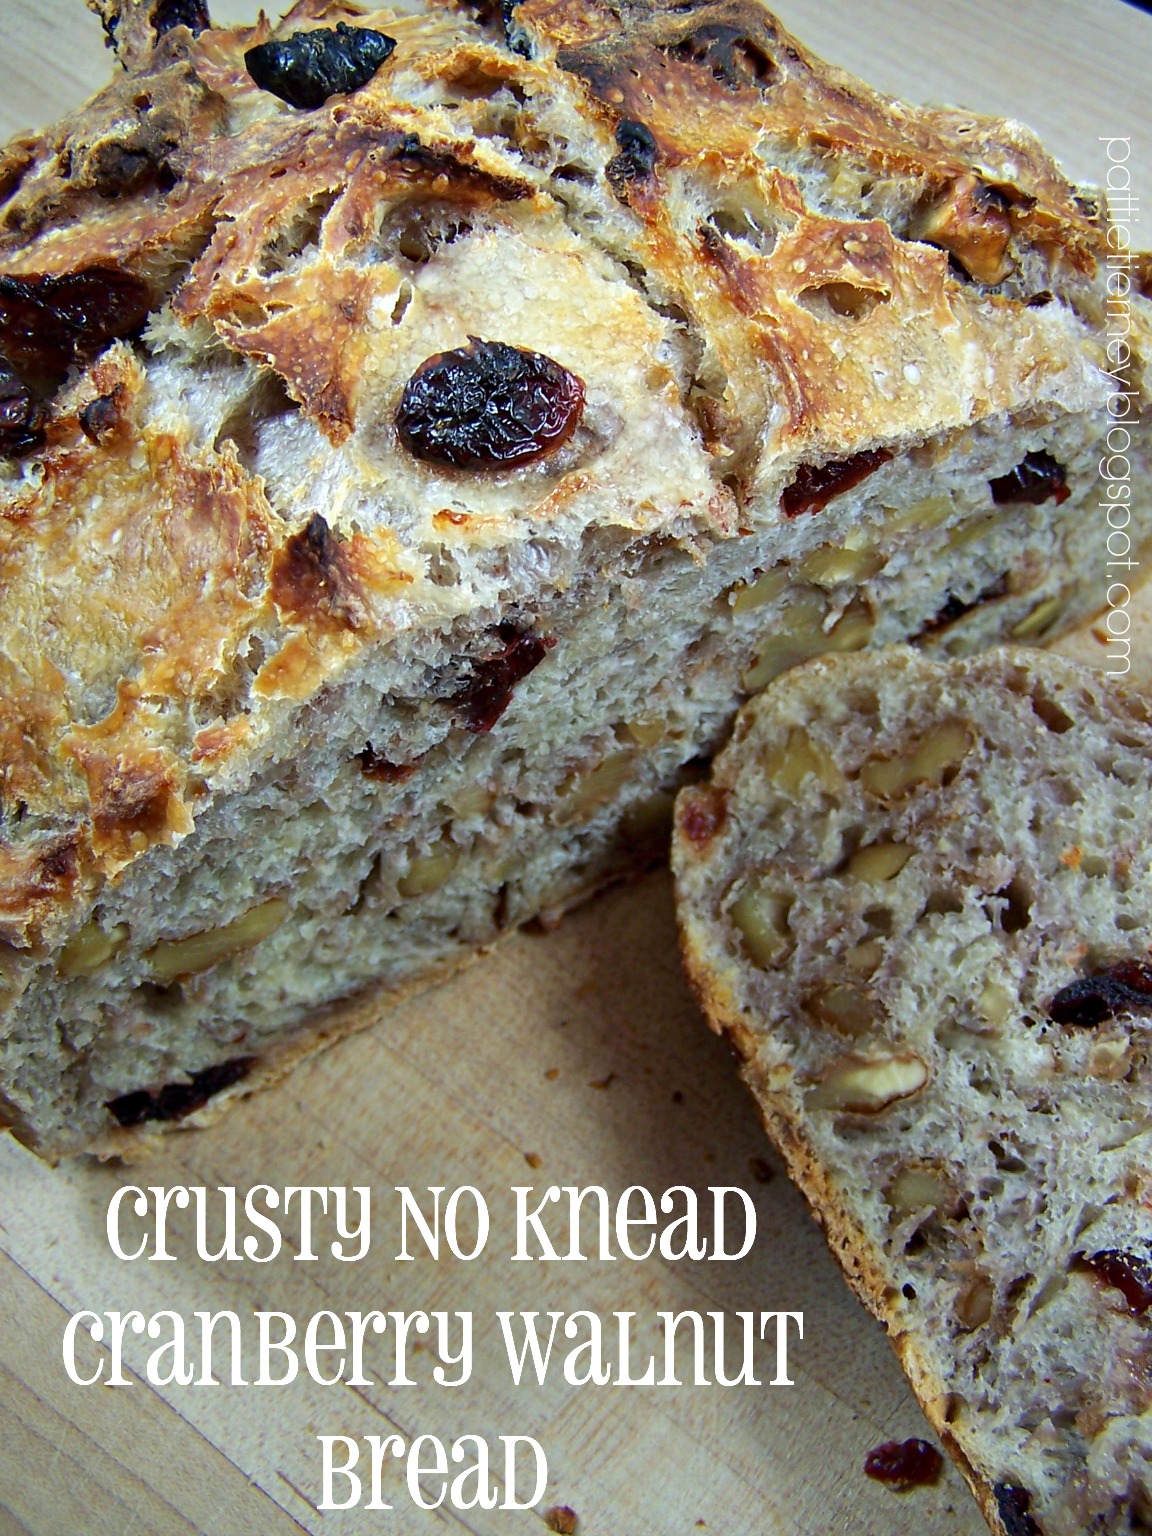
Crusty No-Knead Cranberry Walnut Bread

I think about my late husband every day, but never so much as in January, which would have been his birthday month, and today his birthday. He loved a good loaf of bread, and not a week would go by where I wouldn't find him buying a loaf or two from one of the local bakeries. He liked it with a crispy exterior and a dense and chewy interior. I don't know if it was because I was thinking about him that caused me to make this bread, or because I was just in the mood for dense and chewy home-baked goodness. Either way, when I spotted this recipe I knew I had to give it a try.
The recipe may seem long, but it is very simple to put together. It also yields spectacular results! Honestly, I could not believe it. I had a slice this morning, spread with softened cream cheese, and it was as good, if not better, than any bread I've had from one of the top local bakeries. The fact that I made it at home astounds me. I can tell you that this is going to be the starting point for other fruit/nut/seed varieties that I plan to make. If the thought of making bread seems daunting to you, you need to try this one. The fact that it requires no kneading and precious little work will have you making it again and again.

Happy Birthday, Jim! I miss you, sweetie.
 Crusty No Knead Cranberry Walnut Bread
Adapted from Sally's Baking Addiction

3 cups + 2 Tablespoons all-purpose flour, plus more for hands
2 teaspoons kosher salt
1/2 teaspoon granulated yeast
3/4 cup chopped walnuts
1 Tablespoon honey
1 ½ cups warm water (about 95°F)

Stir the first 6 ingredients together in a large bowl. Stir in the warm water. The dough will be pretty sticky. Don't be tempted to add more flour, sticky is what you're going for. Gently shape into a ball as well as you can. Cover tightly with plastic wrap. Set on the counter at room temperature and allow to rise for 12-18 hours. I tend to keep my house on the cool side (62° during the day and 55° at night) so mine took the entire 18 hours. You'll know the dough is ready when it doubles in size and sticks to the side of the bowl. The top should be covered with air bubbles.

Turn the dough out onto a lightly floured work surface and, using lightly floured hands, shape into a ball. Transfer dough to a large piece of parchment paper.

Using a very sharp knife, gently score an “X” into the top. Cover dough lightly with plastic wrap and set aside while you preheat your oven.

Place your covered Dutch oven into your oven and preheat it to 475° F. When your oven comes up to temperature, set a timer for 30 minutes. After 30 minutes, remove the Dutch oven from the oven, remove the plastic from the top of your bread dough, and carefully place the dough inside by lifting it up with the parchment paper and sticking it all-- the parchment paper included-- inside the pot. Cover with the lid.

Bake for 25 minutes with the lid on. Carefully remove the lid and continue baking for 8-10 more minutes until the bread is golden brown. Remove pot from the oven, carefully remove the bread from the pot, and allow to cool on the counter for 30 minutes before serving.

Cover and store leftover bread at room temperature for 1 week.


This post is linked to:

This post contains affiliate links.