Showing posts with label quick and easy. Show all posts

Monday, November 4, 2024

4 B’s Creamy Tomato Soup

 
The 4B's restaurant chain was established in 1947 by Bill Hainline and his family (his wife, Buddy, and their children, Bill, Jr. and Barbara) in Missoula, Montana. The name, as one might guess, comes from the first letters of their names. While the chain served traditional American food like soups, salads, sandwiches, they were most known for their famous cream of tomato soup.

Source: Pinterest

 The original recipe from back in the early 70’s when 4B’s gave them to customers was founder Barbara Hainline’s family recipe. In that recipe, it calls for 16 oz. crushed tomatoes and 16 oz. diced canned tomatoes. It also calls for 1 cup heavy cream and 1 cup liquid coffee creamer. There are no other spices added to it. Customers added salt and pepper at the table. Personally, I can’t imagine a soup being made with coffee creamer, considering all of the nasty ingredients that are in that. Fortunately, the recipe was altered to become the one that I have pictured here.  The beauty of this soup is, of course, its simplicity. One taste told me why it was so beloved. That said, I had to put my hand in, as I do, so my version is below. I think the fire-roasted tomatoes are an excellent addition, as well as adding salt to the pot while it’s simmering. Pair this with a grilled cheese, and you have the absolute ultimate in comfort food.

 4 B’s Creamy Tomato Soup

 1 14.5-oz. can petite diced tomatoes

1 14.5-oz.can fire-roasted diced tomatoes

9 oz. chicken broth

1 T. butter

2 T. sugar*

¼ t. salt

1 T. Melissa’s shallot, chopped

Pinch baking soda

2 c. heavy cream

 Mix tomatoes, chicken, broth, butter, sugar, onions, and soda together in a medium stockpot. Simmer for one hour. Heat cream in a double boiler. Slowly add cream to hot tomato soup mixture. Serve and enjoy.

 *This soup definitely has a sweet taste; I loved it, you may not. Adjust the sugar accordingly.

As an Amazon Associate I earn from qualifying purchases.

Friday, March 22, 2024

Dolly Parton's Stampede Soup (Copycat)

Despite the fact that I have lived in Missouri pretty much all of my life, I have never been to Branson, ergo, am unfamiliar with Dolly Parton’s Stampede Dinner Theater, that, from what I’ve read, has attracted millions of people (at last count a whopping 20 million). Supposedly it is the world’s most visited dinner show attraction.

Part of its appeal, I’m told, is the four-course meal served in tandem with stunning live performances. A mainstay on the menu for decades is the show’s beloved Dolly Parton Stampede Soup. I had never heard of this before, the ingredients are few, and it sounded too easy to be any good, so naturally, I had to try it. I quite liked it. Don’t let its humble appearance fool you. It’s mild, but flavorful — real comfort food, particularly when served with biscuits on the side. I tend to make soup year round, and I think this will be the perfect summer soup, although indulging in winter is nice too. Next time, to make it heartier, I may just add a little cooked chicken.

Dolly Parton's Stampede Soup (Copycat)

From tasteofhome.com

 4 c. chicken stock*

1 bay leaf

1 t. onion powder

1 t. garlic powder

1 t. kosher salt

½ t. freshly ground black pepper

¼ c. cornstarch

¼ c. water

2 c. heavy cream

2 c. frozen mixed vegetables, partially thawed (e.g., a medley of green beans, carrots, corn and peas)

2 T. fresh parsley, finely chopped (for garnish)

In a large, heavy-bottomed stockpot, combine the chicken stock, bay leaf, garlic powder, onion powder, salt and pepper. Bring to a gentle boil over medium heat.

 In a small glass measuring cup, dissolve the cornstarch into the water, whisking together until lump-free.

 Once the seasoned stock is simmering, whisk the cornstarch slurry and heavy cream into the pot, and whisking until smooth.

 Add the vegetables to the soup (you can roughly chop them into smaller bite-sized pieces if yours are on the larger side). Bring the soup back to a simmer and then let cook, stirring occasionally, until thick and creamy, about 10 to 12 minutes.

 Once thickened, remove the bay leaf and then stir in the fresh parsley. Ladle into bowls and serve hot.

 *I use my own homemade 

As an Amazon Associate I earn from qualifying purchases.

Friday, March 15, 2024

TikTok Chicken Cobbler

 
I’m not sure if it’s because I wasn’t expecting much that I liked this as well as I did, or if it’s just darned tasty. This is a recipe that I found on TikTok. As I pointed out last week with my refrigerator drawer salad bar, I am not on TikTok.  You may find that hard to believe since I have now featured two things from TikTok in the past couple of weeks, honestly, I just stumble upon them. This appealed to me because I liked the idea of a chicken cobbler. Essentially, it is a much easier version of chicken potpie without the bottom crust. I was also drawn in by the fact that it used that yummy Red Lobster Cheddar Bay biscuit mix, and I love those biscuits.
 
m not sure if it’s because I wasn’t expecting much that I liked this as well as I did, or if it’s just darn tasty. This is a recipe that I found on TikTok. As I pointed out last week with my refrigerator drawer salad bar, I am not on TikTok.  You may find that hard to believe since I have now featured two things from TikTok in the past couple of weeks, honestly, I just stumble upon them. This appealed to me because I liked the idea of a chicken cobbler. Essentially, it is a much easier version of chicken potpie without the bottom crust. I was also drawn in by the fact that it used that yummy Red Lobster Cheddar Bay biscuit mix, and I love those biscuits.

I changed this recipe up a good bit because as I was assembling it, I thought it needed a few tweaks. I have notated all of that below the recipe. The recipe that you see here, is the original one from TikTok. If you want to see what I did, be sure to read the notes below. I will say that I had second helpings of this. It was super simple to put together, and I would definitely make it again. It
isn't pretty, but it sure is good.

TikTok Chicken Cobbler

 ½ c. (1 stick) unsalted butter

3 c. cooked and shredded chicken

1 12-oz. bag frozen peas and carrots

½ t. garlic powder

2 c. milk

2 c. Red Lobster Cheddar Bay biscuit mix

2 c. chicken stock

1 10.5-oz. can cream of chicken soup

 Kosher salt and freshly ground black pepper, to taste

Preheat oven to 350°F.

 Put butter in a 9x13-inch baking dish and place in oven to melt while oven preheats.

 Once butter has melted, remove pan from oven. Arrange chicken in an even layer over butter. Next, add peas and carrots over the top. Season with salt, pepper, and garlic powder.

 In a medium bowl, mix together milk and biscuit mix. Pour over chicken and vegetables but do not mix the layers together.

In the same (now empty) bowl, whisk together cream of chicken soup and chicken stock. Pour over biscuit layer, but again, do not mix layers together.

 Bake uncovered for 45-50 minutes. Mixture will be runny, but will thicken to gravy consistency. Let sit 15 minutes before serving. Enjoy!

 COOK’S NOTES:

1. I did not use a stick of butter, I used a half a stick (4 tablespoons). One stick just seemed like too much to me.

2. After I scattered the chicken in the bottom of the pan, I topped it with a generous sprinkling of Montreal chicken seasoning.

3. Instead of using a bag of frozen peas and carrots, I used a bag of frozen mixed vegetables that included corn and green beans in addition to the peas and carrots. I liked the greater variety of vegetables here.

4. I did not use the garlic powder, but I did use the seasoning mix that came in the packet of biscuits, and I used the entire amount of biscuit mix rather than measure out 2 cups.

5. I thought 2 cups of chicken stock seemed like too much, so I only used a cup and a half, and it was plenty moist.

As an Amazon Associate I earn from qualifying purchases.

Tuesday, March 5, 2024

Red Lobster Clam Chowder Copycat

 
There used to be a local restaurant known for its clam chowder. It was called Noah’s Ark, and actually looked like what one would expect Noah’s Ark to look like, complete with life-size replicas of animals, 2 x 2, on the exterior. When it first opened up, it was a nice place to dine, and each table had a cauldron of clam chowder in the center for diners to enjoy with the management’s compliments. It was really quite charming.
Photo credit: Lost Tables

This was my first experience with clam chowder, and I really loved it. The recipe was a simple one, largely cans of condensed Campbell’s soup. It wasn’t until many years after Noah’s Ark closed that I made clam chowder using clam juice, minced clams, and half-and-half. What a difference! I recently came across a copycat recipe for Red Lobster’s clam chowder, and decided to give it a try. It is quick, easy, and very delicious. I used cubed baby red potatoes rather than peeling russet potatoes. It saved time, had more visual appeal, and tasted better as well.

Red Lobster Clam Chowder Copycat

 2 c. cubed Melissa’s baby red potatoes, cut into ½” x ½” cubes

½ c. butter

¼ c. diced green onions, white and light green parts only

¼ c. flour

2 6.4-oz. cans minced clams, reserve juice

1 t. kosher salt

16 oz. half-and-half

½ c. whole milk

1/3 c. bottled clam juice

Fresh parsley, chopped, for garnish

Oyster crackers, for garnish

 Place potatoes in a saucepan and cover with water; cook on medium heat until tender. Remove potatoes from heat, drain and set aside. In 2-quart saucepan on medium-low heat, melt butter.

 Add diced onions and cook until onions are slightly clear in color. Add flour to butter and stir briskly. The mixture will start to thicken. Add half and half a little at a time while stirring briskly. The mixture will be creamy and will look like thick cream. Place salt, clams, and juice from cans, potatoes, bottled clam juice and milk with the mixture.

 On medium-low temperature, bring chowder to a slow boil. Turn temperature down to low and let chowder simmer gently for 15 minutes, stirring frequently. Chowder, hard rolls, fresh whipped butter, and a cozy fire will warm your tummy and your soul.


As an Amazon Associate I earn from qualifying purchases.


Tuesday, June 13, 2023

Black Bean Hummus

 
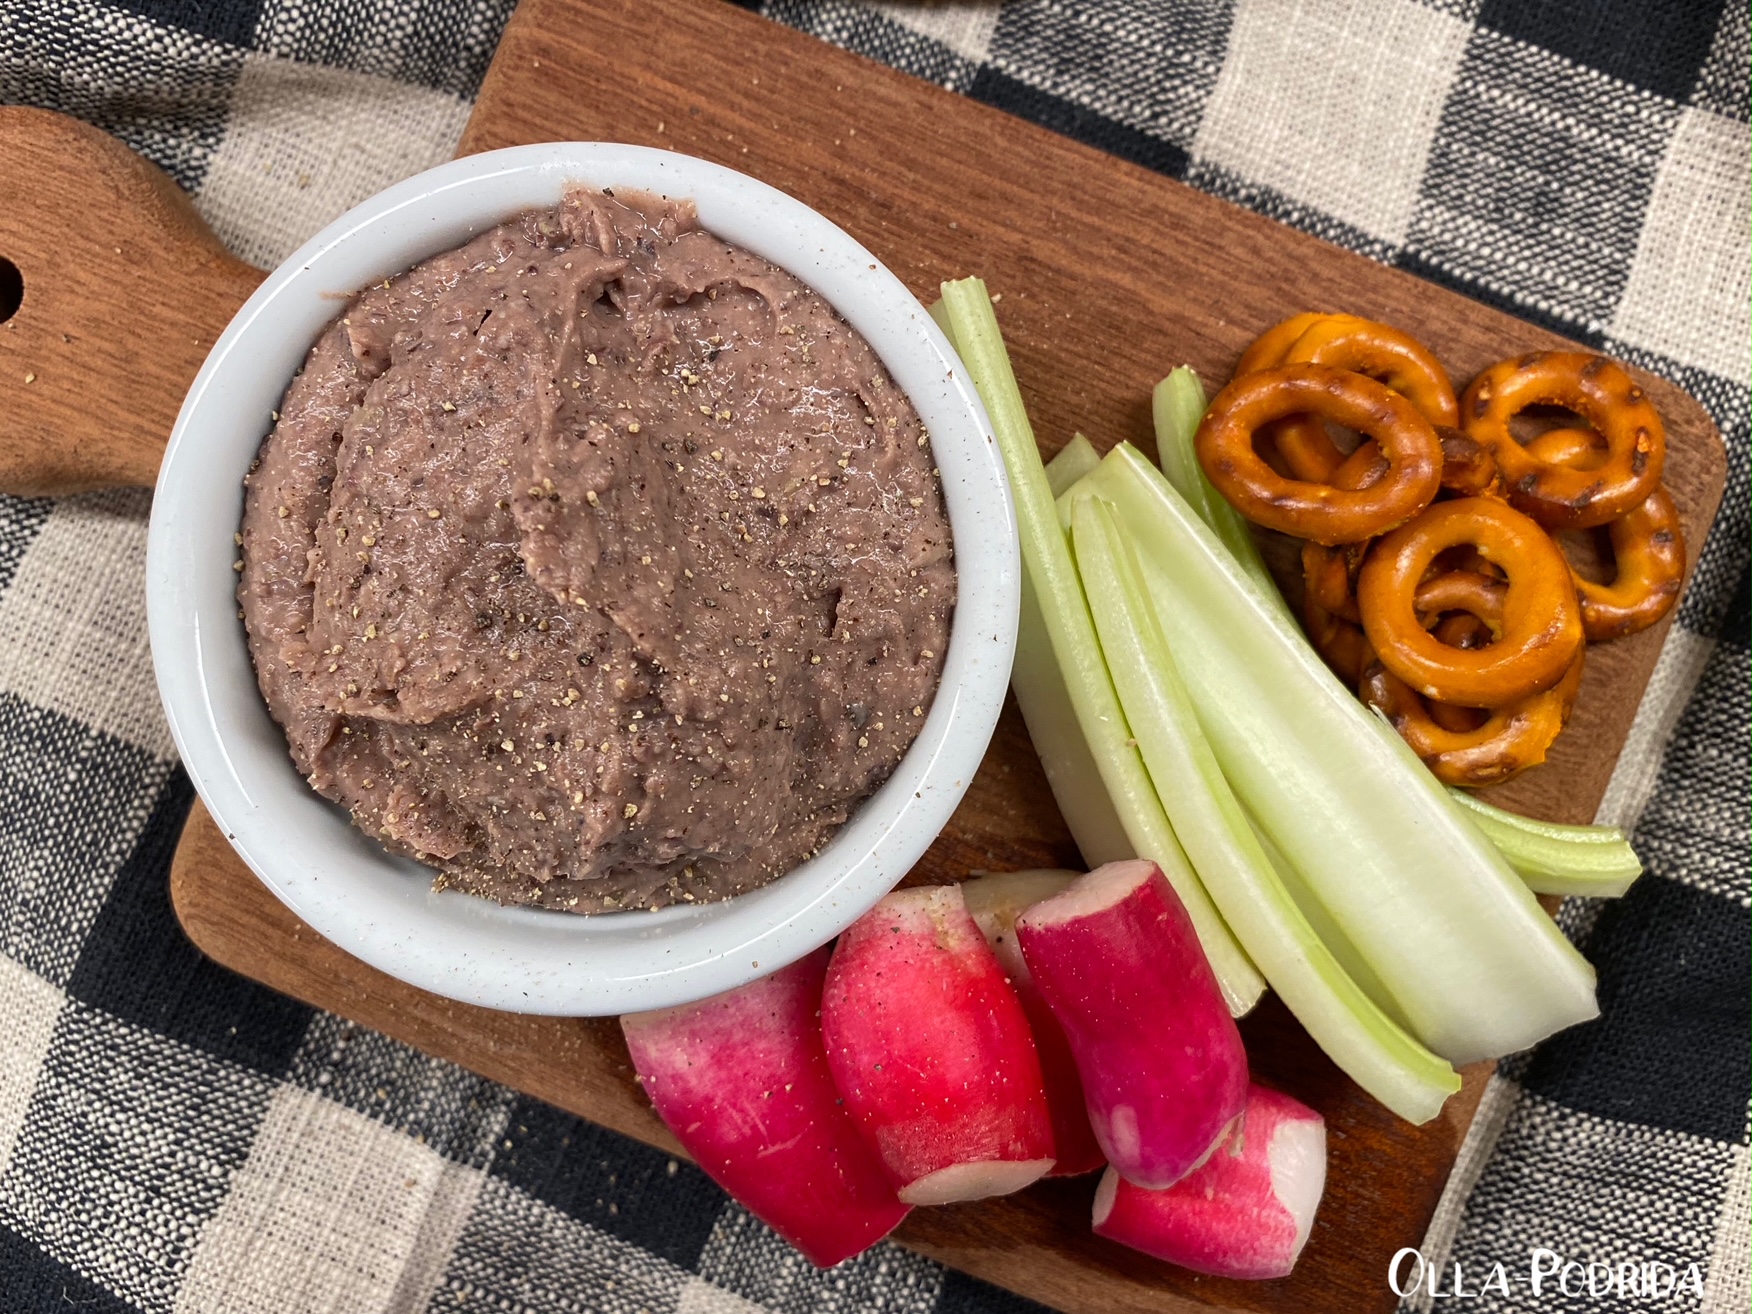
I love hummus! What I don’t particularly care for is tahini, generally one of the main ingredients in hummus. I’m not wild about the flavor or the price, or the fact that it seems to only come in large jars that ultimately end up getting shoved to the back of the fridge after I have it used it only once or twice — one or two tablespoons per use — where it mocks me every time I open the refrigerator door, and ultimately goes bad. That’s why this recipe is so appealing. No tahini! Made with fairly common pantry ingredients, this is an excellent snack, a great thing to serve when you have surprise guests (or guests that you’ve actually invited), and healthy to boot.

Black Bean Hummus

1 15-oz.can black beans, drained and rinsed

1 small clove garlic

1 scallion, both white and green parts

2 T. extra virgin olive oil

1½ T. fresh lemon juice

1 T. champagne vinegar

½ t. ground cumin

½ t. kosher salt

Freshly ground black pepper, to taste

 Place all ingredients into the work bowl of a high-speed mini food processor. Blend until smooth. Refrigerate for one hour to allow flavors to meld before serving.

As an Amazon Associate I earn from qualifying purchases. 

Wednesday, December 21, 2022

Fajitas

  Prior to this week I had never had fajitas. Never! Honestly, I didn’t get what the big deal was. Now I know, and since that time I’ve made them twice. They are so easy to put together, super delicious, hearty and filling, wonderfully tasty, not to mention versatile, so much so that they are going to become a regular part of my meal rotation.


The first time I tried them I used a commercial seasoning packet. It was way too hot for me. In looking at the list of ingredients on the package I saw that chili pepper was the first ingredient. That said everything to me. After a bit of experimentation with a variety of recipes, I came up with what I think is the absolute best.

Fajitas

Seasoning:

1 T. cornstarch
2 t. chili powder
1 t.
sea salt
1 t. smoked paprika
1 t.
ground cumin
1 t. granulated sugar
1/2 t.
onion powder
1/2 t. garlic powder
1/8 t. Mexican oregano
1/8 t. cayenne pepper

Mix together all ingredients and store in an airtight container at room temperature.

To make fajitas:

Fajitas are easy to put together. Choose a protein (I used a pound of boneless, skinless chicken breasts), one pepper (I used 1/2 red pepper and 1/2 yellow pepper) thinly sliced, and 1/2 red onion, thinly sliced. Put a tablespoon of olive oil into a 9 to 10 inch sauté pan and get it hot. Add chicken and cook for 3 to 4 minutes. Allow it to sear on each side, so let it cook for a good two minutes before turning it over to sear the reverse. Use a slotted spoon to remove the chicken to a heated plate. Add thinly sliced peppers and onions add more olive oil, if necessary, to the pan. Sauté until vegetables are soft. Return chicken to the pan along with 1/2 cup of water (or Bloody Mary mix, as I did), and two heaping tablespoons seasoning. Give it a good stir. Cover and cook until heated through and sauce is reduced to your liking. Serve on warm tortillas with salsa, cheese, sliced scallions, slices of avocado, and sour cream.


As an Amazon Associate I earn from qualifying purchases.

Monday, June 21, 2021

Spinach Artichoke Pasta for Two

This post contains affiliate links.

This is a wonderful main dish for two that is perfect for both Meatless Monday, as well as those who are fans, as I am, of spinach artichoke dip. This is my homage, you might say, to that popular dip, in pasta form. If you cook wisely, and get that water boiling before you get out your sauté pan, this can be on the table in 30 minutes. 

Spinach Artichoke Pasta for Two


4 oz. bow tie pasta

2 T. unsalted butter

1 t. Melissa’s minced garlic

2-3 handfuls fresh baby spinach

1/3 c. grated Parmesan cheese

1 t. chicken soup base (I use L.B. Jamison)

2/3 c. heavy cream

Salt & freshly ground black pepper, to taste

2 to 3 gratings fresh nutmeg

1 7.5-oz. marinated artichoke hearts, drained

2 T. Melissa’s pine nuts, toasted*

2 T. chopped parsley

Sprinkling of Parmesan cheese, to garnish

 Prepare bow tie pasta according to package directions; drain.

 In 10” skillet melt butter. Add minced garlic and sauté for one minute. Add baby spinach and sauté until wilted, 1 to 2 minutes.

 Stir in Parmesan cheese and soup base until blended, and then slowly stir in heavy cream, salt, pepper, and nutmeg. Add cooked pasta to cream sauce and toss until pasta is coated. Fold in artichoke hearts. Sprinkle with pine nuts, parsley, and additional Parmesan cheese, if desired. Serve immediately.

 Serves 2.

 * I toasted mine in the sauté pan prior to melting the butter. Over medium heat, it takes about 3 to 5 minutes to turn them a nice nutty brown.


Friday, August 14, 2020

Easy Chicken Divan

This post contains affiliate links.
I have set aside one day a week to make a casserole because it’s quick, easy, will feed me for two days running, and freeze for consumption at some point in the future. This is another star-together meal that is delicious, and a crowd-pleaser. Even kids, who don’t like broccoli, will consume it this way if it’s chopped finely enough, and drenched in cheese. The original recipe calls for fresh broccoli that is parboiled, drained, and chopped, but who has the time? I had a bag of frozen broccoli florets in the freezer, so I thawed and drained them. Use what you like, you can even consider using frozen chopped spinach if you prefer. Quick, easy, delicious.
Easy Chicken Divan

1 lb. chopped fresh broccoli
1 c. sliced fresh mushrooms
1 ½ c. cubed, cooked chicken
1 10.75-oz. can Cream of Broccoli Soup;
1/3 c. milk
1 c. shredded cheddar cheese
1 T. butter
 
Preheat oven to 450°F. Spray a 9-inch pie plate or 1½-qt. casserole dish with PAM; set aside.

If using fresh broccoli, place it in a saucepan with enough water to cover. Bring to a boil and cook for 5 minutes, drain and chop.


Place broccoli into the bottom of your pie plate or casserole dish. Scatter mushrooms and chicken on top. In a medium bowl, whisk together soup and milk; pour mixture over chicken, Sprinkle with cheddar cheese. Sprinkle breadcrumbs over all and dot with butter.

Bake for 15 minutes until bubbly and lightly browned.


Tuesday, March 31, 2020

It Ain’t Gourmet Tamale Chili Casserole

This post contains affiliate links.
I remember when my boys were little and I had to get dinner on the table. It had to be something that I could get to them in the quickest amount of time possible, that my picky then husband would like, that the boys would like, and that was reasonably nutritious, and by reasonable, I mean by the widest definition of that word. I didn’t have time to browse cookbooks, or flip through magazines, or involve myself in tedious activities like pounding meat between two slices of waxed paper, or cutting vegetables into even julienne. I had to have a trough of something at the ready.

Remembering those days, and attempting to make up for today’s lack of culinary preparedness, I furiously ransacked my pantry, and found a can of tamales, and a can of chili, don’t ask me what they were doing there. I remember years ago, and I’m talking back in the 80s, when tamale casserole was all the rage, so I went back in time for a revisit. I assembled it from what I could remember, popped it into the oven, and when it was ready, I dug right in. I’ll tell you what, this is delicious! It was so satisfying and yummy, that I could hear myself making sounds one might hear from a pig looking for truffles. As I alluded to in the title, it isn’t fancy by any stretch of the imagination, but it is REALLY good.
It Ain’t Gourmet Tamale Chili Casserole

1 15-oz. can chili no beans
1 15-oz. can beef tamales
1 small Melissa’s shallot, chopped fine
1 2.25-oz. can
chopped black olives
1 c. frozen corn, thawed
1 c. shredded sharp cheddar cheese
Crushed corn chips

Preheat oven to 350° F. In an 11” x 7” baking dish, spread half of the chili evenly on the bottom. Remove paper from tamales and place them on top of the chili. Sprinkle with shallot, black olives, corn, and cheese. Bake 20 to 25 minutes until hot and bubbly. Serve immediately topped with crushed corn chips, guacamole, sour cream, additional cheese, or whatever you happen to like.


Tuesday, April 30, 2019

Blistered Olives

When someone comes by for a drink, it’s important to have nibbles on hand to offset the effects of the alcohol. That’s why I always keep cans of green olives in the pantry. Yes, cans, not jars. Jarred olives are packaged in brine, giving them an entirely different, salty taste, in comparison with those in cans. The latter have a mild, buttery flavor that is very hard to resist.

Making these blistered olives is a snap. Have your company make his or her own drink from your stocked bar cart (there will be a blog post about this in the future), while you make the olives. They are wonderful warm right from the pan, or cold the following day. They make a special addition to a cheese or charcuterie tray, and are a welcome change of pace on a salad bar. Even if you’re serving a tossed side salad, it’s nice to add a garnish or two, and these olives are perfect for that. You’re going to love the taste and simplicity.
Blistered Olives
Slightly adapted from Instrupix.com

1 15-oz. can green olives, drained and patted dry
1 Tablespoon olive oil
1 Tablespoon minced Melissa’s organic garlic
½ teaspoon red pepper flakes, more or less to taste

In a 10” sauté pan, heat the olive oil on medium heat until it shimmers. Add the drained olives to the pan, and toss them with the oil. Sauté for 3-5 minutes or until they start to brown and “blister.” Stir in the minced garlic; toss to coat. Continue to sauté the olives and garlic, stirring frequently for 1-2 minutes. Do not allow the garlic to burn. Add the red pepper flakes and sauté and stir about 1 minute more. Pour into a heatproof serving dish and enjoy!

These can be enjoyed either hot or cold. Personally, I think they benefit from a night spent in the fridge. The flavors meld so beautifully that the next day they are exceptionally good (read: impossible to stop eating). They will keep in the fridge for up to 5 days.

If you love olives like I do, then you will want to try this Olive Cheese Spread. It is delicious, versatile, and one of the most popular recipes on the blog.


This post contains affiliate links.