Tuesday, October 5, 2021

Lunchroom Chocolate Peanut Butter Bars

This post contains affiliate links.


I am old school. Literally. I went to school before these lunchroom bars were popular. In fact, I had never even heard of them until I saw them online. They looked good, easy, and who doesn’t like the combination of peanut butter and chocolate? I must say that I was pleasantly surprised. These are not cloyingly sweet. They are sweet, but not overly so; the amount of peanut butter in the dough and topping is just right. The chocolate finishes these off to perfection. If, like me, you were never treated to these when you were in school, give them a try.

Lunchroom Chocolate Peanut Butter Bars

Slightly adapted from halfbakedharvest.com

 1½ sticks salted butter

2 c. creamy peanut butter, divided

¾ c. dark brown sugar

¼ c. granulated sugar

2 large eggs, room temperature

1 T. vanilla extract

2 c. flour

1 t. baking powder

½ t. kosher salt

 Frosting

1 stick salted butter, room temperature

2½ c. powdered sugar

½ c. dark cocoa powder

2 t. vanilla extract

¼ c. warm milk

Preheat the oven to 350° F. Line a 9” x 13” baking dish with parchment paper; set aside.

 In a microwave safe bowl, melt butter and ½ cup peanut butter, stirring every 30 seconds until creamy. (This took me one minute.) Whisk in brown sugar, sugar, eggs, and vanilla.

 Stir in flour, baking powder, and salt.

Press dough into the bottom of the prepared dish. Bake for 20-22 minutes, until set in the center. Remove from oven and immediately dollop remaining 1½ c. peanut butter over the crust, lightly spreading in an even layer. Cool completely.

 To make frosting: place butter, powdered sugar, cocoa powder, vanilla, and warm milk in a medium mixing bowl. Beat until smooth, adding additional warm milk as desired to reach spreadable consistency. Spread over bars and allowed to set. (This may take a couple of hours.) Slice and enjoy.


Monday, October 4, 2021

Orzo with Parmesan & Basil

This post contains affiliate links.

I’m going to tell you something that will shock you. It’s something that I don’t tell just everybody because, frankly, I’m a little embarrassed by it. Are you ready? Do you promise to keep your lips sealed after reading this post? OK, here goes: I have a Rice-A-Roni collection. This is no joke. It is on the third shelf of my pantry, sandwiched in between my pasta collection. It’s in the middle because I have my pasta divided; straight noodles are on the left, curly noodles are on the right. I know it’s crazy, but Rice-A-Roni has saved me more often than you can imagine. It is amazingly versatile, comes in a wide variety of flavors, and so many things can be added to it by way of both meat and vegetables, so that it can be served as a side or a main. No, I don’t represent the company; I just love their product.

  Why do I mention this, you may ask? Because, while wandering around on the web, I found this recipe (somewhere, I can’t remember where), and it is a homemade version of Rice-a-Roni. Naturally, I love it! I have made it three times in the past two weeks, each time varying the herbs. It is amazingly easy to make, can be tailored to whatever suits you, and works equally well for a weeknight dinner as it does for company. You must give this a try!

Orzo with Parmesan & Basil

 2 T. butter

1 c. uncooked orzo pasta

1¾ c. chicken stock

½ c. grated Parmesan cheese

¼ c. chopped fresh basil

Salt and freshly ground pepper, to taste

Additional fresh basil, for garnish

 Melt butter in a heavy skillet over medium-high heat; stir in orzo and sauté until lightly browned.

 Stir in chicken stock and bring to boil. Cover. Reduce heat to low, and simmer until orzo is tender and liquid is absorbed, about 20 minutes.

 Stir in Parmesan cheese and basil. Season with salt and pepper. Transfer to shallow bowl and garnish with basil sprigs.


Thursday, September 30, 2021

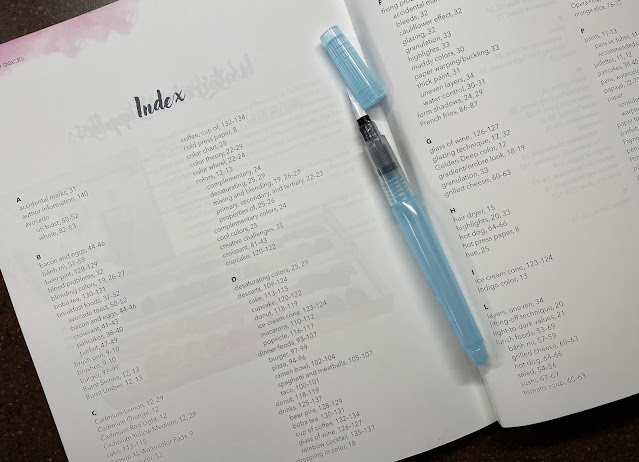
Watercolor Snacks, a Review

Inasmuch as I would love to be a painter, I’m simply not. I am, however, a collector of paints and various paint-related accoutrements — watercolors, acrylics, paint sticks, mica powders, water color pencils, water brushes, if you can name it, I probably have it. When I learned of Watercolor Snacks, I was eager to get my hands on a copy as it appealed both to my love of food and desire to paint; it did not disappoint. Quite the contrary, it delighted and inspired.

With only the turn of a page or two, I had surrounded myself with cups of water, paintbrushes, and all of my supplies. A filled watercolor sketchbook later, I had page after page of painted food stuffs, in various degrees of completion, done in watercolor, following the informative directions, and ending up rather pleased when all was said and done. If, like me, you would like to be able to try your hand and be reasonably accomplished at watercolor, and if the thought of painting food appeals, stop what you’re doing, and order a copy of this book now. You can get one here.

 Perfect for beginners, the author provides step-by-step, easy to follow instructions on how to paint your favorite foods. Informative, yet not condescending, the author gives you information on supplies, techniques, how to fix mistakes, and overall be happy with your art.


This book will appeal to artists and food lovers alike. If you would like to expand your creativity in a new direction, this is definitely the book for you.


 Disclosure: I received a complimentary copy of this book from the publisher  in exchange for an honest review.

 As an Amazon Associate I earn from qualifying purchases.

Thursday, September 23, 2021

Streusel-Topped Pumpkin Loaf

This post contains affiliate links.

Over the weekend I made double chocolate brownies with pumpkin buttercream frosting. They were delicious. Unfortunately they were not photogenic. Not, in a very big way. As a consequence, I am going to have to make them again and have another photo shoot, because this is a recipe you absolutely must try. I had just enough leftover pumpkin from the buttercream to give this recipe a try. Am I ever glad that I did! I do believe that this is one of the best pumpkin loaves that I have ever tasted. I happen to be a big fan of streusel, totally convinced that it improves everything it graces, which may explain why I like this loaf so much. You have to make this one.


Streusel-Topped Pumpkin Loaf
Slightly adapted from cookiesandcups.com

Crumb Topping:

½ c. flour

½ c. dark brown sugar
½ t. pumpkin pie spice
1/8 t. kosher salt
¼ c. cold unsalted butter, cubed

Pumpkin bread:

1 c. flour
1 t. baking soda
½ t. kosher salt
1 c. granulated sugar
¾ c. vegetable oil
2 large eggs
2 t. vanilla extract
1 c. pumpkin purée

2 t. pumpkin pie spice

Preheat oven to 350°F. Spray an 8” x 4” loaf pan with a Baker’s Joy; set aside

Prepare crumb topping: In the work bowl of a large or
mini food processor combine topping ingredients. Pulse until large crumbs are formed; set aside.

In a large bowl, whisk together flour, baking soda, and salt; set aside.

In another large bowl, whisk together sugar, oil, eggs, vanilla, pumpkin, and pumpkin pie spice until smooth and blended. Pour the pumpkin mixture into the flour mixture and whisk until smooth and no lumps remain.

Pour the batter into the prepared pan and top with prepared crumb mix. Bake for 55 to 60 minutes or until the loaf tests done. If you see the top is browning too quickly, loosely tent with foil.

Remove from oven and allow the bread to cool in the pan for 20 to 30 minutes. Transfer to a wire rack to cool completely. Serve warm or at room temperature.

Wednesday, September 22, 2021

Homemade One-Pot Hamburger Helper (with Zucchini!)

This post contains affiliate links.

It is officially the first day of fall and, in this household anyway, the official beginning of comfort food season. I thought I would kick off the season with an adapted version of homemade hamburger helper that I found online. What I particularly liked about this version is that it contains vegetables in the form of shredded zucchini that disappears into the mix, so no one’s the wiser. Whether your kids like or don’t like vegetables, they won’t even know they are there in this comforting and delicious casserole. You will find it hearty and satisfying, the kids will love it.


Homemade One-Pot Hamburger Helper
Adapted from halfbakedharvest.com

2 T. olive oil
1 lb. ground chuck
1 medium onion, chopped
Kosher salt and freshly ground black pepper
½ t.
Montreal steak seasoning
1 t. chili powder
1 t. paprika
1 t. garlic powder
10 oz.
medium shells
1 zucchini, grated (about 1 c.)
2 c. beef broth
1½ c. whole milk
1½ -2 c. shredded cheddar cheese
1 T. ketchup

Place beef and onion in a large pot (I used
this one) set over medium/high heat; season with salt and pepper. Cook until the meat is browned, breaking up as you go, 10 to 12 minutes. Stir in the steak seasoning, chili powder, paprika, and garlic powder, and cook another minute.

Add pasta and zucchini and toss to coat. Pour in broth and milk; add ketchup, stirring to combine. Bring to a gentle boil over medium/high heat, and simmer 8 to 10 minutes until the pasta is al dente, stirring occasionally. Stir in the cheese and cook until melted and creamy.

Serves four.


Wednesday, September 15, 2021

Smoked Sausage and Corn Chowder

This post contains affiliate links.


Despite the 90° temperatures that we’re having during the day, once September hits, I move into “soup mode.” I absolutely love it! The thicker and chunkier, the better, beginning with the concoction below. It goes together quickly, keeps 3 to 4 days in the fridge, and it’s wonderful alongside half a sandwich, salad, or all on its own with a crusty roll.

Smoked Sausage and Corn Chowder

8 oz. smoked sausage, fully cooked, thinly sliced
1 c. chopped
Melissa’s shallots
1 carrot, diced
1 rib celery, diced
3½ - 4 c. chicken stock
2½ - 3 c. frozen O’Brien potatoes
1 14.75-oz. can
cream style corn
1/8 t. cayenne
1/8 t.
Old Bay
¼ t. Italian seasoning
½ c. heavy cream

In a large saucepan, ground sausage over medium heat. Add shallots and sauté an additional 3 to 4 minutes. Drain any excess fat. Stir in broth, potatoes, corn, cayenne, old Bay, Italian seasoning, and salt and pepper to taste.

Bring to a boil; reduce heat to low. Simmer uncovered for 25 to 30 minutes. Stir in cream; heat through.

Garnish with croutons and sliced scallions, if desired.


Tuesday, September 14, 2021

Veggie Wrap with Spinach Artichoke Cream Cheese

This post contains affiliate links.

If you are desperately trying to use up all of the zucchini and tomatoes that you harvested this year, have I got a sandwich for you! It’s a simple wrap that goes together quickly, providing you prepare your spinach artichoke cream cheese the day before. The wonderfully tasty cream cheese mixture (inspired by the iconic dip), lasts in the fridge for up to one week, and the flavor enhances if it’s left overnight before using. One wrap sandwich provides 2 to 3 servings of vegetables (depending upon how thickly you layer them), and is a delicious way to get your nutrition for the day. Make a number of them, wrap them tightly in cling film, and keep them at the ready in the fridge.

Veggie Wrap with Spinach Artichoke Cream Cheese

2
spinach herb tortillas
1 tomato
1 zucchini

½ red onion, thinly sliced*

½ c. Melissa’s red bell peppers, sliced into strips

2 leaves Romaine lettuce

1/2 c. grated mozzarella

Spinach Artichoke Cream Cheese (recipe below)

 Thinly slice tomato, sprinkle lightly with salt, and allow to drain on a paper towel-lined plate while you prepare the zucchini. Slice zucchini, lengthwise, into 1/8” - 1/4” strips. Sauté in a skillet or grill pan over medium-high heat, or on the grill, until both sides are nicely seared.

On one side of the tortilla, spread an ample portion of Spinach Artichoke Cream Cheese within a half-inch of the edge. Layer zucchini, tomato, onion, pepper, cheese, and lettuce. Salt and pepper to taste, and roll up burrito style. Slice in half on a diagonal and serve. May be made ahead, wrapped in plastic wrap, and stored in the fridge. Makes 2.

*I used a mandoline.

Spinach Artichoke Cream Cheese

 1 6-oz. jar marinated artichoke hearts, drained and chopped

1/2 10-oz. pkg. frozen chopped spinach, thawed, squeezed dry

1 8-oz. pkg. cream cheese, softened

2 T. Duke’s mayonnaise

2 T. sour cream

½ c. shredded mozzarella

½ t. garlic powder

1 t. dry Vermouth

¼ t. dried basil

1/8 t. salt

Few gratings freshly ground black pepper


Place all ingredients into a medium bowl, and beat with a hand mixer until smooth and creamy. Refrigerate until ready to use.