Monday, September 30, 2013

Caramel Apple Upside Down Pie

 When I saw a recipe for an upside down apple pie on the Taste of Home website, I knew that I had to try it.  The idea of caramel and pecan topping on a pie that is built in reverse was just too intriguing to pass up.  The original recipe can be found here.  I made some adjustments based upon what I like in an apple pie – a bit of citrus, a mixture of apples, and a bit less sugar.  I also took photos along the way so you could see exactly how it was done.  Using packaged crust (Honestly, who has the time to make crust?) it was really a lot easier than I thought it would be.  The end result was delicious.  I will definitely be making this again.

Caramel Apple Upside Down Pie

CRUST:
Your choice, go crazy.  I used Pillsbury Ready-Crust.

PECAN TOPPING:
4 tablespoons butter, melted
1/2 cup packed dark brown sugar
1/2 cup roughly chopped pecans

APPLE FILLING:
1-1/2 pounds Jonathan apples, peeled, sliced 1/8 thick
1-1/2 pounds Granny Smith apples, peeled, sliced 1/8 thick
1/2 cup granulated sugar
2 tablespoons butter, melted
1/3 cup all-purpose flour
Zest of ½ lemon
1 teaspoon freshly squeezed lemon juice
3/4 teaspoon ground cinnamon
1/4 teaspoon freshly ground nutmeg

GLAZE:
1/2 cup confectioners' sugar
2 to 3 teaspoons orange juice

DIRECTIONS:

Line a 9-in. deep-dish pie plate with heavy-duty foil, leaving 1-1/2 in. beyond edge; coat the foil with cooking spray. (I only had regular foil, so I used two pieces.)
Combine 4 tablespoons butter, brown sugar and pecans; spoon into prepared pie plate. 
In a large bowl, combine the apples, sugar, flour, cinnamon, nutmeg and remaining butter; toss gently.

Place pastry over nut mixture, pressing firmly against mixture and sides of plate. 
Fill with apple mixture. 
Place second crust over filling.  Fold bottom pastry over top pastry; seal and flute edges. Cut four 1-in. slits in top pastry.
 Bake at 375° for 60-65 minutes or until apples are tender and crust is golden brown (cover edges with foil during the last 20 minutes to prevent over browning if necessary).
Cool for 15 minutes on a wire rack. 
 Invert onto a serving platter; carefully remove foil. Combine glaze ingredients; drizzle over pie.

Yield: 8 servings.


This post is linked to:


Wednesday, September 25, 2013

Peach Cobbler

Do you mourn the end of peach season like I do?   Peaches are one of my favorite fruits, and I truly hate to see the fresh peach season come to an end.  You can preserve a bit of their freshness, though, in not only making this mouthwatering cobbler to serve to your appreciative family, but also by making up extra batches of the filling to freeze for use during those bleak months of winter.


Peach Cobbler

Filling:
6 large peaches, peeled, quartered, and cut into wedges
1/3 cup sugar
1 tablespoon fresh lemon juice
1 teaspoon cornstarch
Pinch of cardamom


Topping:
1-1/2 cups all-purpose flour
3/4 cup sugar
1-1/2 teaspoons baking powder
1/2 teaspoon salt
Pinch of cardamom
9 Tablespoons cold unsalted butter, cut into small pieces
1/4 cup, plus 2 Tablespoons boiling water

Preheat oven to 425°F.  In a large mixing bowl, combine peaches, sugar, lemon juice, cardamom, and cornstarch until coated.  Pour into a 2-qt. nonreactive baking dish and bake in middle of the preheated oven 10 minutes.

Meanwhile, in the work bowl of a food processor, place flour, sugar, baking powder, cardamom, and salt.  Pulse to combine.  Add butter and pulse 8-10 times until mixture resembles coarse meal. With motor running, slowing pour water into mixture via the tube, and mix until just combined.

Remove peaches from oven and drop heaping spoonfuls of topping all over the top. Place dish on a cookie sheet to catch drips and bake in the middle of oven until topping is golden, about 25 minutes. (Topping will spread as it bakes.)

Allow to cool on wire rack.  Serve topped with ice cream, whipped cream, a dollop of peach yogurt, or eat directly from pan with large spoon.

To Freeze Filling:
Mix together filling ingredients (DO NOT BAKE!), pour into a gallon-size plastic freezer bag and freeze.  Remove from freezer to the fridge the day prior to desired use.  Continue as directed.


This post is linked to:

Tuesday, September 24, 2013

Baby Potatoes with Cipolline and Dill

Are you ready for a sumptuous side dish that tastes so delicious, and is so tremendously easy, that surely your mind will blow? Wait until you hear about this. Onions and potatoes. Nothing new you say?  How about Dutch Baby Potatoes and Cipolline Onions?  Sound more interesting? Whether it does or whether it doesn't, two men in my life who would happily pass up potatoes, both stuffed themselves with these to their surprise and to mine. Mr. O-P, a notorious hater of potatoes tried them only because I had dazzled him the week before with this recipe. He loved them!  My dad didn't get his short ribs and potato dinner until the following day. I'd given him enough meat and potatoes for two meals. He said the potatoes and onions were so good that he kept going back for more and eventually ate them all!

When I spotted this recipe in an old issue of Bon Appetit, I laughed at how boring it appeared. No way, I told myself, could butter, onions, and potatoes, in any combination, come together to make a dish that tasted anything other than mundane. Boy, was I wrong. 

I blanched and peeled the onions ahead of time, and made this dish during the first three innings of the ballgame. Now if you know me and baseball, you know that I wasn't paying one bit of attention to these potatoes. I had short ribs in the crockpot (tremendously good - short ribs, a packet of onion soup, and a cup and a half to Chianti, cooked on low all the live long day), a salad at the ready, and these potatoes. What a perfect pairing. On my busiest of days, this is going to be my go to meal. Company's coming?  Great!  They'll love them too.  

Baby Potatoes with Cipolline and Dill
Bon Appétit, November 1998

1 pound Melissa’s Cipolline onions
3 tablespoons butter
2 pounds Melissa’s Baby Dutch Yellow potatoes (each about 1 to 1 1/4 inches in diameter)
3 tablespoons minced fresh dill

Cook cipolline in medium saucepan of boiling water 3 minutes. Drain; rinse with cold water and peel. (Can be prepared 1 day ahead. Cover and refrigerate.)

Melt 2 tablespoons butter in large skillet over medium heat. Add potatoes; stir to coat. Cover skillet; cook potatoes until golden and almost tender, stirring occasionally, about 25 minutes. Mix in cipolline. Cover; cook until cipolline and potatoes are tender and golden, stirring occasionally, about 20 minutes longer. Mix in dill and 1 tablespoon butter. Season with salt and pepper. Transfer to bowl.


This post is linked to:

Monday, September 23, 2013

Coconut Macaroons


When the weather turns cool and the humidity drops (here in the Mississippi Valley that means 45%) it’s time to make macaroons.  As I was taking a couple of meals to dad, and knowing that he loves them, I decided to make a batch.  I always think of my number two son when I do.  Not because he loves them, but because he hates them.  It’s not the taste of coconut that bothers him, no, it’s the texture.  He describes it as bits of dried skin.  Graphic, right?  It kinda makes you think, doesn’t it?  It still doesn’t stop me from making them, or keep me from loving them, or appreciating the fact that they stir together quickly, bake up on two cookie sheets, and are ready for gobbling within the hour.

I like them with almond flavoring, big almond fan that I am, but they are equally delicious with vanilla.  I melted some milk chocolate chips to drizzle over the top, more for appearance than for taste (because, truth be told, you couldn’t taste the chocolate), you can add more, dip the bottoms in chocolate, or dip half of the macaroon in chocolate for greater visual appeal and a luscious chocolate taste.  Pretty much any way you decide to make them, they will be good.

Coconut Macaroons

1 bag (14 ounces) sweetened flaked coconut
1 can (14 ounces) sweetened condensed milk
1 tablespoon all-purpose flour
1 teaspoon almond extract
2 extra large egg whites
1/4 teaspoon kosher salt

Preheat the oven to 325° F.

Combine the coconut, condensed milk, flour, and extract in a large bowl. In a stand mixer fitted with the whisk attachment, whip the egg whites and salt on high speed until they form stiff peaks. Carefully fold the egg whites into the coconut mixture.

Drop the batter onto sheet pans lined with parchment paper using an ice cream scoop.  Bake for 25 to 30 minutes, until golden brown.  Drizzle with chocolate, if desired,


This post is linked to:

Friday, September 20, 2013

It all started with fish...


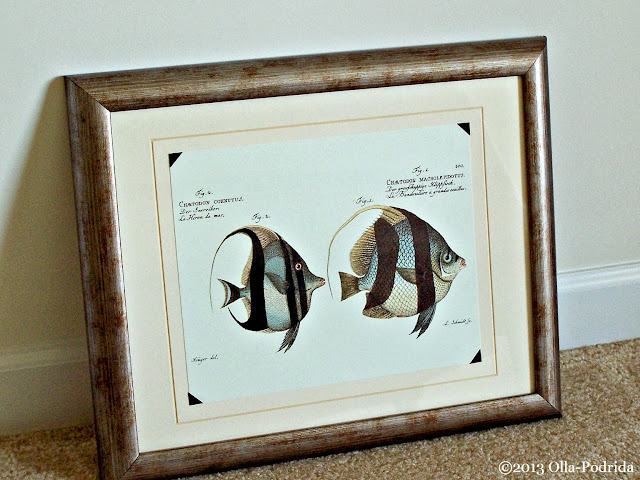
I fell in love with this fish picture at a local consignment store.  This is when I learned the fun of consigning.  I get rid of stuff I don’t want, and get to take home things that I do. I have loved fish and gravitated toward the East Coast since I was a child.  When I was ten I wrote the Chamber of Commerce of every Eastern seaboard state asking for travel information.  It baffled my parents and, I think, scared them a little.  They did not share my wanderlust, nor gravitated, it would seem, in any direction.

Not being able to ride my bike to the shore I started raising fish – fresh water, tropical, salt water.  I was lulled to sleep every night by the noise of the bubbler. It was not a bad way to drift off to dreamland.

Back to the present, a.k.a. REALITY.

When Mr. O-P came home from his hip surgery I was sent to the guest room.  He needed time to heal on his own.  Now, for a lover of solitude like me, you’d think this was no problem.  Well, take a look at the guest room.

Here is the layout of the lower level and the room.
Here are pictures showing just what each corner looks like.


Yep, a little room that has been ignored since I moved into this house about 20 months ago; it was the last of my priorities.  For the next six weeks or so, this, for lack of a better word, cell will become my home.  Are you stifling sobs?  Yeah, me too.

One of the problems is that not all of our furniture is here. Some remains at the old house. So, I always figured that I’d just wait to decorate this room.  You know, when I actually had decorative items, or even a bed.

I know there are A LOT of savvy decorators out there, so I need your help in telling me just what to do.  Keep in mind that my budget is pretty much $0.  More sobs? I know.

The headboard/footboard combination dates back to the 80s and I hate it.  Number two son suggested that I paint the headboard off white and distress it, and then bolt it to the wall, eliminating the need for the footboard.  I like this idea, plus, it will go with the theme.  Did I mention it is coastal?  Yes.  Those of us with no coastline, long for coastal.

I have moved a bed into this room and topped it with a rather mish mash of bedding from what I have on hand.
This chest, from an old set that son number one used, shown here at the old house, was muscled into my Subaru by number two son and my humble self earlier this week and is now in place in the guest room.  The sides have what look to be slats, so I plan on painting this an off white too, and I think those side planks will add to the coastal theme.
Here is what I like, all items found at a shop on a recent trip to the Lake of the Ozarks. 


I plan on painting the walls a sand colormaybe something like this


I want the colors of the room and bedding to be the colors of sea glass.


So, my question to you all isnow what?

Please comment!  Don’t be shy.  I’m desperate here!

This post is linked to: