Sunday, October 17, 2021

Christmas with Southern Living: Inspired Ideas for Holiday Cooking and Decorating, Reviewed

As an Amazon Associate I earn from qualifying purchases.

Lifestyle magazine Southern Living came into existence in 1966; when you are still in circulation after 50 years, you know that you’re doing something right. In addition to their wildly successful periodical, they have also published a series of lifestyle books including a Christmas annual. This year’s Christmas with Southern Living: Inspired Ideas for Holiday Cooking and Decorating is a real winner!

There is much to like about this book — the wonderful decorating styles, the beautifully photographed, mouthwatering recipes, the overall feeling of Christmas joy as well as one of my favorite parts, the included holiday planner.
I don’t know about you, but sometimes I have trouble getting it together over the holidays. If I’m honest, sometimes I have trouble getting it together, period. This book will help you if you’re anything like me because not only does it provide you with a calendar, it even tells you what to do! I love that! There’s also plenty of room for note taking, a special planning section strictly for decorating, a party planner, guest list, party to do list, Christmas dinner planner, gift and card log, and a guided section to help you highlight the successes of this year.
  If you are familiar with SL’s Christmas books, you’re going to want to get your hands on this one; if you’re unfamiliar, ditto. You will begin a long and happy tradition and eagerly await new ones year after year.

Now to the recipes! The recipes in this book are all doable no matter the level of culinary experience. Some take a little more time than others, but I have read through each and every one of them, and even a novice in the kitchen will be able to serve a fabulous dinner over the holidays. Each recipe is written in a clear and concise fashion. In many cases recipes have tips to help you through the process, swapping suggestions in case you don’t have all of the called-for ingredients; the photographs will help you plate your excellent meal in fine fashion.

Whether you are interested in preparing a classic Christmas dinner, or something more modern, all of your answers are in this book. I cannot recommend it enough.


Disclosure: I received a complimentary copy of this book from Abrams Books as a member of their Abrams Dinner Party 2021-2022.


Wednesday, October 13, 2021

Come to dinner, Pumpkin!

This post contains affiliate links.

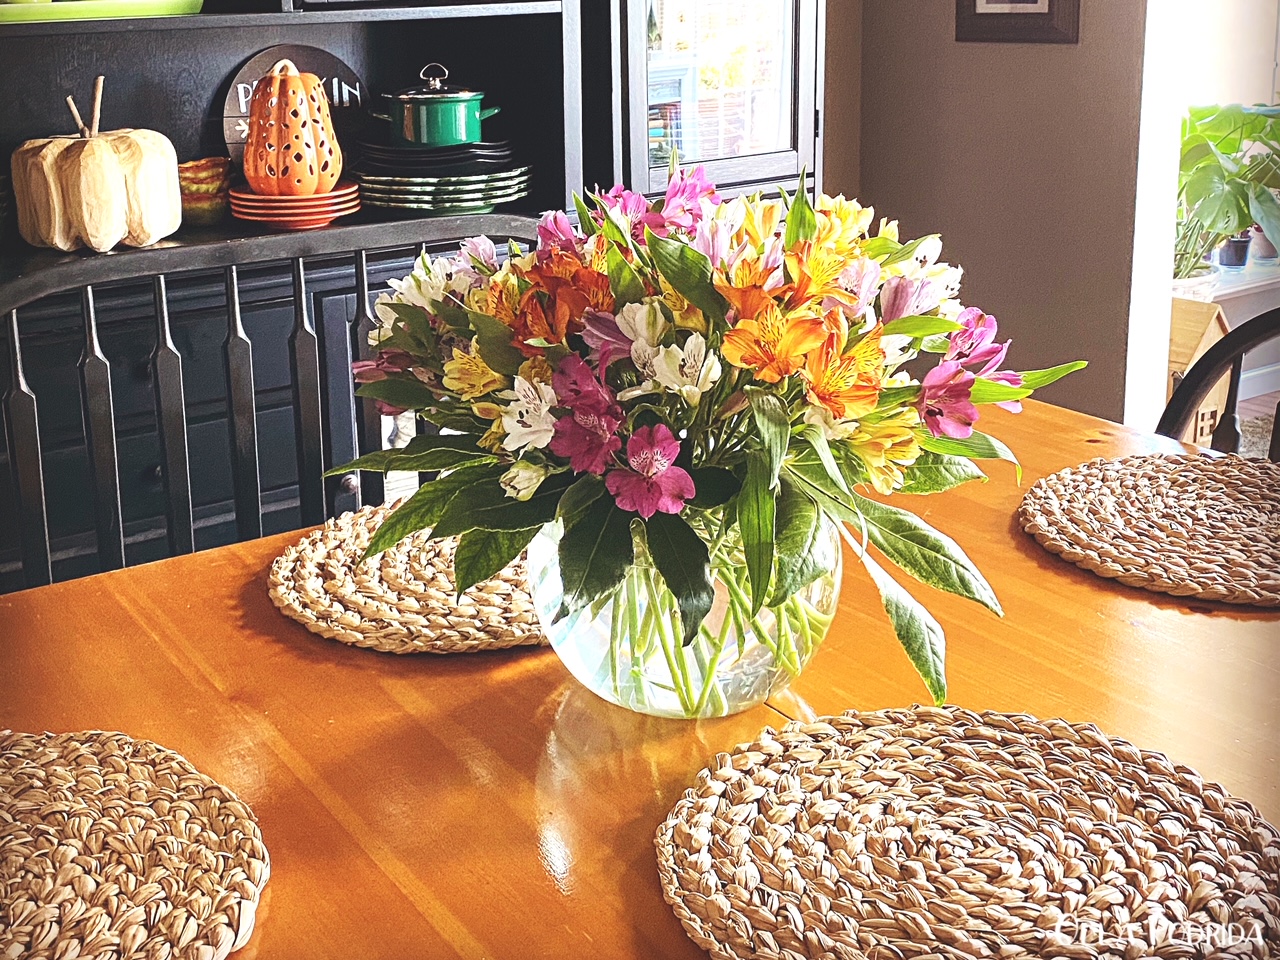
I got such beautiful flowers for my birthday that I decided to build a table setting around them. One reminiscent of colorful leaves, cool fall days, of wood smoke, and strong tea.

I chose to match all of the colors of the flowers in the dinnerware, glassware, and the purple votive candle holders. It’s bold, but I love it!


Here you’ll find a gathering of new items, of gifts, of inheritances, and memories galore.

Water hyacinth placemats make up the base. They are topped with Bordallo Pinheiro geranium leaf chargers. A lot of green is visible in fall, and I wanted to reflect that in my table.

The wavy edge plates are favorites of mine. I love the color and sunflower pattern. They are called, suitably, “Sunset Sunflower,” and they are from Maxcera.

 The lidded pumpkin bowls are from Pier 1, and were gifts for a milestone birthday. The pumpkin mugs I have had for years. They are from Starbucks from some time back in the 90s.

The amber stemware is from POSH in Chicago; the green water glasses I inherited from my mother. The small green salad bowls (that I had intended to fill with maple leaf cookies, but forgot) are also Bordallo Pinheiro.

Napkin rings are from Pier One, the napkins are from my mother. The yellow flatware is the “Radiant” pattern from Noritake. It was my mother’s, then mine, then hers, and then mine. We tended to pass things back-and-forth a lot as it suited us.

The purple votives I bought last year, on a whim, from Wal-Mart. I thought that they would look mysterious on a Halloween or fortune telling table.

  Also from Wal-Mart is the darling pumpkin-shaped cheese board with matching spreader.

 This post is linked to:

Tablescape Thursday

Tuesday, October 12, 2021

Slow Cooker Potato Soup

This post contains affiliate links.

I awakened to the sound of raindrops hammering the skylights. Flashes of lightning lit up the room, followed moments later by thunder that rattled the windows. It was a perfect morning. Fall is here! There was a cool nip in the air (I have yet to turn on my furnace), so I pulled the quilt up to my chin. I waited for the timer to turn on the coffee, and lie in bed listening to the burst of steam signaling it was ready. While I was enjoying my 1st cup, I assembled ingredients, and, in 15 minutes, had a big pot of potato soup in the crockpot. Four and a half hours later I tasted my first bite. This soup, like most of them, is better the second day, but it was wonderful for the first, and is super simple to put together. If you don’t feel like chopping vegetables, toss in some celery seed, and a tablespoon of instant minced onions. When it comes to potato soup, it’s all about the garnishes, so go heavy on those. A cup with half a sandwich makes a wonderful lunch, a big bowl, garnishes piled high, makes a hearty, seasonal dinner.

Slow Cooker Potato Soup

1 32-oz. pkg. cubed frozen hash browns*
1 rib celery, diced
1 large carrot, diced
2
Melissa's shallots, sliced
1 can cream of chicken soup
2 packets (6 T.)
Ranch Dressing mix
1/4 t. freshly ground black pepper
1/4 t. garlic powder
1/2 t. kosher salt
1 T. dried parsley
32-oz. chicken or vegetable stock
1 8-oz. pkg. cream cheese, cubed
2 c. shredded cheddar cheese

3 slices bacon, cooked and crumbled

Spray the inside of a
6-quart slow cooker with Pam. Put potatoes on the bottom, and scatter celery, carrots, and shallots over the top. In a small bowl, whisk together the soup, dressing mix, pepper, garlic powder, salt, and parsley. Pour over potatoes. Pour stock over potatoes. Place cream cheese on top, sprinkle cheddar cheese on top of that, and top everything with bacon. Put the lid on your slow cooker, and cook on low for four hours.

*Because I like peppers, I used a combination of potatoes O’Brien and shredded hash browns. I liked the taste, and I liked the different textures.


Monday, October 11, 2021

Peace, Love, and Pasta, Reviewed

This post contains affiliate links.

For the third year in a row I am representing Abrams Books as a part of their Abrams Dinner Party. The first batch of books has arrived, and they all appear to be winners. One of the beauties of reviewing books is that I get to try a lot of new recipes and share them with you. Last week, I shared the recipe for Pasta e Fagioli, a restaurant quality soup that can double as a meal. Today I’m going to tell you a little bit more about the book.

Peace, Love, and Pasta: Simple and Elegant Recipes from a Chef’s Home Kitchen by Scott Conant, may initially appear not, as the subtitle would suggest, simple. In quite a few cases, there are lengthy cooking processes, hard to find, perhaps unfamiliar ingredients, and techniques that may be foreign to the average home cook. That said, anyone who has a working knowledge of cooking, or the desire to turn everyday food into something restaurant quality, this book is for you.


 The recipes are plentiful and varied; the photos are positively mouthwatering. The desserts will make your eyes roll back in your head. The introductions to many of the recipes are both helpful and informative. You’ll feel as though you are sitting down with an old friend with whom you often exchanged culinary tips and ideas.


In addition to a cookbook, you will also get an education in Italian cooking, taught by the chef and owner of Italian-American dining destination, the Americano in Scottsdale, Arizona, Mora Italian in Phoenix, Arizona, and Cellaio, an Italian steakhouse in the Catskills. This book focuses on the dishes of Conan’s childhood, the ones that he makes for his loved ones today. These recipes combine sophistication and comfort to bring the absolute best to your table.

Disclosure: I received a complimentary copy of Peace, Love, and Pasta from Abrams Books as a member of their Abrams Dinner Party 2021-2022.

Friday, October 8, 2021

ABM Cheese Bread

This post contains affiliate links.


Yesterday I posted a recipe for tasty Italian soup. Today I am going to give you a recipe for something delicious to go with that soup, cheese bread. This bread is fabulous, and incredibly easy to make, thanks to the automatic bread machine. It’s delicious when warm, wonderful at room temperature, and absolutely superb when toasted to enjoy at breakfast the next day. It also makes a mean BLT.

ABM Cheese Bread
Adapted from Red Star Yeast

Bread:
1/2 c. buttermilk, warmed to 110° F
1/3 c. water, warmed up to about 110° F
5 T. unsalted butter, melted and slightly cooled
1 large egg, room temperature
3 c. bread flour
1 t. salt
¾ t. garlic powder
2 T. granulated sugar
1 packet (2¼ t.) yeast

Filling:
2 c. shredded cheddar cheese

Topping:
2 T. unsalted butter, melted
2 T. chopped fresh parsley (or your favorite herb)
¼ t. garlic powder
10 cheese cubes, your choice of cheese

Place bread ingredients, in the order listed, into the bowl of the bread machine. Put the machine on the “dough” setting and press “start.” When the cycle has run its course, turn the dough out onto a lightly floured work surface. Punch down. Roll the dough into a 9“ x 15“ rectangle. Sprinkle cheese all over the top, leaving a 1/2 inch border. Tightly (and I am talking TIGHTLY) roll the dough into a 15-inch log. Place the log seam side down on the work surface. Using a sharp serrated knife, cut the log in half lengthwise. Crisscross 1/2, cut side down on top of the other half, forming an “X.“ Tightly twist the two together. Pinch the outer edges to seal. Place in a greased loaf pan and cover with plastic wrap that has been sprayed with Pam. Allow the covered loaf to rest for 30 minutes. It will rise slightly.

Place the oven rack in the bottom third of your oven and preheat to 350° F. Whisk the melted butter, herbs, and garlic powder together, and drizzle over the top of the dough. Shove cheese cubes into various splits on the surface of the loaf. Bake until golden brown, about 45 to 55 minutes. If it begins browning too quickly, tent with aluminum foil. Remove from oven and allow to cool for 10 minutes on a wire rack. Remove from pan and cool completely before slicing and serving.


Thursday, October 7, 2021

Pasta e Fagioli

This post contains affiliate links. 

I find, as I get older that, like many others my age, I don’t cook as often as I used to. Three times a week does it for me, with Sunday being my main “in the kitchen” day. There is nothing I like more than chopping up ingredients that I’m going to use that day, or later in the week, and putting on a big pot of soup. Soup is one of my favorite foods. I love that a big bowl of it and a crusty roll make a meal; I love that I can pour some into a mug and have it as a snack. There is just something wonderfully soothing about soup, not to mention that it’s wildly nutritious. This recipe for iconic Italian soup will take you all day long, but the results are both plentiful and restaurant quality.


Pasta e Fagioli
From Peace, Love, and Pasta by Scott Conant

1 c. dried cannellini beans
1 c. dried borlotti beans
¼ c. extra virgin olive oil, plus more for serving
4 c. chopped yellow onions
1½ t. chopped fresh thyme
½ t. crushed red pepper
1 T. finely chopped garlic
1½ t. finely chopped fresh oregano
2 sprigs fresh rosemary
Kosher salt
8 oz. prosciutto ends, skinned and cut into ¼-inch dice
1 15-oz. can puréed tomatoes
2 qt. vegetable or chicken stock
2 c. dried
tubettini pasta
Grated Parmesan cheese, for serving
Roughly chopped fresh flat leaf parsley, for garnish

Soak the two types of beans in separate containers overnight
in 4 cups of water per container.

The next day, set the container of borlotti beans aside. Drain the water from the cannellini beans and place them in a pot. Add water to cover, bring to a simmer, and cook until tender, 1 to 1 1/2 hours. Drain the cooked cannellini beans and set aside.

In a large pot, heat the olive oil over medium high heat. Sweat the onions with the thyme, crushed red pepper, garlic, oregano, rosemary, and a little bit of salt to help release acid from the vegetables, 5 to 6 minutes. Continue to cook until the onions start to caramelize, 8 to 9 minutes. Add the prosciutto, if using, and cook for another minute. Add the tomatoes and cook for another minute, stirring to prevent the vegetables from burning. Pour in the stock, bring to a boil, then reduce the heat to a simmer. Drain the soaked borlotti beans, add them to the pot, and continue to simmer the broth until the beans are tender, about one hour

While the beans are cooking, cook the pasta in heavily salted water until tender. Drain the pasta, without rinsing, reserving the pasta water. Toss the pasta with a little olive oil to prevent sticking, and set aside.

When the borlotti beans are tender, add the cannellini beans and return to a simmer. Add half the pasta cooking water, return to a simmer, and cook for at least 40 minutes.

Allow the soup to cool slightly, then remove 1/4 of the beans from the pot and set aside. Using a slotted spoon, transfer the rest of the cooked beans to a blender and purée until smooth. (Or purée the soup in the pot using an immersion blender.)

Combine the tubettini and reserved beans and divide among four or six bowls. Pour the soup over the pasta and beans and serve immediately, topped with chopped parsley, grated Parmigiano Reggiano, and a drizzle of olive oil. (The beans and soup can also be prepared the day before, refrigerated, and reheated, but you may need to add some additional stock, as the beans will absorb a lot of liquid as they sit. Do not add the pasta before storing.)


Disclosure: I received a complimentary copy of Peace, Love, and Pasta from Abrams Books as a member of their Abrams Dinner Party 2021-2022.


Tuesday, October 5, 2021

Lunchroom Chocolate Peanut Butter Bars

This post contains affiliate links.


I am old school. Literally. I went to school before these lunchroom bars were popular. In fact, I had never even heard of them until I saw them online. They looked good, easy, and who doesn’t like the combination of peanut butter and chocolate? I must say that I was pleasantly surprised. These are not cloyingly sweet. They are sweet, but not overly so; the amount of peanut butter in the dough and topping is just right. The chocolate finishes these off to perfection. If, like me, you were never treated to these when you were in school, give them a try.

Lunchroom Chocolate Peanut Butter Bars

Slightly adapted from halfbakedharvest.com

 1½ sticks salted butter

2 c. creamy peanut butter, divided

¾ c. dark brown sugar

¼ c. granulated sugar

2 large eggs, room temperature

1 T. vanilla extract

2 c. flour

1 t. baking powder

½ t. kosher salt

 Frosting

1 stick salted butter, room temperature

2½ c. powdered sugar

½ c. dark cocoa powder

2 t. vanilla extract

¼ c. warm milk

Preheat the oven to 350° F. Line a 9” x 13” baking dish with parchment paper; set aside.

 In a microwave safe bowl, melt butter and ½ cup peanut butter, stirring every 30 seconds until creamy. (This took me one minute.) Whisk in brown sugar, sugar, eggs, and vanilla.

 Stir in flour, baking powder, and salt.

Press dough into the bottom of the prepared dish. Bake for 20-22 minutes, until set in the center. Remove from oven and immediately dollop remaining 1½ c. peanut butter over the crust, lightly spreading in an even layer. Cool completely.

 To make frosting: place butter, powdered sugar, cocoa powder, vanilla, and warm milk in a medium mixing bowl. Beat until smooth, adding additional warm milk as desired to reach spreadable consistency. Spread over bars and allowed to set. (This may take a couple of hours.) Slice and enjoy.