Showing posts with label shelter in place. Show all posts

Thursday, May 21, 2020

Frozen Creamsicle Crush

This post contains affiliate links.
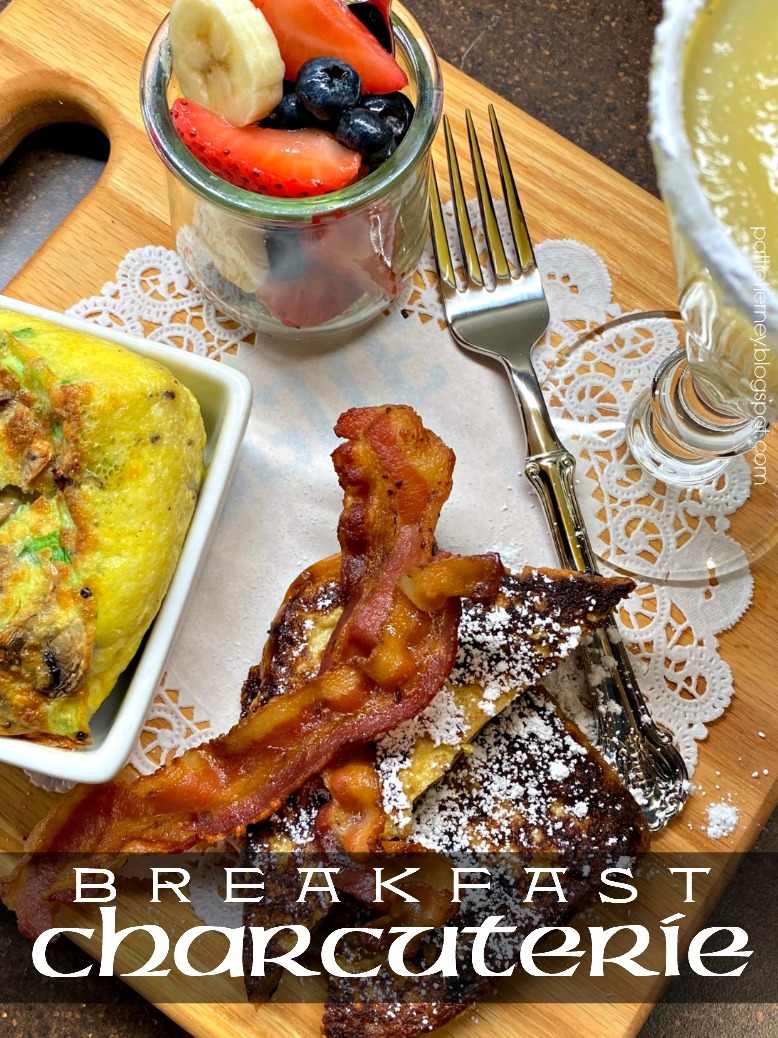
On Tuesday I told you about my charcuterie breakfast and gave you the recipe for Baked Eggs for One, today I am going to give you the recipe for that wonderfully delicious Frozen Creamsicle Crush. It’s not as easy for us to enjoy ourselves these days as it has been in the past, so I say get likker’d up early. Start at breakfast. It makes a whale of a difference in how you look at the rest of your day. I’m teasing of course…or am I? At any rate, whenever you decide to enjoy this, I think you’ll find it quite delicious.
 
Frozen Creamsicle Crush

1/2 of 6-oz. can frozen orange juice concentrate
½ c. water
½ c. whole milk
3 oz. Whipped Cream Vodka
¼ c. sugar
½ t. vanilla
5 - 6 ice cubes

Blend all ingredients in
high-speed blender for 30-45 seconds. Makes 3 cups.


Tuesday, May 19, 2020

Breakfast Charcuterie: Baked Eggs for One

This post contains affiliate links.
I’m sure that many of you are familiar with the popular charcuterie board. Essentially, it is a board full of attractively displayed and varied types of meats, cheeses, and condiments, along with cornichons, olives of all types, nuts, sometimes a bit of sweet, and flatbread or crackers. It is a fun way to relax with friends while enjoying cocktails, because it allows you to graze at your leisure.

Something new to social media is the breakfast charcuterie, similar to the above, but with items more suitable to the day’s first meal. Because we are all in self-isolation, I didn’t want to make (and had no need for) a large board, so I decided to make a breakfast charcuterie for one. It was so enjoyable to sit down with this beautiful meal. I’ll be giving you the recipe for the delicious cocktail in my next post (Yes, around here, cocktail hour is 24/7, give me trouble, and I’ll fight you.), but for now, I will share the recipe for the baked eggs.

This is a very versatile recipe. Mine was vegetarian, but feel free to add crumbled bacon, crumbled cooked sausage, or diced ham. I find it bakes up the best (and offers a serving significant enough to enjoy) in square ramekins like
these.
Baked Eggs for One

2 large eggs
1 T. whole milk
1 T. grated Parmesan cheese
2 button mushrooms, sliced
1 scallion, chopped
1/3 c. chopped, fresh spinach
Salt and freshly ground black pepper, to taste


Preheat oven to 350°F. Spray a small baking dish with PAM; set aside. Whisk together eggs and milk until light and fluffy. Stir in remaining ingredients. Pour mixture into the prepared baking dish and bake for 20-25 minutes until puffed and golden.


Monday, May 11, 2020

White Almond Snack Cake

This post contains affiliate links.
I like cake. I like white cake. I like bakery cake. I like wedding cake. My mother found this exasperating, because she didn’t think any of those cakes had much taste. I thought the taste was subtle, but wonderful. I’m not going to give you the whys and wherefores as to how much I love cake; you can read about that in my post about the White Almond Cake. No, today I’m going to give you a mini version of that White Almond Cake in this White Almond Snack Cake. Now, I’m going to be honest with you, it is a bit of work, but then isn’t everything? The plus here is that it only makes a small cake, and you don’t have to deal with stacking layers. This cake also makes wonderful petit fours if you’re looking to do that for a shower, tea party, or children’s party. All you need to do is cut these into small squares. Then get yourself a can of white icing, put it in the microwave for a minute, stir it up, and pour it over all of those little cake cubes. Allow the icing time to dry, and you will have the most precious little cakes, and can decorate them as you see fit. I just used a star tip to decorate this one. I made it for myself, but just because I did, doesn’t mean it can’t be pretty.
White Almond Snack Cake

½ c. butter, softened
1 c. granulated sugar
½ c. whole milk, room temperature
1½ c. cups cake flour
2 t. baking powder
4 egg whites, room temperature

Preheat oven to 350°F. Spray an 8” x 8” pan with Baker’s Joy; set aside.

In the work bowl of a stand mixer, beat butter at medium speed until creamy.  Gradually add sugar, beating until light and fluffy, 5-7 minutes.

Stir together milk, vanilla, and almond extract. Sift together flour and baking powder. With mixer set on low, alternately add flour and milk mixture, beginning and ending with flour. Beat until just blended.

In a separate bowl, beat egg whites at medium speed until stiff peaks form; gently fold into batter. Pour batter into prepared pan.

Bake at 350°F for 35-38 minutes or until a wooden pick inserted in center comes out clean. Cool in pan on wire rack for 10 minutes.
Frost with Almond Butter Cream Frosting

Almond Butter Cream Frosting

3 c. confectioners’ sugar
1/3 c. unsalted butter, room temperature
1 to 2 T. whole milk

Beat together sugar and butter in a large mixing bowl until creamy. Add remaining ingredients and beat at high-speed for five minutes, until light and fluffy, add more milk to thin, if necessary.


Tuesday, April 7, 2020

Thai Noodles with Peanut Sauce

This post contains affiliate links.
I like to think of myself as having nerves of steel, but when you get down to it, I really don’t. And thus, I have not been ordering food for delivery, because as soon as I think I’m ready to do that, I hear of yet another restaurant being closed down because some of their employees have tested positive.

I have really been craving Thai food, so I just decided to make my own. Let me say that, whether you’re a seasoned veteran or not, when it comes to cooking there’s not much that gets any easier than this. So if, like me, you’re longing for peanut noodles from your local Thai place, give this a try. My guess is that you’re going to have all of the ingredients on hand. If you don’t have radishes, substitute julienne strips of carrot.
Thai Noodles with Peanut Sauce

½ c. creamy peanut butter
¼ - 1/3 c. hot water
2 T. soy sauce
2 T. fresh lime juice
1 tablespoon brown sugar
½ c. radishes, cut in julienne
½ c. sliced scallions, white and green parts

Cook pasta according to package directions.

While the noodles are cooking, put the peanut butter, water, soy sauce, lime juice, chili paste, brown sugar, and garlic in a food processor and process until smooth.

Drain pasta, and return to the pot. Add the sauce and toss until well coated. If you need to add more hot water to loosen the sauce so it distributes easily over the noodles, now is the time.

Turn the pasta into a shallow serving bowl and top with the radishes and scallions. Toss and serve warm.

*If you don’t have chili garlic paste, mash up some garlic and whatever chilies you have together to form a paste.