Showing posts with label Taste of Home. Show all posts

Friday, March 22, 2024

Dolly Parton's Stampede Soup (Copycat)

Despite the fact that I have lived in Missouri pretty much all of my life, I have never been to Branson, ergo, am unfamiliar with Dolly Parton’s Stampede Dinner Theater, that, from what I’ve read, has attracted millions of people (at last count a whopping 20 million). Supposedly it is the world’s most visited dinner show attraction.

Part of its appeal, I’m told, is the four-course meal served in tandem with stunning live performances. A mainstay on the menu for decades is the show’s beloved Dolly Parton Stampede Soup. I had never heard of this before, the ingredients are few, and it sounded too easy to be any good, so naturally, I had to try it. I quite liked it. Don’t let its humble appearance fool you. It’s mild, but flavorful — real comfort food, particularly when served with biscuits on the side. I tend to make soup year round, and I think this will be the perfect summer soup, although indulging in winter is nice too. Next time, to make it heartier, I may just add a little cooked chicken.

Dolly Parton's Stampede Soup (Copycat)

From tasteofhome.com

 4 c. chicken stock*

1 bay leaf

1 t. onion powder

1 t. garlic powder

1 t. kosher salt

½ t. freshly ground black pepper

¼ c. cornstarch

¼ c. water

2 c. heavy cream

2 c. frozen mixed vegetables, partially thawed (e.g., a medley of green beans, carrots, corn and peas)

2 T. fresh parsley, finely chopped (for garnish)

In a large, heavy-bottomed stockpot, combine the chicken stock, bay leaf, garlic powder, onion powder, salt and pepper. Bring to a gentle boil over medium heat.

 In a small glass measuring cup, dissolve the cornstarch into the water, whisking together until lump-free.

 Once the seasoned stock is simmering, whisk the cornstarch slurry and heavy cream into the pot, and whisking until smooth.

 Add the vegetables to the soup (you can roughly chop them into smaller bite-sized pieces if yours are on the larger side). Bring the soup back to a simmer and then let cook, stirring occasionally, until thick and creamy, about 10 to 12 minutes.

 Once thickened, remove the bay leaf and then stir in the fresh parsley. Ladle into bowls and serve hot.

 *I use my own homemade 

As an Amazon Associate I earn from qualifying purchases.

Tuesday, August 8, 2023

Utah’s Pink Cookies

 
Am I the only one who hasn’t heard about Utah Cookies? Trust me when I tell you that these were totally foreign to me. Apparently these giant sugar cookies with pale pink frosting (mine didn’t turn out quite so pale) are a big thing in Utah. I just thought they looked darned good, so wanted to give them a try. I was not disappointed. The [apparent] original recipe is below. I found that the amount of frosting was WAY too much for the baker’s dozen cookies the recipe yields, so I cut it in half.

 Utah’s Pink Cookies

As seen on Taste of Home

 ½ c. unsalted butter, softened

¼ c. vegetable oil

½ c. granulated sugar

½ c. powdered sugar

1 egg

½ t. vanilla extract

½ t. almond extract

2 c. flour

½ t. baking powder

½ t. baking soda

½ t. salt

For the frosting:

½ c. unsalted butter, softened

6-½ c. powdered sugar

2-½ T. milk

1 t. almond extract

Pink gel food coloring

 Preheat the oven to 350°F.

 In the work bowl of a stand mixer, combine the butter, granulated sugar, powdered sugar and oil. Cream until well combined and smooth. Mix in the egg, vanilla extract, and almond extract.

 In a small bowl, combine the flour, baking powder, baking soda and salt. Mix the dry ingredients into the wet ingredients until a soft dough forms.

Line a baking sheet with parchment paper. Form large balls of dough, (about 3 T. each). Roll them into smooth balls and place 4-6 on the prepared baking sheet so they have plenty of room. Use the bottom of a glass dipped in granulated sugar to press down each ball of dough, keeping them about ½” thick. Chill the baking sheet for 10 minutes before putting the cookies in the oven. Bake the cookies for 8 minutes (do not over bake!), remove them from the oven, and allow them to cool on the baking sheet for 30 minutes.

 In a mixing bowl with a hand mixer, cream the butter. Mix in two cups of powdered sugar and the milk. Gradually mix in the remaining powdered sugar until the frosting begins to form. Turn the speed up on the mixer to whip the frosting until smooth. Mix in one to two drops of pink food coloring to achieve desired light pink color. Use a flat spatula to generously frost each cookie. Store in fridge.

As an Amazon Associate I earn from qualifying purchases.

Friday, July 16, 2021

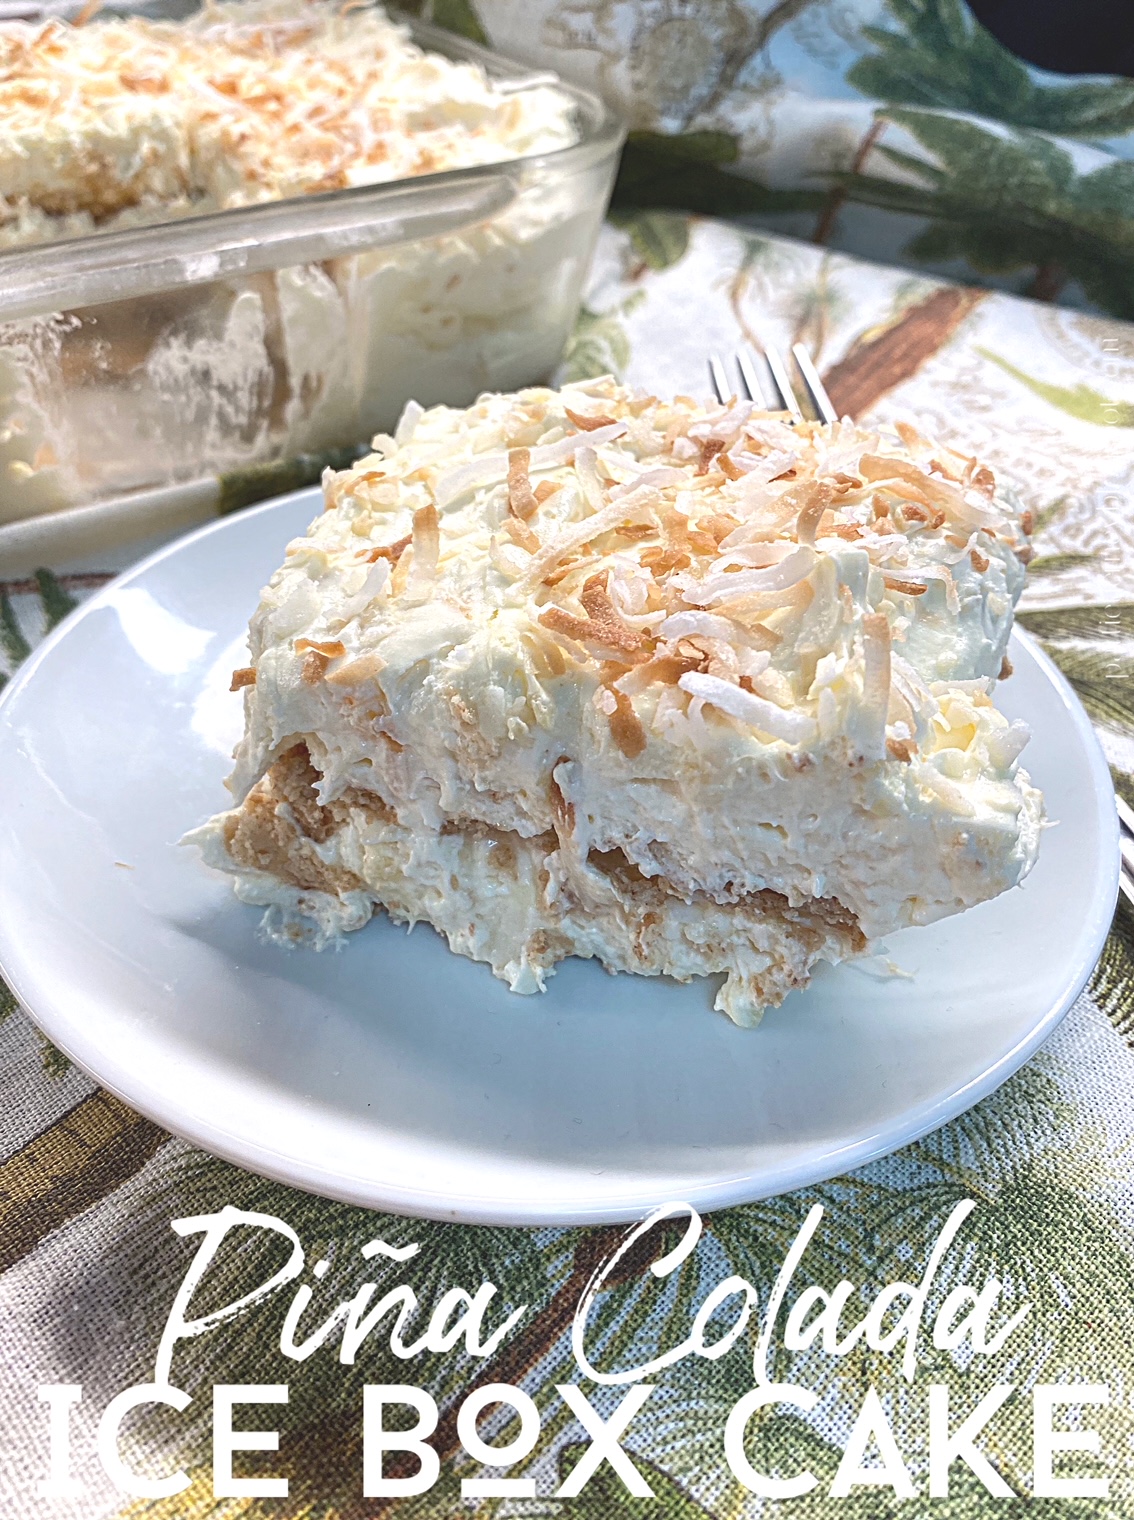
Piña Colada Icebox Cake

This post contains affiliate links.


I learned at an early age that “fluff” desserts were synonymous with summer. I can still see my mother icing those thin and crispy Famous Chocolate Wafers with sweetened whipped cream, stacking them in little columns to eventually be topped with a maraschino cherry. When I saw her making those, I knew that it was going to be a good day. Icebox cakes were another favorite of this fan of fluff. Here’s one for those of you who are fond of the piña colada. I adapted it from a recipe that I found in Taste of Home, to give it more punch.

Piña Colada Icebox Cake

1 8-oz. pkg. cream cheese, room temperature
½ c. confectioners’ sugar
1 t. rum extract
½ t. coconut extract
1 13.66-oz. can coconut milk, divided
1 3.4-oz. pkg. instant French vanilla pudding mix
1 8-oz. container Cool Whip, thawed
14-15 whole graham crackers
1 20-oz. can crushed pineapple, drained
1 c. sweetened shredded coconut, divided

In a large mixing bowl beat together cream cheese, sugar, and extracts until smooth and creamy. Gradually beat in one-cup coconut milk. Add pudding mix, and beat on low speed until smooth. Fold in Cool Whip and pineapple.

Pour remaining coconut milk into a shallow bowl. Dip half of the graham crackers into the milk and arrange in a single layer on the bottom of a 9” x 9” baking dish, breaking to fit as needed. Layer with half layer with half of the cream cheese mixture and 1/3 of the coconut. Repeat the layers (graham crackers, cream mixture, and 1/3 of the coconut). Toast the remaining third of the coconut and sprinkle on top. Refrigerate, covered, for four hours before serving.


Friday, May 10, 2019

Radish Asparagus Salad

Using fresh asparagus in new and inventive ways is a wonderful way to celebrate spring. Having spotted this recipe on the Taste of Home website, I knew I had to give it a try. I love asparagus, and I love radishes, so how could I possibly go wrong? As it turned out this is very good! It is fresh, and crunchy, with a wonderful sweet-spice dressing. It is pretty on a plate, and makes a wonderful light side salad with a cold supper or sandwich lunch. I couldn’t decide whether to use green or white asparagus, so I used half of each. Next time, for greater contrast, I will use black sesame seeds.
Radish Asparagus Salad
Adapted from Taste of Home

1 lb.
Melissa's asparagus*, trimmed, cut into 2” pieces
7 radishes, thinly sliced
2 tablespoons sesame seeds

DRESSING:
2 T. olive oil
2 T. thinly sliced green onion
1 T. Meyer lemon juice
2 t. sugar
¼ t. garlic salt
¼ t. grated lemon zest
Pinch freshly ground black pepper

In a large saucepan, bring 6 cups water to a boil. Add asparagus; cover and boil for 3 minutes. Drain and immediately place asparagus in ice water. Drain and pat dry. Transfer to a large bowl; add radishes and sesame seeds.

Place dressing ingredients in a jar with a tight-fitting lid; shake well. Pour over salad; toss to coat.

*To be festive, I used both green and white.

If you like radishes as much as I do, but have yet to have them roasted, you MUST try Roasted Radishes with Green Goddess Dressing.


This post contains affiliate links.

Friday, January 4, 2019

Cornbread Biscotti

I like biscotti, and I make biscotti, but I had never tasted a savory version before. Have you? That’s why, when I saw this recipe on the Taste of Home website, I knew that I had to try it. There were a number of reasons for this, other than simple curiosity. I don’t like to start my day with sweet, but I do like to start my day with convenience, and this seemed the perfect accompaniment to my morning cup of coffee, and I was right. Further, with this being soup season (and soup season is really year-around for me), these seemed like a wonderful accompaniment alongside a cup or bowl of soup, when crusty bread, a homemade roll, or half sandwich isn’t readily available. Right again!

I’m sure there are a lot of ways in which to consume these, dipped into chili is sounding good right about now, and I imagine two of them crisscrossed atop a fresh salad
would make quite a nice addition, but they are equally as good just plain (although they are mighty tasty with herb cream cheese, or a dollop of marmalade). Why not try something new this year?
Cornbread Biscotti

2 8.5-oz. pkgs. Jiffy Cornbread Mix
1 cup freshly grated Parmesan cheese, divided
2 teaspoons ground black pepper
2 teaspoons chopped fresh thyme
¼ cup cold unsalted butter, cubed
3 large eggs, divided
¼ cup cold whole buttermilk

Preheat oven to 350°F. Line a baking sheet with parchment paper or use a Silpat.

In the work bowl of a food processor, place cornbread mix, ¾ cup cheese, pepper, and thyme; process until combined. Add cold butter, and pulse 5 to 6 times until mixture is crumbly.

In a small bowl, whisk together 2 eggs and cold buttermilk. With processor running, add egg mixture in a slow, steady stream just until moistened. (Batter will be thick.)

Using lightly greased hands, spread dough into a 12” x 4” rectangle on prepared pan. In a small bowl, beat remaining egg, and brush over dough. Sprinkle with remaining ¼ cup cheese.

Bake until lightly golden and firm, about 20 minutes. Let cool for 10 minutes. Reduce oven to 300°. Using a serrated knife, cut crosswise into ½-inch-thick slices. Place slices cut side down on pan. Bake until golden and crisp, 15 to 20 minutes more. Let cool completely. Store in an airtight container for up to 1 week.

If this is too avant garde for you, you will love this more traditional version with a hint of the tropics, Caribbean Corn Bread.


This post contain affiliate links.


Monday, March 6, 2017

Thai Beef Stir Fry

One of the benefits of living alone, aside from the fact that I am the absolute queen of everything, is that I only have to please one palate when fixing meals. As a big fan of Thai peanut noodles, and other similar dishes, this week I embraced that love and made a wonderful Thai beef stir fry with peanut-y overtones. It came together in a flash, and tasted incredible. I found a rather sad looking (and probably ancient) chunk of sirloin steak in the freezer, so I used it, easily slicing it on the diagonal while it was still partially frozen. I did most of the prep work early in the day, so at dinnertime just tossed everything together, and had a tasty meal in minutes. I found this recipe online, and cut it in half so that I could enjoy it for two days and no more. It seemed to get better overnight in the fridge, so if it benefits you to make it ahead of time, the dish won't suffer for that.
Thai Beef Stir Fry
As seen on TasteofHome.com

1/2 cup packed brown sugar
2 tablespoons cornstarch
2 cups beef broth
1/3 cup reduced sodium soy sauce
1 teaspoon onion powder
1 teaspoon garlic powder
1 teaspoon ground ginger
1/4 teaspoon hot pepper sauce

2 pounds boneless beef sirloin, cut into thin strips diagonally
6 tablespoons olive oil, divided
2 cups fresh cauliflower florets
1-1/2 cups julienne carrots
4 cups fresh broccoli florets
2 cups sliced fresh mushrooms
1/4 cup peanut butter
Hot cooked spaghetti
1/2 cup chopped dry roasted peanuts

Combine the first eight ingredients in a small bowl, stirring until smooth; set aside. In a large skillet or wok, stir fry beef in 3 tablespoons of the oil until meat is no longer pink. Remove, set aside, and keep warm.

In the same skillet, stir fry cauliflower and carrots in remaining oil for five minutes. Add broccoli, and stir-fry for seven additional minutes. Add mushrooms and stir-fry for 6 to 8 minutes longer, or until the vegetables are tender crisp.

Stir broth mixture to combine, and add to the pan. Bring to a boil, and cook and stir for two minutes or until thickened. Reduce heat and add beef and peanut butter, cooking and stirring over medium heat until peanut butter is incorporated. Serve with spaghetti. Garnish with chopped peanuts.
 
This post is linked to:

Wednesday, December 7, 2016

Toffee Almond Sandies


Just between you and me, I've eaten so much chicken the past couple days that I'm starting to cackle. So I thought I'd change things up a bit today, and share a cookie recipe. If you like pecan sandies as much as I do, you are going to go crazy over this toffee version. I mean what's not to like? You've got the cookie, you've got chopped almonds, and you have those decadent, can't-stop-eating-them, chocolate-covered toffee bits.


This is an easy recipe to make, it makes a lot of cookies, and the dough freezes beautifully. I baked up 1/3 of the batch, rolled the rest into balls, bagged them, labeled them, and put them in the freezer. These are going to fly off of your cookie tray this holiday season.

Toffee Almond Sandies

Slightly adapted from Taste of Home


 1 cup butter, softened
1 cup granulated sugar
1 cup confectioners' sugar
1 cup canola oil
2 large eggs
1 teaspoon almond extract
4-1/2 cups all-purpose flour
1 teaspoon baking soda
1 teaspoon cream of tartar
1 teaspoon salt
2 cups chopped almonds
1-8 oz. package milk chocolate English toffee bits
Additional sugar for rolling

Preheat oven to 350°F.

In a large bowl, cream butter and sugars until light and fluffy. Beat in oil, eggs, and extract. Combine the flour, baking soda, cream of tartar, and salt; gradually add to creamed mixture and mix well. Stir in almonds and toffee bits.

Shape into 1-in. balls; roll in sugar. Place on ungreased baking sheets and flatten with a fork or the bottom of a glass (which is what I did). Bake for 12-14 minutes or until lightly browned. Yield: about 12 dozen.

This post is linked to:


Friday, October 7, 2016

Peanut Butter Cup Crack Brownies

This blog post will be brief because, well, look at the picture. Do I really need to go on and on gushing about how good these are? The name alone, Peanut Butter Cup Crack Brownies, pretty much says it all. 

I'd seen this recipe, as perhaps many of you had, making the rounds on Facebook. After seeing it again and again, I finally caved and decided I had to make it. I made a big pan, divided it up between my dad, and my two sons and their families, and waited for the response. As you can well imagine, thumbs up all around. These are easy to make, rich, sweet, chocolaty, peanut buttery, and delicious. Need I say more?

Oh. P.S. It's my birthday!
Peanut Butter Cup Crack Brownies

 1 pkg. fudge brownie mix (not family sized)
½ cup chopped salted peanuts
12 peanut butter cups, chopped
2 cups semi-sweet chocolate chips
1¼ cups creamy peanut butter
1 Tablespoon butter
1½ cups crispy rice cereal
1 teaspoon vanilla
¼ teaspoon kosher salt

Preheat oven to 350°F.

Prepare brownies according to package directions. Spread into a greased and foiled-lined 9” x 9” pan. Bake for 17-20 minutes, until a toothpick inserted near the center comes out with moist crumb.

Remove from oven and sprinkle with chopped peanut butter cups and chopped peanuts. Bake 4-6 minutes longer or until chocolate is melted. Cool on a wire rack.

Meanwhile, in a microwave-safe bowl, melt the chocolate chips, peanut butter, and butter; stir until smooth. Fold in the cereal, vanilla, and salt. Carefully spread over brownies. Chill until chocolate is set, about 2 hours. Cut into squares to serve.

Slightly adapted from Taste of Home

Tuesday, June 10, 2014

Chocolate Lover's Dream Cookies


I was rooting through the archives the other day, and stumbled upon the August 2009 issue of Taste of Home magazine and this recipe. Because I consider myself something of a cookie aficionado, I had to give these a try.  As with most cookie recipes (I am seldom disappointed in a cookie no matter how simple and unassuming) I was glad that I did. They are quick, easy, and garnered two thumbs up from our end. These do tend to be a bit on the sweet side, so be warned.  But if you hanker for a cookie that is densely chocolate, wonderfully chewy, and decadently sweet, this recipe is definitely for you.  It turned out that they were the perfect accompaniment to an evening cup of coffee, and repeat episode of The Closer.  Brenda Leigh would have loved them.

Chocolate Lover's Dream Cookies
Taste of Home August/September 2009

6 tablespoons canola oil
1/4 cup butter, softened
3/4 cup packed brown sugar
1/2 cup sugar
2 eggs
1 teaspoon vanilla extract
1-1/4 cups all-purpose flour
1/2 cup baking cocoa
1/4 teaspoon baking powder
1 cup white baking chips
1 cup (6 ounces) semisweet chocolate chips

In a large bowl, beat the oil, butter and sugars until well blended.  Add eggs, one at a time, beating well after each addition. Beat in vanilla. Combine the flour, cocoa and baking powder; gradually add to oil mixture and mix well. Stir in chips.

Drop by rounded tablespoonfuls 2 apart onto ungreased baking  sheets. Bake at 350°F for 12-15 minutes or until edges begin to brown. Cool for 1 minute before removing from pans to wire racks.
Yield: 3-1/2 dozen.

This post is linked to: