Showing posts with label gingerbread cookies. Show all posts

Tuesday, November 8, 2022

Honey Gingerbread Pinecone Cookies

As you all know, I am not much of a baker. I know I precede every baking post with that disclaimer, but it’s true. Essentially, what I’m saying here is that if I can do something successfully then so can you. One of my least favorite things to make is cookies because they are so labor-intensive. That said, I have a particular liking for cookie molds because I find the results to be so charming. Cookie molds can be rather expensive, so when I saw this one on Amazon for around $10, I couldn’t resist. Plus, I love the pine cone image during holiday time.

Ready for the oven.

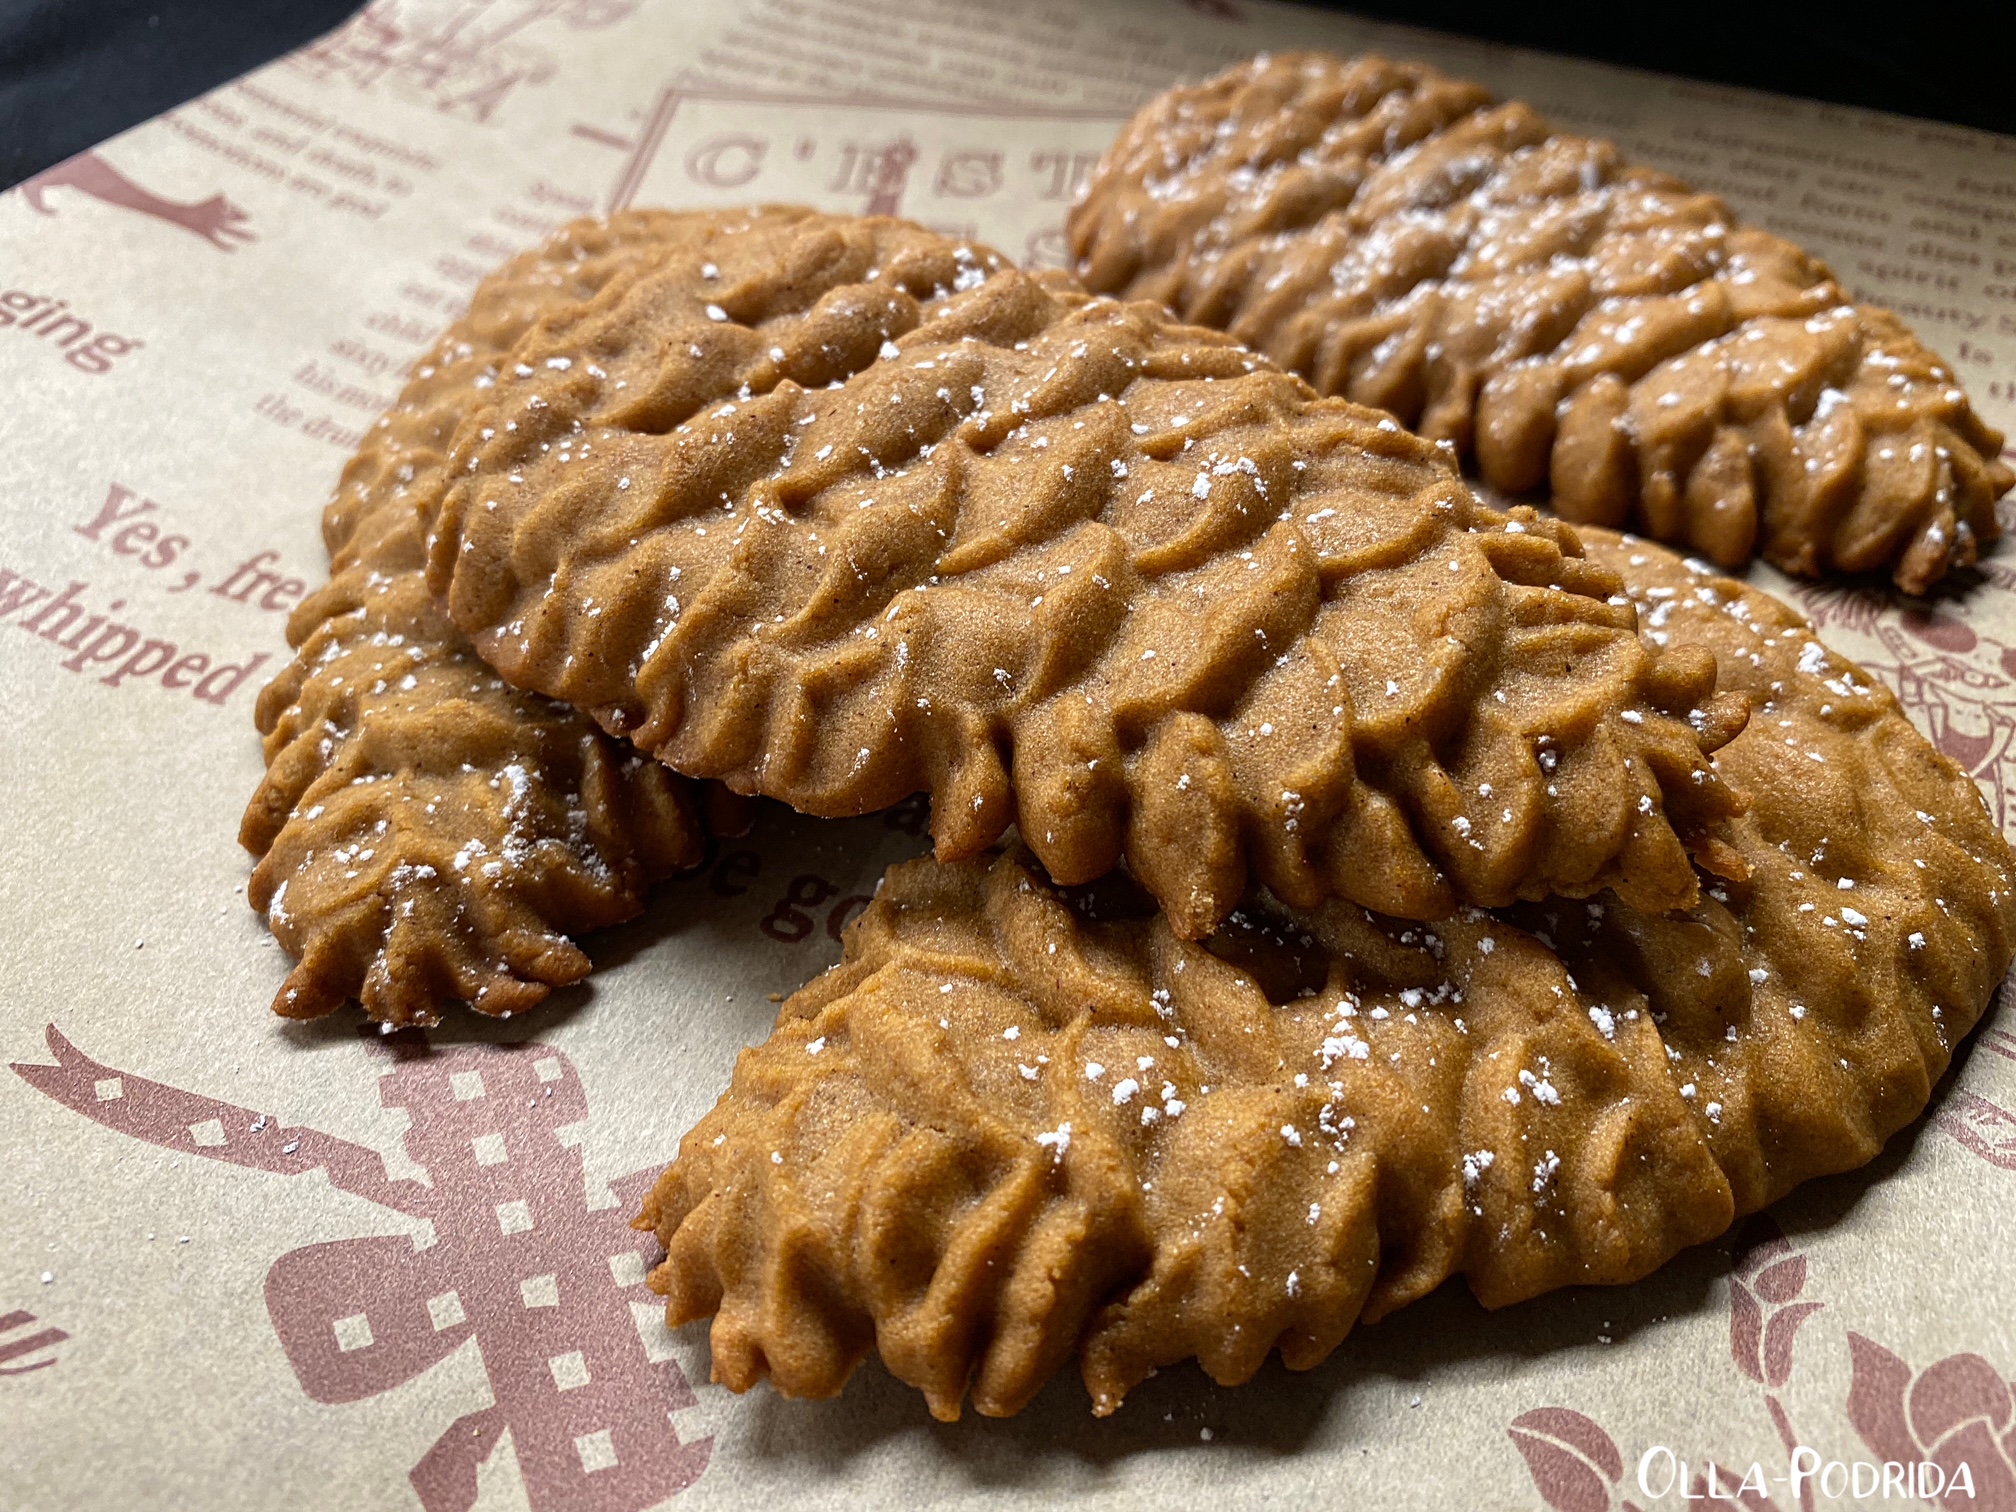
Yesterday I decided to give it a whirl, so I mixed up a batch of my honey gingerbread cookies and tried it out. I could not believe how beautifully this mold worked. If you are looking for a great gift for someone who enjoys baking, or eating cookies, here is your answer. The mold itself is deeply etched and, as you can see, produces a sharp, clear result.

Out of the oven.

Give these a try. They will be a pretty and delicious addition to your holiday cookie tray.

Deli paper source.

Honey Gingerbread Pinecone Cookies

 ½ c. Crisco

½ c. sugar

¼ c. molasses

¼ c. honey

1½ t. vinegar

1 egg, beaten

3 c. flour

½ t. baking soda

½ t. cinnamon

½ t. ginger

¼ t. salt

Bring shortening, sugar, molasses, and vinegar to a boil.  Cool; add egg.  Sift dry ingredients together.  Add to first mixture, mixing well.  Chill.  Press into cookie mold (See Notes). Place onto a cookie sheet lined with parchment or a Silpat.  Bake at 375°F for 8-12 minutes. Cool 5 minutes before removing from sheet.

 Notes: If molding cookies is new to you let me give you a couple of tips. First of all, don’t chill the dough; use it at room temperature. It’s much more pliable and will work its way into the small crevices of the mold much more easily. Second, don’t fret over it. Take a glob of dough, press it into the mold, and then using the heel of your hand, force it into all of those tiny spaces; let it overrun the mold. Once that’s accomplished, take a sharp knife, place the side of the knife blade at the base of the cookie mold and, using a sawing motion, saw off the excess dough in the same manner that you would fillet a fish. Turn the cookie mold on its side (the long side) and rap it firmly on a hard surface 4 to 5 times, and you will see it start to come loose. You can coax it out, or rap it a few more times and it will pop right out. I like to spray the mold with PAM every four or five cookies, just to make sure it comes out easily.

Plate Source.

As an Amazon Associate I earn from qualifying purchases.


Friday, December 17, 2010

HOLIDAY PROJECT #3 - Gingerbread Cookie Tags and Ornaments

And you thought gingerbread cookies were just for eating.  No, they can be a fun decorating element as well as a tasty holiday cookie.

A couple of years ago I decided that I was going to spend less time searching for, hauling, unpacking, decorating the tree, and then repacking all of the Christmas ornaments.  Considering, at one point, I decorated 9 trees, my supply, as you can imagine, is considerable.  But I found the holidays becoming overwhelming and had to ask myself whether time to relax and reflect was more important than making myself crazy creating a stunningly perfect atmosphere, and overwhelmingly, time won.

In order to provide myself with more time, I decided to embrace simplicity and go with a lot of edibles and organics on one of the two trees I continued to set up.  The kitchen-themed dining room tree became the "edible tree" decorated solely with cookies, candies, nuts and popcorn. It made for a fun tree, a real conversation piece, plus when the holiday was over, what hadn't been eaten or carried off was given to the birds or discarded and the only thing needing packing away was the tree.

Spicy Gingerbread Cut-Outs drizzled with white chocolate
In addition to making chocolate chip cookies with holes in the top through which I could thread ribbon and tie them to the tree, I also made gingerbread snowflakes.  I used the largest cooky cutter that I had in order to provide an eye-catching display.  Guests were encouraged to remove one to take with them on their way home.

I made plenty of cookies, too, drizzling them with both white and milk chocolate for inclusion on the ample cookie tray.  Then I took it one step further and free-hand cut out gift tags with the remaining dough, decorated, and personalized them (with the help of my son, Andrew, who made the leaves); these were then used in place of name tags on holiday packages.  I placed each one in a cellophane bag, tied the bag closed with a long length of curling ribbon, then tied that same ribbon onto the package.  Talk about rave reviews!


It was work, but it was fun and a lot of laughs, and it brought smiles to the faces of both young and old making the effort very worthwhile.  There are a lot of recipes for gingerbread cookies, so I encourage you to use your favorite, but if you don't have one of your own, here is a spicy version that you might enjoy.

Spicy Gingerbread Cookies

1 cup unsalted butter 
1 cup dark-brown sugar, packed 
2 large eggs 
1 cup unsulfured molasses
6 cups sifted all-purpose flour 
1 teaspoon baking soda 
1/2 teaspoon baking powder 
4 teaspoons ground ginger 
4 teaspoons ground cinnamon 
1-1/2 teaspoons ground cloves 
1/2 teaspoon finely ground black pepper 
1-1/2 teaspoons salt 

Raisins, dragées, and/or red hot candies for decoration (optional)

Royal Icing for decoration (optional)

In a large bowl, beat together butter and sugar until light and fluffy. Beat in eggs and molasses. In another bowl, sift together flour, baking soda, baking powder, spices and salt. Stir flour mixture into butter mixture. Divide dough into thirds and wrap each third in plastic wrap. Chill for about 1 hour. Preheat oven to 350 F. Roll dough 1/8 inch thick between two pieces of waxed paper. Cut into shapes with cookie cutters. Transfer shapes to ungreased cookie sheets. If desired, decorate with raisins, dragées, and/or red hot candies. Refrigerate about 15 minutes. Bake for 8-10 minutes or until crisp but not dark. Allow to cool on the cookie sheet for 1 minute, then remove to wire racks to cool completely.


For more holiday cookie recipes, treat yourself to Martha Stewart's cookie book.


Martha Stewart's Cookies: The Very Best Treats to Bake and to Share (Martha Stewart Living Magazine)


This post is linked to Foodie Friday and Show and Tell Friday, and Metamorphosis Monday.