Friday, January 12, 2024

Chopped Hoagies

 
I’ve seen a number of recipes for sandwiches similar to this one online and decided to give it a try. The beauty of the sandwich filling is that it also works as a wonderful little side or main dish salad. Me? I prefer it mounded onto a hoagie roll. Everything can be prepped ahead of time, the dressing added, the ingredients tossed together, and you have a fresh and delicious sandwich. With the Super Bowl coming up, you might give this some consideration. Prep everything ahead of time, and mix it together at halftime to enjoy during the last two quarters of the game. It would work equally well at a picnic. Either way, give it a try.

Chopped Hoagies

Makes 2

 ¼ lb. Genoa salami

¼ lb. ham

¼ lb. mozzarella

¼ lb. Muenster cheese

1 c. chopped iceberg lettuce

¼ c. finely diced red onion

¼ c. Melissa’s pickled jalapeños, seeded* and chopped

½ c. diced cherry tomatoes

½ t. Everything But the Bagel Seasoning

1/3 c. Duke’s mayonnaise

1 T. Zesty Italian Salad Dressing Mix

2 hoagie rolls

Dice the meat and cheeses into nice little squares and place them into a large bowl along with the lettuce, red onion jalapeños, and cherry tomatoes; toss well to combine.

In another, small bowl, whisk together the mayo, Italian dressing mix, and bagel seasoning, until creamy and smooth.

Pour the prepared dressing over the meat, cheeses, and vegetables, toss to combine and mound into hoagie rolls.

 *If you like more heat, leave the seeds in.

As an Amazon Associate I earn from qualifying purchases.


Thursday, January 11, 2024

Snowy Woods Tablescape

 
I always associate the month of January with snow, but statistics indicate that, in my part of the country anyway, more snow falls in March than it does January. Go figure.

This table setting came about because, in looking back at all of the friendships that I have lost due to their passing, I remembered one Christmas about 25 years ago when friends of ours gave us a crystal snowman. What is unique about the snowman is that the silver-plated metal arms that look like twigs are held in place by magnets embedded in the snowman.  That way the positioning can be changed up anyway that you like.

 
The last time I remembered using the snowman was at my former home that I haven’t lived in since 2012. That sent me on a quest to the belly of the beast wherein I dug through every box until I found it. I can’t tell you how happy it made me to find this. I put it on my table in the Conservatory, little tufts of polyester fiberfill snow around it, and put a couple of lighted trees in place to make it look like winter.
 
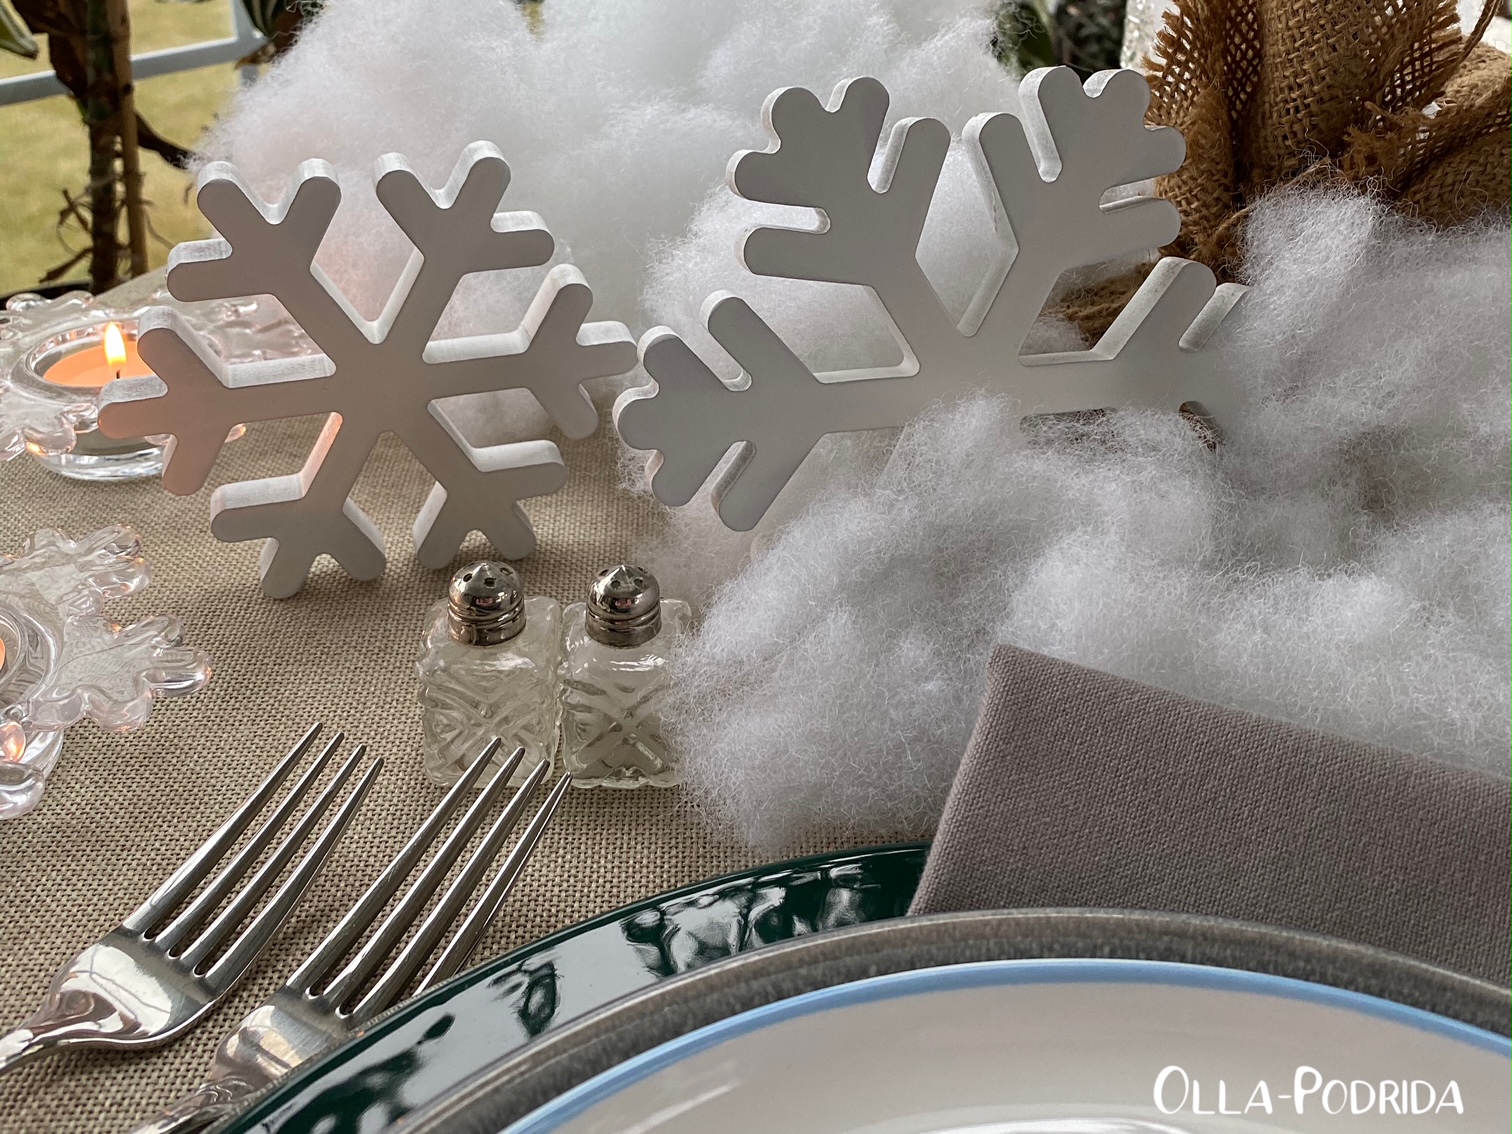
I chose an unobtrusive beige tablecloth, as well as tin chargers. I wanted a silvery frosty look, and that worked for me. On top of the tin chargers are smaller Italian chargers that used to belong to my mother. They have a forest green border, and I chose them so that they would pick up a little bit of green in the evergreens in the centerpiece.
On top of these, I have simple gray plates from Arora, topped with a cute little snowman plate, a part of the “Snowman Forest” pattern from Mikasa.

I chose simple, gray napkins, so as not to compete with the snowman design on the plate, and hammered flatware (also from Mikasa) to give the place setting a bit of an icy look. I combined La Rocher glassware with a vintage juice glass, again to get a bit more sparkle.


 Scattered around the table are my favorite snowflake tea light holders that I got years ago from Crate & Barrel; they have certainly served me well over the years. In addition, I have little white wooden snowflakes, in three sizes, to set the snowy mood. Cups and saucers are simple snow white cappuccino cups.

I intend to enjoy this table throughout the month of January. I like the icy coolness of it.

Stay warm!

 As an Amazon Associate I earn from qualifying purchases.

 This post is linked to: Tablescape Thursday


Tuesday, January 9, 2024

Cream Cheese Wrapped Olives

This week I am continuing with my olive love fest with this wonderful appetizer that can be changed up in a variety of ways, made ahead, and is as deliciously appropriate at elegant occasions as it is at more casual ones.

Any variety of stuffed olive can be used. I used
jalapeño-stuffed olives for this batch, but feel free to use pimento-stuffed, garlic-stuffed, or blue cheese-stuffed; they all work, and each one has its own subtle difference. The olive juice in this recipe can be cut in half, the other half replaced with gin for a dirty martini variety. The ingredients are simple and few, and most likely things that you already have on hand, making this perfect for last-minute plans.

Cream Cheese Wrapped Olives

 1 jar queen green stuffed olives

8 oz. cream cheese, room temperature

½ t. garlic salt

¼ t. freshly ground black pepper

1 T. freshly grated Parmesan

2 T. olive juice, or brine from the jar*

½ c. walnuts, crushed

 Place olives, hole side down, on a plate lined with a double layer of papers towels to drain.

 In a medium bowl place cream cheese, garlic salt, black pepper, Parmesan, and olive juice or brine. Beat with an electric mixer until smooth. Chill until firm, about 30 minutes.

 Once mixture has chilled, give the olives a bit of a pat down with a paper towel, and wrap in the cream cheese mixture (it will be a bit sticky) by pressing it around the olive until it is completely covered. Roll in crushed walnuts.

Skewer each with a toothpick, place into your favorite olive server, and return to the fridge, lightly covered, until ready to serve.

 Great for charcuterie!

As an Amazon Associate I earn from qualifying purchases.


Monday, January 8, 2024

Oven Baked Meatballs

 
I don’t know about the rest of you, but as soon as the holidays are over, I want simple food. I want food that is easy to make and easy to eat. Nothing fancy, nothing on a skewer, nothing with colored sugar, the simpler the better. In most cases, this generally means meatloaf, but I was feeling more like meatballs this year, and looking for the easiest possible way to make them. These oven-baked meatballs were the answer. There’s nothing to putting them together, I used an ice cream scoop to measure them out, and in no time they were in the oven baking while I put my pasta water on to boil.  Believe it or not, it was a 30-minute meal.Oven Baked Meatballs

1 lb. ground chuck

½ c. Italian breadcrumbs

¼ c. freshly grated Parmesan cheese

2 cloves garlic, minced

½ small yellow onion, grated

2 T. marinara sauce

1 T. dry red wine

1 T. Italian seasoning

½ t. kosher salt

¼ t. freshly ground black pepper

1 large egg, slightly beaten

 Preheat oven to 375°F. Line an edged baking sheet with parchment or a Silpat.

 In a large mixing bowl, whisk together all ingredients EXCEPT ground chuck. Once that is thoroughly combined, add the beef, and mix well with your hands. I find I’m most comfortable doing this when wearing kitchen gloves.

 Use an ice cream scoop to portion the meat out, roll into balls, and place on the prepared baking sheet.

 Bake for 35 minutes, or until the meatballs are browned and cooked through. Remove and transfer to sauce or serve immediately.  As an Amazon Associate I earn from qualifying purchases.


Friday, January 5, 2024

Cream Cheese Olive Dip

 
I have a thing for olives, I just cannot resist them. As a consequence, I have an entire shelf in one of my kitchen cabinets filled with a wide variety. While I do enjoy a pimento-stuffed olive, I particularly enjoy those stuffed with garlic, jalapeño, or blue cheese. I have black olives, Kalamata olives, queen olives, stuffed olives, olive medleys, and olives that have no filled centers at all. I like to use them in all kinds of recipes, and find they never let me down. I have added them to dressing that I have stuffed into a turkey, to a vinaigrette that I tossed with fresh lettuce, included them in the dough when I made biscuits, and when I found this recipe online, I had to make it. It made me wonder why I hadn’t thought of using olives in a vegetable dip before, but having now done so, will make it again and again.
 
 This is so tasty! Not just due to the olives, but the acidity of the lemon juice gives it excellent flavor as well. This would be great on your Super Bowl buffet, make a wonderful spring and summer snack,  or a light lunch by spreading it on toast points or crackers.
Cream Cheese Olive Dip

Slightly adapted from Hearth and Vine

 8 oz. cream cheese, room temperature

½ c. Duke’s mayonnaise

1 clove garlic

1 t. minced onion

½ t. dried thyme

½ t. kosher salt

2 T. fresh lemon juice

12 small olives

2 dashes Tabasco sauce

Combine all ingredients into a food processor. Pulse until well blended. Scrape down the sides and blend again. Spoon into a bowl and serve with a variety of fresh cut up vegetables.


As an Amazon Associate I earn from qualifying purchases.

Wednesday, January 3, 2024

Olive Ham Salad

How did the holidays turn out for you? Ultimately, mine were reasonably good although they didn’t turn out entirely as anticipated. Due to illness, the dinner that I made for Christmas Eve was only enjoyed by my son and me. It was a pretty fancy dinner for just the two of us, but I think we really enjoyed not just the food, but the time that we spent together in such elegant surroundings.

 I sent him home with plenty of food, but I still had a good bit of ham left, as well as the ham bone. I set the bone aside to use in pea soup, used slices in casseroles and sandwiches, and decided to toss what was left into the food processor for ham salad. Generally, when I make ham salad I use sweet pickle relish, but because I had gotten a glazed ham that had a lot of its own sweetness, I decided to replace the sweet pickle relish for olives. It made a wonderful difference!

Olive Ham Salad

 ¾ lb. piece of baked ham, cut into chunks

1 rib celery, cut into fourths

1 scallion, cut in half

10 small pimiento-stuffed olives

1/3 c. Duke’s mayonnaise

1 t. Dijon mustard

Few gratings ground black pepper

Put all ingredients into the work bowl of a food processor, and pulse until. Cover and chill for at least a Cover and chill for at least an hour before serving to allow flavors to meld.

This will keep up to three days, covered and refrigerated.

As an Amazon Associate I earn from qualifying purchases.


Tuesday, January 2, 2024

Toasted Cheese Rounds

 
If you are in need of a last-minute appetizer, would like to plan for some point in the future, or are looking for a wonderful accompaniment to soup or salad, these toasted cheese rounds are your answer. They are simple to put together, contain ingredients that you likely already have on hand, and are golden bits of cheesy deliciousness.  Guests will love them, and gobble up these cheesy comestibles like there’s no tomorrow. You just may want to make a double batch.


Toasted Cheese Rounds

1 c. Duke's mayonnaise

1 c. grated mozzarella

1 c. grated sharp cheddar

1/3 c. grated Parmesan cheese

Pinch of garlic powder

Pinch of dry mustard

Freshly ground black pepper, to taste

4 scallions, minced

40 ½" thick slices of French baguette

 Preheat the oven to 350°F. Line a baking tray with parchment or a Silpat; set aside.

Place all ingredients (except the bread) into a medium bowl, and mix to combine.

 Dollop a bit of a generous amount of cheese mixture onto one side of each slice of the bread rounds, place cheese side up on your prepared baking sheet, and bake for 15 minutes until bubbling and golden brown.

 NOTE: These can be prepared ahead of time and frozen for use at some point in the future. Freeze them on a baking tray until solid. Then remove from breaking tray and place in a zipper top freezer bag to until ready to use. To bake from frozen add five minutes to baking time.

As an Amazon Associate I earn from qualifying purchases.