Friday, July 30, 2021

Jungle Nights Tablescape

This post contains affiliate links.

This table setting came about quite by accident. I was folding clothes and pieces of yardage that I had laundered for storage. I had turned the right sides together on a large piece of black denim, and found the wrong side to be quite interesting. I spread it out on top of the table, and it gave me a kind of a jungle feel. Does this, or does this not remind you of snakeskin? It did me, and I could just see that snake dangling out of a tropical tree. A jungle theme, I thought, and here is the result.

The conservatory that was completed in the spring (for those of you who have followed me for sometime let me just say that the lanai is no more) definitely has a jungle vibe. I pulled the monkey bookends off of the bookshelves, grabbed some books, a pair of Amiri fans, plants, and piled it up in the center. A few plates later and the table was done.

 The centerpiece is really the star of this show. Nearly all of it I inherited from my mother. The delightful monkeys were hers as well as the trio of Moroccan lanterns (A good selection of these can be found on Amazon, beginning here.).

 Plants are straight from the conservatory.

 The chargers are Bordallo Pinheiro geranium leaf plates; the square dinner plates are on old offering from Rachael Ray. They are no longer available, but you can get something similar here.

  The bamboo-handled flatware is always fun to use and works perfectly in an exotic setting.

 I wanted to mix things up a bit and add some sparkle, so I used my mother’s crystal knife rests. It’s not often that you see these, I can tell you! Hers are vintage, but you can find something similar here.

 The stemware was my mother’s as were the napkins. The stemware is Fostoria, and was discontinued years ago, but a similar version can be found here.

 The wonderful bamboo bordered palm and banana tree salad plates are by Fitz and Floyd. Two different tree designs are on these plates, the design is called “Cape Town.”

 I hope that you enjoyed viewing this table as I did creating it.

  This post is linked to:

Tablescape Thursday


Tuesday, July 27, 2021

Pinkglow Pineapple Sorbet

This post contains affiliate links.

Around here we are into the heat of summer. That means we are looking for cool and refreshing sips and nibbles to enjoy during this hot time. One thing that I find wonderfully refreshing is fresh fruit sorbet. It is intensely flavorful, deeply chilling, and when mixed with rum and whirred in a blender, makes one heck of a frozen cocktail. This version was made using a Pinkglow pineapple, provided to me (with my enduring thanks) by Melissa’s Produce. Not only is it very pretty, but it is deliciously sweet, and makes a lovely presentation to serve to your grateful guests.

Pinkglow Pineapple Sorbet

½ Pinkglow pineapple, peeled, cored, and cubed (two cups)
½ c. sugar
1/3 c. water
2 T. pineapple rum

Place all ingredients into a food processor, and process until creamy. Refrigerate for at least one hour before processing in an ice cream maker. Put into an airtight container and freeze.


Monday, July 26, 2021

Brie and Apricot Jam Grilled Cheese

 This post contains affiliate links.

  Earlier in the month I reviewed The Happy Sandwich Cookbook by Jason Goldstein. You can find that review here. In the comments, Gina mentioned wanting to see the recipe for the brie and apricot sandwich, so girl, this post is for you. I have to admit, this sandwich is delicious. In fact, I have yet to find one in the cookbook that I didn’t enjoy. This is the last recipe that I’m going to give you from the cookbook, you’re just going to have to buy a copy of your own. Trust me when I tell you that you certainly will not regret it.

Brie and Apricot Jam Grilled Cheese

8 T. apricot jam or orange marmalade

¼ c. chopped roasted hazelnuts

1 wheel double cream brie, sliced

Mayonnaise

8 slices sourdough bread

 Spread mayonnaise on both sides of each slice of bread.* Spread some jam on one side of each slice of bread, then sprinkle chopped hazelnuts onto the jam. Lay some brie slices on the bread, fanning them out to cover the slice. Place another slice of bread on top. Cook in a pan on medium heat for three minutes per side.

 *I only spread mayonnaise on one side of each slice of bread. This is done in place of butter, and it facilitates the most beautiful, even, golden brown toastiness that you can imagine.


Friday, July 23, 2021

Honeydew Peanut Salad with Mint & Thai Basil

This post contains affiliate links.

Summer is the season of salads, and as such, I have been making plenty. Lately I have been fixated on melons, honeydew in particular. It’s surprising how well melon pairs with a wide variety of salad ingredients. While paging through The Complete Salad Cookbook from America’s Test Kitchen, I ran across a honeydew and peanut salad and decided to put my own spin on it. This is a unique combination of ingredients that works fabulously well together. It has a bit of an Asian bent, so if you’re serving an Asian main dish, this would be the perfect side salad. Cool, refreshing, and flavorful.

Honeydew Peanut Salad with Mint & Thai Basil

1
Melissa’s honeydew melon
1 large Melissa’s shallot
1 Melissa’s pickled jalapeño
2 T. fresh chopped mint
1 T. fresh chopped Thai basil
1/4 c. chopped
dry roasted peanuts
Baby spinach
Raspberry vinaigrette (recipe below)

Remove seeds from melon, and cut into small cubes, about 1" x 1". You should have about 4 cups. If you have more than that, set the extra aside for another use. Place in a large bowl. Slice shallot paper thin (I used a
mandolin), and scatter on top of melon. Remove stem and seeds from jalapeño, thinly slice, and add to the bowl. Add mint, Thai basil, chopped peanuts, and drizzle with raspberry vinaigrette. Toss and serve on a bed of baby spinach.

Raspberry Vinaigrette

1/4 c. canola oil
1/4 c. raspberry balsamic vinegar
3 T. granulated sugar
1 t. Dijon mustard
Pinch salt
Pinch freshly ground black pepper

Combine all ingredients EXCEPT oil in a small mixing bowl. Whisk together until blended. Continue to whisk as you slowly pour in the oil. Whisk until emulsified.


Thursday, July 22, 2021

Tate’s Chubby Chocolate Chip Cookies

This post contains affiliate links.

 It never ceases to amaze me just how many recipes there are for chocolate chip cookies. The amounts and combinations of, essentially, the same ingredients is astounding. I am a fan of Tate’s Bakeshop, Kathleen’s various cookbooks (Tate’s Bake Shop Cookbook; Kathleen’s Bake Shop Cookbook: The Best Recipes from Southampton’s Favorite Bakery for Homestyle Cookies, Cakes, Pies, Muffins, and Breads; Tate’s Bake Shop: Baking for Friends; and the delightful, Tate’s Bake Shop: Baking with Kids), and their legendary thin and crispy chocolate chip cookies, so when I saw this recipe in a recent issue of Sweet Paul, I had to give it a try. I won’t say these are my new favorite because, truth be told, I love them all, but I do like the chewier interior on these. If that is something that appeals to you as well, give this recipe a try.


Tate’s Chubby Chocolate Chip Cookies

As seen in Sweet Paul

 2¼ c. unbleached all purpose flour

1 t. baking soda

1 t. salt

1 c. firmly packed dark brown sugar

12 T. salted butter, room temperature

½ c. granulated sugar

1 T. light corn syrup

1 large egg plus one large egg yolk, room temperature

2 T. pure vanilla extract

2 c. semi sweet chocolate chips

 Position the oven racks on the top third and center of the oven and preheat to 325°. Line 2 large rimmed baking sheets with parchment paper or silicone baking mats.

 In a medium bowl, whisk together flour, baking soda, and salt. In a large bowl beat the brown sugar, butter, granulated sugar, and corn syrup with an electric mixer on high speed until combined, about one minute. Beat in the eggs, egg yolk, and vanilla. With a mixer on low speed, mix in the flour mixture, just until combined. Mix in the chocolate chips.

 Using 2 tablespoons per cookie, drop the dough about 3 inches apart onto the prepared baking sheets. The mounds of dough can be frozen on the baking sheets until hard, then transferred to a Ziploc plastic bag and frozen for up to one month. Bake without thawing.

 Bake, rotating the positions of the sheets from top to bottom and front to back halfway through baking, until cookies are lightly browned on the edges, about 18 minutes.


Tuesday, July 20, 2021

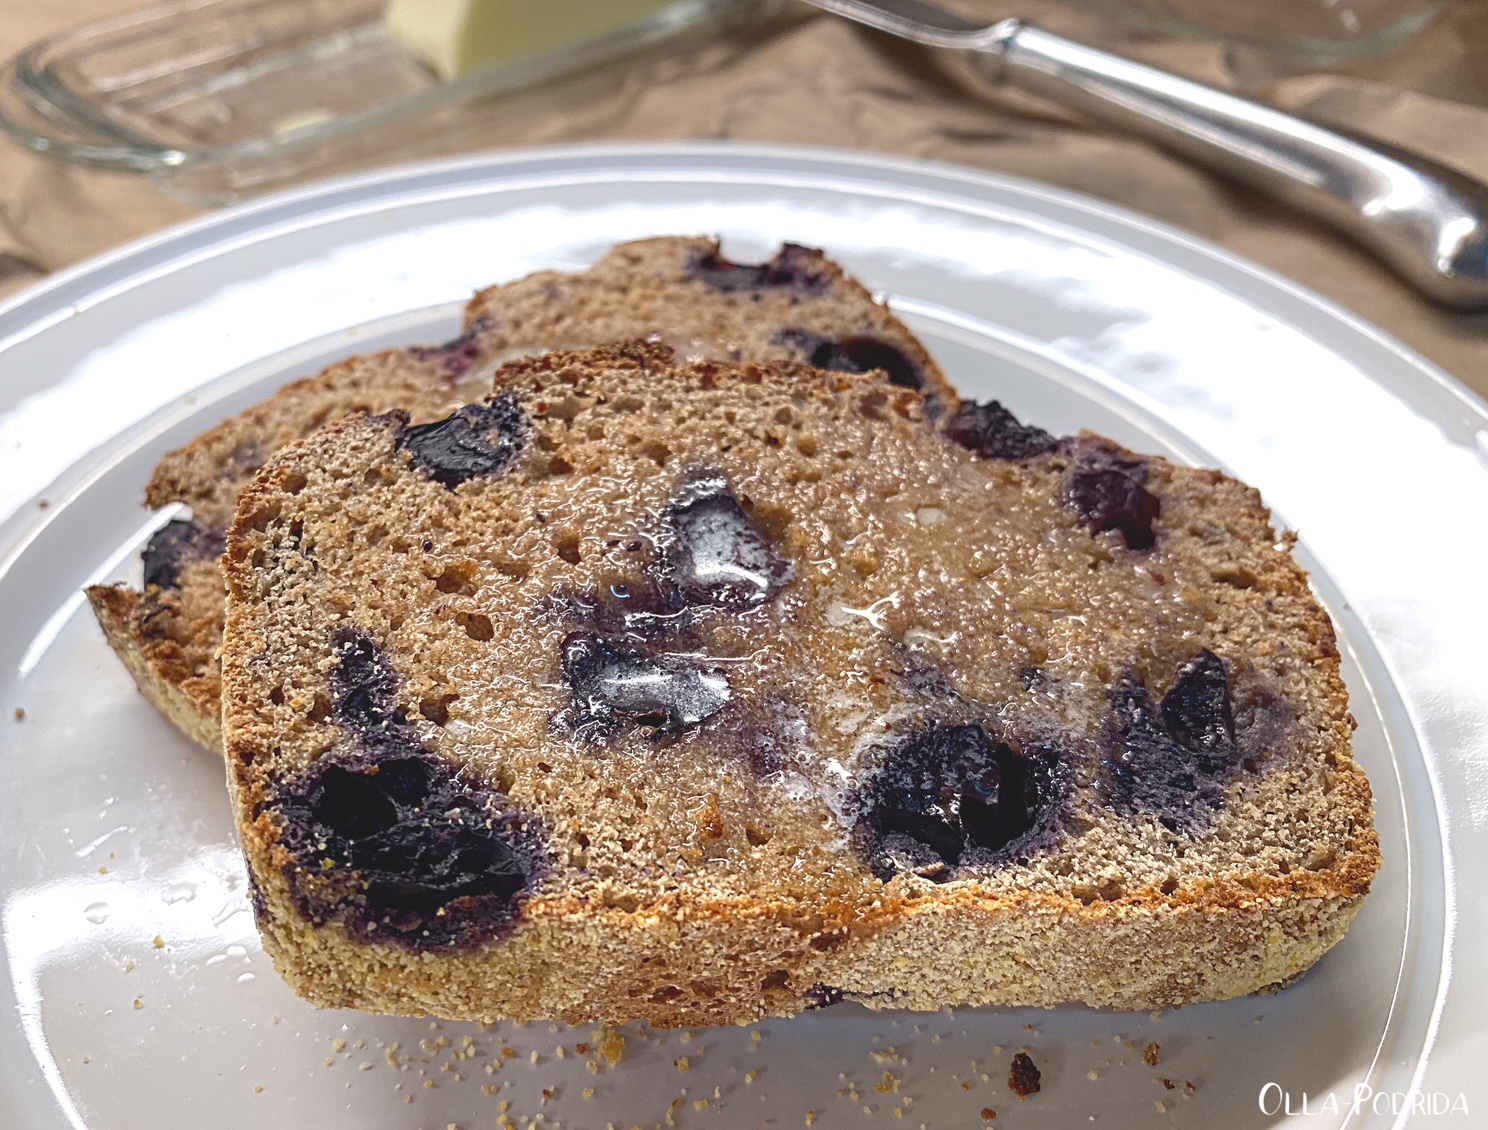
Blueberry English Muffin Bread

 This post contains affiliate links.

 I found this recipe on Twitter, of all places. Generally, I don’t hang out very much on Twitter, but the other day, plagued with weariness, I decided to scroll through. I saw a picture of this bread and thought it sounded tasty. It had been tweeted by Red Star Yeast; I find that, generally, companies only back recipes that are good, and this theory was proven right.


I am not a big baker of bread although I do love it. This seemed easy, required no kneading or special equipment, and it was sunny, warm, and humid, so I put my loaf outside to rise. This was my first experience making English muffin bread, and it certainly won’t be my last. I loved the crispy exterior and the tender interior. I also loved that this was touched with just a hint of sweetness, no more, so goes perfectly well on its own at breakfast, or alongside bacon and eggs. I found it to be particularly delicious when toasted and topped with grapefruit marmalade.

Blueberry English Muffin Bread
From A Kitchen Addiction

1½ c. bread flour
1 c. whole wheat flour
1½ t. cinnamon
½ t. nutmeg*
1½ t. salt
¼ t. baking soda
1 pkg. (2½ t.) Red Star baking yeast
1 c. milk, warmed to 120°- 130° F
6 T. maple syrup
¾ c. fresh blueberries, washed and dried
Cornmeal (for dusting pan)

Lightly spray a 9”x5” loaf pan with nonstick cooking spray. Sprinkle and coat bottom and sides of loaf pan with cornmeal.

In the bowl of a stand mixer, combine flours, cinnamon, nutmeg, salt, baking soda, and yeast.

With mixer on low, slowly add warmed milk and maple syrup. Increase speed to medium, and beat until the dough and pulls away from the side of the bowl. It will be soft and sticky; gently fold in blueberries.

Gently spread out into prepared loaf pan. Cover with a clean towel and allow us to rise in a warm, draft-free spot until doubled in size, about an hour (this could take up to 1½ to 2 hours depending upon the temperature of your house.)

Preheat oven to 400° F. Bake for 25 minutes or until golden brown and internal temperature reaches 195°- 200° F. Allow cooling in pan for 10 minutes before removing to a wire rack to cool completely.

* I grated fresh nutmeg.


Monday, July 19, 2021

Vegetarian Casserole

This post contains affiliate links.

I’ve mentioned before, and it’s nothing that you don’t already know, that the 70s was the decade of the casserole. Women were rapidly entering the workforce -- in many cases still expected to fix dinner --  and needed something that would go together easily, be shoved into the oven, and come out hot and ready to serve a hungry family or crowd. This recipe is a throwback to that time, something that I think you will no doubt realize when you see some of the ingredients. That should not deter you from making it exactly as written. What I’m saying here is use the condensed soup and the Velveeta, it makes all the difference.

I found this little gem amongst my mother’s recipes, and decided to give it a try. I enjoyed it as a meatless main dish; you can do the same, or serve it as a side. This makes a lot, so is excellent for a brunch or buffet because you can make it the day before baking.

Happy Meatless Monday!

Vegetarian Casserole

1 medium onion, thinly sliced
½ c. (1 stick) butter
2 c. cooked, drained, chopped broccoli (can use frozen)
2 c. prepared
Uncle Ben’s Long Grain & Wild Rice
½ c. sliced water chestnuts
½ c. canned sliced mushrooms
8 oz. Velveeta, cubed
1 can cream of mushroom soup
½ c. milk
Freshly ground pepper to taste
Crushed
Cheez-Its
Sliced almonds

Preheat oven to 350° F. Spray a 9” x 13” casserole dish with PAM; set aside.

Sauté onion in butter; empty into a large bowl. Add broccoli, rice, water chestnuts, and sliced mushrooms; set aside. Place Velveeta, condensed soup, and milk in a small saucepan. Heat, stirring occasionally, until Velveeta has melted. Pour soup/cheese mixture over your bowl of vegetables and pepper generously. Fold ingredients together, and turn into a prepared casserole dish. Place in preheated oven and bake for 20 minutes. Top with crushed Cheez-Its and almonds and bake an additional 10 minutes.