Showing posts with label bread. Show all posts

Thursday, September 12, 2024

Cream Cheese Nut Bread

 
It seems that, lately, I have had no time for baking or cooking. Today I had a hankering (I tend to hanker a lot) for a comforting quick bread for tomorrow’s breakfast.  I pulled out a recipe for an old favorite, warming and deliciously scenting the kitchen in the going. This is an easy recipe to make, and you probably have all of the ingredients on hand.  It does take up a number of bowls, but the end result is well worth it.

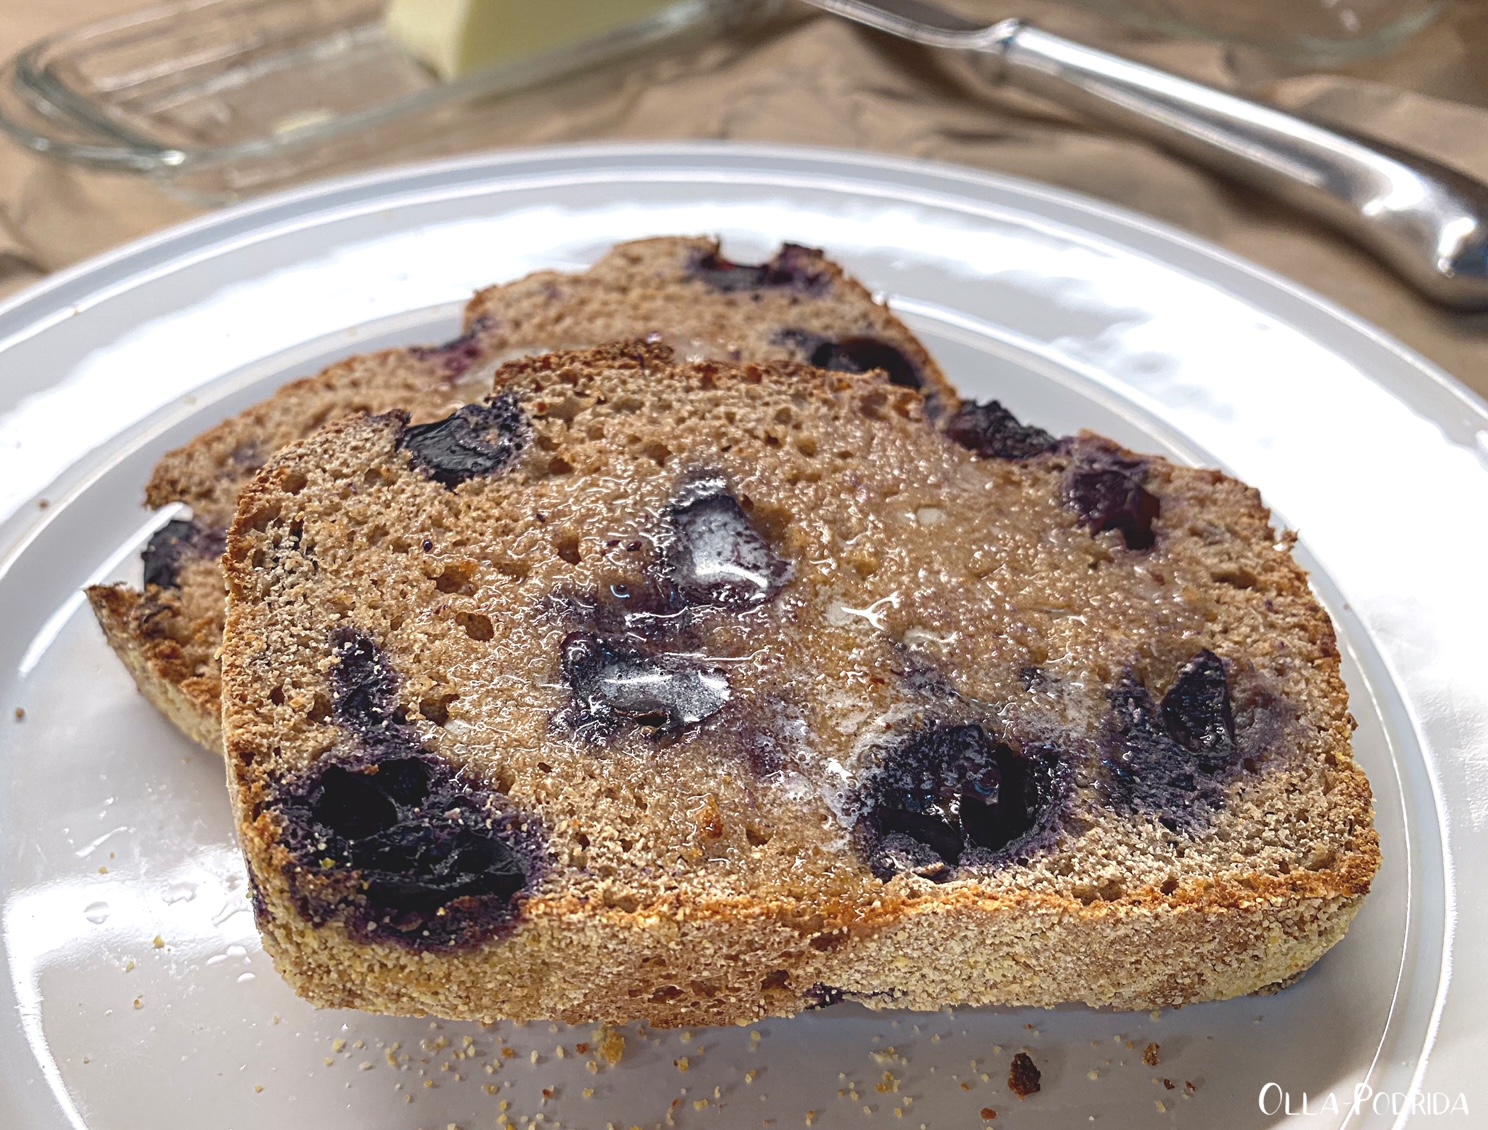
This moist, dense, nutty loaf is made all the better with an almond-flavored ribbon of cream cheese running right through the center. This cream cheese filling can be used with almost any of your favorite quick bread recipes, by the way, but do give this one a try, and then experiment by adding it to other favorites.  It makes an already delicious quick loaf all the better.  As an added note, this bread gets better every day. Cream Cheese Nutbread

 To make filling:

 8 oz. cream cheese, room temperature

1/3 c. sugar

½ t. almond extract

1 large egg, room temperature

 Beat the above ingredients together in a medium mixing bowl on high speed until smooth and creamy. Set aside.

To make bread:

 2 large eggs, room temperature

½ c. canola oil

½ c. whole milk

1 t. freshly grated lemon peel

2¼ c. flour

1/3 c. sugar

1/3 c. firmly packed light brown sugar

1 t. baking soda

1 t. kosher salt

1 c. chopped pecans

Preheat oven to 350°F.  Spray a 9” x 5” loaf pan with PAM and dust thoroughly with granulated sugar (or, a cinnamon-sugar mixture, if you prefer).  Set aside.

Beat eggs until frothy and lemon colored.  Slowly add oil, milk, and lemon rind, mixing until well blended.

 In separate bowl, stir together flour, sugars, soda, salt, and nuts.  Add this dry mixture, all at once, to the wet mixture and mix until just moistened.  Do not over mix.  Spoon half of bread batter into loaf pan, smoothing as you go.  Top with all of the cream cheese mixture, then spoon the remaining half of the dough on top, spreading to cover as well as you can.  Bake for 1 hour.  Remove from oven and allow to cool in pan for 15 minutes before inverting onto a wire rack to cool completely.

 As an Amazon Associate I earn from qualifying purchases.

Friday, February 2, 2024

Cheesy Garlic Crescent Rolls

 
I am not a great user of convenience foods, but there’s no disputing the fact that they can simultaneously make life easy and delicious. This is an adaptation of a recipe that I found online. Prior to making these I hadn’t had a refrigerated crescent roll in more than a decade. I must say that they have improved over the years. This is a roll that is so tasty that I had a hard time stopping at two alongside my bowl of vegetable soup. They are easy to make, and I guarantee the entire family is going to love the cheesy goodness.

Cheesy Garlic Crescent Rolls

1 8-oz.can refrigerated crescent rolls

4 T. butter, melted 

1 t. Melissa’s minced garlic

1 t. Italian seasoning

4 mozzarella string cheeses, cut in half

 Preheat oven to 375°F and line a baking sheet with parchment paper or a Silpat.

Separate and unroll crescent rolls and brush with garlic butter, reserving a bit to brush the tops. Place a piece of string cheese at the larger end and roll up dough. Brush tops with garlic butter.

 NOTE: I reheated these with great success in the air fryer. I stored them, covered, in the refrigerator, and then reheated at 340°F for about five minutes. They weren’t exactly the same as fresh from the oven, but good nonetheless.

As an Amazon Associate I earn from qualifying purchases.


Tuesday, September 26, 2023

Zucchini Cornbread Casserole

 
It is officially fall; can you believe it? I don’t know about you, but I find the passage of time to be rather shocking. At any rate, it’s best to enjoy every day as well as we can, and that includes good food. I made a big pot of chili over the weekend, and wanted to have something to serve alongside. I wanted a side dish, and yet not a side dish, something more like bread, but not. Tall order, no? Enter the Zucchini Cornbread Casserole! This came as a result of my having purchased a zucchini, forgotten why, and then desperately trying to use it before it got slick. Some things, it would seem, work out just fine.
Zucchini Cornbread Casserole

 2 large eggs

1 t. garlic powder

1 t. cumin

1 t. kosher salt

1/4 t. freshly ground black pepper

1 large zucchini, grated, not drained

1 large Melissa’s shallot, diced

1 Melissa’s pickled jalapeño, diced, seeds removed

1 14.25-oz. can corn, drained

1 15-oz. box Famous Dave’s Original Recipe cornbread mix

1 c. shredded cheddar cheese

1 c. shredded Monterey Jack cheese

 Preheat oven to 350°. Spray an 8” x 8” glass baking dish with PAM; set aside.

 In a large mixing bowl whisk together eggs and seasonings. Stir in zucchini, shallot, jalapeño, corn, cornbread mix, and the cheddar cheese. Blend thoroughly to moisten all ingredients, but do not over mix. Turn out into prepared baking, smooth top, dish and top with the shredded Monterey Jack cheese. Bake for 50-55 minutes until the top is golden.

 Serve with soup, stew, chili, or devour it all on its own.  It’s great with a drizzle of hot honey.

As an Amazon Associate I earn from qualifying purchases.


Friday, February 10, 2023

Cheddar Bay Biscuit Loaf

If you, like me, are absolutely in LOVE with the Cheddar Bay Biscuits from Red Lobster, then you will go crazy over this similarly tasting, super easy loaf. It is incredible warm from the oven, but also delicious when cooled. It makes fabulous toast, and the tastiest croutons ever.

Cheddar Bay Biscuit Loaf

Adapted from bellyfull.net

 For the Bread:

1¾ c. flour

1 T. sugar

1 T. baking powder

½ t. fine sea salt

¼ t. Old Bay seasoning

3 c. freshly shredded cheddar cheese

1 c. whole milk

1 large egg

¼ c. unsalted butter, melted

 For the Topping:

¼ c. unsalted butter, melted

¼ t. garlic powder

1/8 t. fine sea salt

Pinch Old Bay seasoning

Pinch onion powder

Pinch dried parsley

 Preheat the oven to 350°F. Spray a 9”x5” loaf pan with PAM; set aside.

In a large bowl, whisk together the flour, sugar, baking powder, salt, and Old Bay until combined. Add the cheddar cheese and stir it together so the cheese is coated in the flour mixture. Set aside.

In a small bowl, whisk together the milk and egg; pour into the dry mixture and stir it until just combined. Add melted butter and mix it in until everything is combined and there are no dry patches.

Pour the mixture into the prepared loaf pan and smooth out the top. Bake for 35-40 minutes or until a toothpick inserted into the center comes out clean.

While the bread is baking, make the topping: whisk together the butter, garlic powder, salt, Old Bay, onion powder, and dried parsley.  

Remove loaf pan from the oven and set on a wire rack to cool slightly. Immediately brush the bread with the butter topping. Let the bread cool for 5 minutes in the pan and then take it out of the pan and cool completely on the wire rack. Slice and serve.

 As an Amazon Associate I earn from qualifying purchases.


Tuesday, July 20, 2021

Blueberry English Muffin Bread

 This post contains affiliate links.

 I found this recipe on Twitter, of all places. Generally, I don’t hang out very much on Twitter, but the other day, plagued with weariness, I decided to scroll through. I saw a picture of this bread and thought it sounded tasty. It had been tweeted by Red Star Yeast; I find that, generally, companies only back recipes that are good, and this theory was proven right.


I am not a big baker of bread although I do love it. This seemed easy, required no kneading or special equipment, and it was sunny, warm, and humid, so I put my loaf outside to rise. This was my first experience making English muffin bread, and it certainly won’t be my last. I loved the crispy exterior and the tender interior. I also loved that this was touched with just a hint of sweetness, no more, so goes perfectly well on its own at breakfast, or alongside bacon and eggs. I found it to be particularly delicious when toasted and topped with grapefruit marmalade.

Blueberry English Muffin Bread
From A Kitchen Addiction

1½ c. bread flour
1 c. whole wheat flour
1½ t. cinnamon
½ t. nutmeg*
1½ t. salt
¼ t. baking soda
1 pkg. (2½ t.) Red Star baking yeast
1 c. milk, warmed to 120°- 130° F
6 T. maple syrup
¾ c. fresh blueberries, washed and dried
Cornmeal (for dusting pan)

Lightly spray a 9”x5” loaf pan with nonstick cooking spray. Sprinkle and coat bottom and sides of loaf pan with cornmeal.

In the bowl of a stand mixer, combine flours, cinnamon, nutmeg, salt, baking soda, and yeast.

With mixer on low, slowly add warmed milk and maple syrup. Increase speed to medium, and beat until the dough and pulls away from the side of the bowl. It will be soft and sticky; gently fold in blueberries.

Gently spread out into prepared loaf pan. Cover with a clean towel and allow us to rise in a warm, draft-free spot until doubled in size, about an hour (this could take up to 1½ to 2 hours depending upon the temperature of your house.)

Preheat oven to 400° F. Bake for 25 minutes or until golden brown and internal temperature reaches 195°- 200° F. Allow cooling in pan for 10 minutes before removing to a wire rack to cool completely.

* I grated fresh nutmeg.


Thursday, May 27, 2021

Mexican Monkey Bread

 This post contains affiliate links.


 Salads are synonymous with summer. What better way is there to take advantage of all of the fresh fruits and vegetables of summer than in a salad? Whether you enjoy them as a side dish or main, they often need that little extra something on the side. In the winter it’s a tasty sandwich or a hearty bowl of soup, in the summer it’s fresh bread.

I am generally not a fan of monkey bread because I prefer savory to sweet, so when I found this recipe on allrecipes.com I had to try it. I also had to change it up a bit to suit my interests. You are going to love it, the kids are going to love it, as is anybody else who sinks their teeth into this nicely spicy, cheesy bread enjoyed warm from the oven. In fact, it may behoove you to get a couple packages of biscuit dough in because I have a feeling that you’re going to be making this more than once.

Mexican Monkey Bread
Adapted from a recipe on allrecipes.com

3 T. butter, melted
1/8 t.
garlic powder
1 16.3-oz. pkg. refrigerated buttermilk biscuit dough, separated, each biscuit cut into eighths
1 1/2 c. shredded cheddar cheese, divided
2
Melissa’s pickled jalapeños, sliced, divided
¾ t.
dried parsley flakes, divided
½ c. shredded mozzarella cheese

Preheat oven to 350° F. Spray a
9” x 5” loaf pan with PAM; set aside.

Combine garlic powder with melted butter in a medium bowl. Dip each piece of biscuit dough in melted butter to coat, and arrange 1/3 of the dough in the bottom of the loaf pan to form a single layer. Top with 1/2 cup cheddar cheese, 1/2 of the pepper slices, and 1/4 teaspoon parsley. Repeat this layer again, i.e. 1/3 of the biscuit dough, 1/2 cup cheddar cheese, 1/2 of the pepper slices, and 1/4 teaspoon parsley, and top with remaining biscuit pieces. Sprinkle remaining 1/2 cup of cheddar cheese and all mozzarella cheese over the top of the loaf to cover. Bake until golden brown, 40 to 45 minutes. Cool in pan for five minutes before removing. Delicious warm.


Monday, May 10, 2021

Cajun Shrimp Mini Loaf Pizza

This post contains affiliate links.

I mentioned the other day about going a little crazy during the past year buying things. Not only did I buy items, but I also bought services. Later, I’ll tell you about all of the services I purchased, mainly upgrades to the house as well as a room addition, don’t get me started. Anyway, before I digress too much, when you have work done in your home dust gets everywhere, and you are forced to do something you don’t want to do and that is clean. Now I know some of you out there do you like to clean. My mother loved to clean. Let me tell you that apple fell far from that tree, and rolled into the next county. Cleaning is not my thing. My mother was known for her immaculate home. I am known for blowing on the furniture just before company’s about to arrive. 

Where am I going with this you ask? Well, I’ll tell you. In the process of cleaning (and tossing, mostly tossing) I decided to go through a stack of flyers and magazines that I had saved for reasons long forgotten. I came across a flyer from my local market (shout out to Schnuck’s Markets), the March/April 2020 issue in particular. It had a recipe for Cajun Shrimp Mini Loaf Pizza. Huzzah! I thought to myself, a new recipe to try, plus one that uses shrimp. If that isn’t a fateful win-win I don’t know what it is.

So I tried it, and boy is it good! Despite having purchased the mini French bread loaves, I ended up using a thick slice of rustic bread instead. I think I prefer that to using the French loaf because there is a greater topping-to-bread ratio. Because I had cooked the shrimp the day before, there was nothing to putting this together, and it was elegant, intensely flavorful, unique, and satisfying. I also cut back the ingredients so as to serve one. You could easily do the same to serve any number you like. This would work very well for a ladies luncheon, or a nice side with a salad for dinner. Wonderful! 

Cajun Shrimp Mini Loaf Pizza
From Schnuck’s Markets

1 T. olive oil
1 T. Cajun seasoning
1/2 lb. medium cooked shrimp, peeled and deveined
One mini loaf of French bread
1/2 c. spinach artichoke dip
1/2 c. shredded mozzarella cheese

Preheat oven to 400° F. Cover a baking sheet with parchment or foil.

In a medium bowl mix olive oil and Cajun seasoning. Add shrimp and toss to coat. Halve mini loaf lengthwise and place on a prepared baking sheet. Spread with spinach and artichoke dip and top with mozzarella cheese. Bake until cheese is melted and bread is toasted, 8 to 10 minutes. Top with prepared shrimp and bake to warm through, 1 to 2 minutes. Garnish with parsley and crushed red pepper.

The recipe claims this serves six. Funny!


Friday, April 9, 2021

Honey Cornbread

This post contains affiliate links.

I found a recipe in my mother’s recipe box for Honey Cornbread. It was her “go to“ recipe for cornbread, and my dad's favorite. The problem was, at least for those of us who love to slather on copious amounts of butter and marmalade, is that it always tended to be a bit too crumbly. So I went to work on this. I reduced the amount of cornmeal (the reason for crumbly cornbread), and increased the amount of flour. Perfect!

 This cornbread is a wonderful accompaniment to a bowl of Slow Cooked Pinto Beans, Red Beans and Rice, or, Overnight Slow Cooked Pinto Beans and Rice. It is easy to put together, has a touch of sweetness (I know that cornbread purists cringe at that, but I like it), and is improved with a schmear of butter while warm from the oven.

Honey Cornbread

 1¼ c. flour

¾ c. yellow cornmeal

¼ c. sugar

1 T. baking powder

½ t. salt

2 extra large eggs, room temperature

1 c. heavy whipping cream

¼ c. vegetable oil

¼ c. honey

 Preheat oven to 400°F. Spray a 9" x 9" baking pan with Baker’s Joy; set aside.

 In a small mixing bowl combine flour, cornmeal, sugar, baking powder, and salt. In a small bowl, beat the eggs. Add cream, oil, and honey; beat well. Stir into the dry ingredients just until moistened. Pour into prepared pan.

 Bake for 20-25 minutes or until a toothpick inserted in the center comes out clean. Serve warm.


Monday, March 15, 2021

Cranberry Walnut Irish Soda Bread Muffins

This post contains affiliate links.

Oh my goodness, these are so good! I was perusing the Guinness website because I had bought a six-pack, but only had firm plans for two bottles (one for my traditional corned beef, the other for Irish Guinness Brown Bread), and was wondering what to do with all of the rest. (I am not a beer drinker. No.) When I came across this recipe, I had to try it. This recipe also included another recipe for what they referred to as maple butter, although instead of using maple syrup, they used honey. Umm, that would be honey butter, not maple butter, but I digress. So, I adapted that to use real bourbon-aged maple syrup, and it is phenomenal on pretty much anything in the baked good category.

I am not a baker, as you all know, it irritates me. This recipe, however, didn’t irritate me as much as some. You don’t need any special equipment to make it, and I didn’t have to drag out the mixer. That pleased me. These are good at any time of the day. I can’t speak for how well they freeze, but my hope is that they will because they’re going into the freezer until I serve my St. Patrick’s Day dinner au deux on the 20th.

 Cranberry Walnut Irish Soda Bread Muffins

(with Whipped Maple Butter)

Slightly adapted from Guinness.com

 ½ c. dried cranberries*

1 c. Guinness® Extra Stout

2¼ c. flour

2 t. baking powder

¼ t. baking soda

½ t. salt

1/3 c. granulated sugar

1 egg

1 c. buttermilk

6 T. melted Irish butter

½ c. chopped walnuts

Flaky sea salt**

Demerara sugar

 Preheat oven to 400°F.

 Combine cranberries and Guinness® Extra Stout. Microwave on high for 45 seconds and let it steep and cool, to allow those cranberries to saturate with all that lovely beer flavor. Strain and set aside.

 Mix together flour, baking powder, baking soda, salt and sugar. In a separate bowl, whisk together egg, buttermilk and melted butter. Combine the dry and wet ingredients until just mixed. Do not over mix, you just want all the dry ingredients hydrated.

 Gently fold in cranberries and walnuts.

 Fill muffin tin with tulip liners (or spray muffin tin with a liberal amount of non-stick cooking spray). Fill each section about ¾ of the way up. Top with a pinch flaky sea salt and Demerara. Bake for about 18-25 minutes or until a toothpick or cake tester comes out clean.

 Cool for 5 minutes and quickly remove each muffin from the tin and finish cooling on a wire rack.

 Whipped Maple Cinnamon Butter

 2 Sticks Irish Butter, room temperature

¼ c. pure maple syrup

1 t. cinnamon

1 t. kosher salt

 Using a whisk, whip butter until everything is combined. Season to taste. Use on everything!

 *I used Melissa’s dried tart cherries. I think they are much more flavorful, and because of their larger size tend to hydrate better, holding more of that Guinness goodness.

**I used Fleur de Sel.