Tuesday, January 10, 2017

Shirley’s Spiced Peaches

As I mentioned earlier, I waxed nostalgic at my Boxing Day Brunch this year, using recipes both old and new, both sentimental, and not, and it made for an interesting meal.

Every brunch, I think, should have fruit as one of its offerings. I chose to use a recipe that I have had for many years, and that my mom had pretty much since she was first married. This recipe called Spiced Peaches was given to her by maid of honor, Shirley Fick. It's spicy, and zingy, and very good. I’ve tried it with both fresh and canned peaches and, honestly, the canned work better. Obviously this is an amazingly easy dish to put together, pretty much all you have to do is open a couple of cans. Don’t let the canned fruit deter you from trying it. It is wonderful.
Shirley’s Spiced Peaches

1 cup vinegar
1 cup honey
3 whole cloves
3
Melissa’s cinnamon sticks
6 cups canned peaches
1 can Bing cherries, drained
1/2 cup apricot brandy (or any kind of brandy)

Mix together vinegar, honey, cloves, and cinnamon in a large pan. Place over medium heat, bring to a simmer, and cook about 10 minutes. Add peaches and cherries and heat through. Remove from heat and allow to cool. Chill several hours or overnight. (Note: I have found that the flavor intensifies the longer you keep it. These will last 5-7 days in the fridge.)

Shirley mentions in the recipe that it is wonderful when served from a chafing dish, but can also be offered at both room temperature or chilled. She adds that it goes well with pork, ham, or lamb.
Shirley is on the far left; my mom is the one with the toothy grin (or maybe it's terror).


This post is linked to:

Monday, January 9, 2017

Preparing Green Pepper for the Freezer


Here's a little tip to make life easier for you in the New Year, and help to save you money.
I know we've all been in a situation where we find our vegetable bin overflowing with vegetables on their last legs. Sometimes you buy something on sale  (in my case, a four pack of green peppers), and then decide not to make the dish that made use of them. I cannot stand waste of any kind, so certainly don't want to watch my fresh vegetables all go bad. So...what to do? The answer is simple. I'm sure you've all seen bags of chopped onion in the freezer section of your grocery store. Did you know that you can also dice and freeze green pepper? I generally set aside one day a week to go through everything that's in my vegetable bin and determine what can be  chopped, bagged, and frozen for future use.
Today is my chopping day. I bought a bag of onions on sale, so I'm going to be dicing them, bagging them up in measured quantities, and freezing them; I'm chopping and bagging green peppers as well. As some recipes (namely my favorite Greek salad) call for strips of green pepper, I'll cut half of the green peppers in slices and bag those for future Greek salad use. The rest I'll dice for use in soups, stews, and sauces.
Not only are you going to find this invaluable in the coming year, but you will also save time and money. Let's try to make things easier for ourselves in the New Year. You can start right here.
This post is linked to:

Friday, January 6, 2017

Green Bean-Stuffed Grilled Cheese


Yesterday I gave you that delicious and simple recipe for Smothered Green Beans (Go on, have a look, I’ll wait.). Today I'm going to do something that may shock and even appall you. Don't be afraid! This is really delicious, and a wonderful way to use up leftover vegetables. During the Boxing Day Brunch, my cousin told me that she had read somewhere on the Internet (she didn't quite remember where) that leftover green bean casserole is excellent in a grilled cheese sandwich. I didn't make green bean casserole, but my green beans with their slight sweetness and wonderful bacon addition sounded like they would be perfect on a sandwich. This was not my first foray into using vegetables on a sandwich; I first tried it out here with great success.
So, I put together a grilled cheese sandwich using grated cheese and the Smothered Green Beans, sandwiching them in between layers of the cheese. I grilled it up in my Copper Chef Pan (Heavens, but these are wonderful! I'm going to be telling you about this in the near future.), and it was absolutely delicious. The kids are sure to run from a sandwich like this, but adults are probably going to like it a great deal. It's truly a wonderful way to use up leftovers, a painless way in which to get your daily servings of vegetables, and provides you with an excellent and hearty lunch. Feel free to experiment with any vegetables that you have left over. Give it a try, and let me know what you think.
This post is linked to: 
 

Thursday, January 5, 2017

Smothered Green Beans

When I shared my Boxing Day table with you couple of days ago, and told you what a great success the gathering was, I also promised some recipes. I made good with my recipe for Butter Pecan Cinnamon Rolls, and now here comes another recipe for the very popular green beans. Now I don't want to hear any snorts of derision when I tell you that this recipe calls for canned green beans. Frankly, I like them. When I was a kid I would eat them straight from the can. It may seem crazy, but how many kids do you know who snack on vegetables?

This recipe is so easy, and so good; you'd be wise to add it to your vegetable recipe repertoire. I made it the night before so all I had to do was slide it into a preheated oven the day of the party. Everyone loved it, and when children come back for seconds, you know it's a hit.
Smothered Green Beans
Adapted from Gooseberry Patch​
5 (15-oz) cans green beans, drained
6 strips bacon
2/3 cup brown sugar
1/4 cup butter, melted
1/4 cup low-sodium soy sauce
1-1/2 tsp garlic powder

Preheat oven to 350°F.

Pour drained green beans in an ungreased 9x13-inch pan.

In a large skillet, cook bacon until almost done but not too crispy. Remove from skillet, drain on paper towel and chop. Sprinkle cooked bacon on top of green beans.

Whisk together brown sugar, melted butter, soy sauce, and garlic powder. Pour over green beans.

Bake for 40 minutes.

This post is linked to:

Tuesday, January 3, 2017

Scroodles

During the winter, particularly after the holidays, I'll wax nostalgic and pull out my old recipe box from the '70s. This is a box full of tattered and stained recipe cards featuring recipes for the first dishes I made when I initially set up housekeeping. These simple recipes are all about ease and comfort. The recipe I'm sharing with you today is one that is simple to put together, family and kid friendly, and reheats beautifully. Back in the day it was also a very economic meal because ground beef wasn't selling for seven dollars a pound. We always called it "Scroodles," taking the name from the spiral shape of the pasta. Originally, I believe, I got this recipe off of the back of a box of fusili. You can call it anything you like, I just call it tasty.
Scroodles

1 T. olive oil
8 oz. package button mushrooms
Sprinkling of steak seasoning
1 small yellow onion, diced
1 clove garlic, sliced
1 pound ground chuck
2 teaspoons smoked paprika
4 cups beef stock
8 ounces spiral pasta
1/2 cup sour cream
Fresh parsley or fresh dill to garnish

Heat olive oil over medium heat in a 10"-12" skillet. Add mushrooms and steak seasoning, and cook until they begin to soften. Add onion and cook until, both vegetables are nicely tender. Stir in garlic and cook for one minute more. Crumble the ground beef over the vegetables, and continue to cook, breaking up the beef with a spoon as it cooks, until it is browned and cooked through. Sprinkle paprika over all, and stir to combine. Add the beef broth and curly pasta of your choice, and bring to a light boil. Cover and cook, stirring often, until the pasta is al dente, 17-20 minutes. Remove the pot from the heat and stir in the sour cream. Serve in pasta bowls, and garnish with fresh dill or parsley.


Monday, January 2, 2017

Home for the "Owl"-idays Tablescape

Here's a bit of presto change-o with my tablescape, changing it from my Boxing Day table, to a more informal table for a soup and salad supper. You may notice here that the table looks a bit smaller than the one that you saw in my Boxing Day post. You're right, it is a bit smaller. It's the same table, it's just that when I want to expand it for eight people from the maximum of six that it generally holds, I bring in a 4’ x 6’ piece of plywood to put on top in order to make it a bit bigger. (I also have a 4’ x 8’ sheet of plywood that I use for my larger dining table that makes it big enough to serve 10, or if we squeeze in tightly, 12.) You might consider this yourself. It's a whole lot cheaper to buy some plywood than it is to buy a new dining set if you need to seat more people.
This is a fun, simple, informal table, where I'm going to be serving bowls of my Busy Day Taco Soup, Italian salad, and homemade Everything Rolls.
If you follow me on Facebook then you'll know that I have gone over the moon for this Maxcera dinnerware pattern called Postcard Owl. I've only, thus far, been able to get the serving platter, the salad bowl, and four mugs, but I have been putting it to good use this season, I can assure you. I absolutely adore this set. The mugs are sturdy and heavy, and I have had many cups of soup out of them. I've also used them for cocoa and hot, spiced tea, talk about feeling all warm and cozy inside, they sure do it for me.
I was having a difficult time parting with the tree candleholders (that I mentioned in this post) that my dad and mom made for the season. When dad uncovered these this year and gave them to me, my heart just sang. I well remember when mother made these and how much I loved them at the time. It gave me the most wonderful feeling to have them on my table this year. So, I have decided that I am going to make them work in a variety of table settings all winter long.
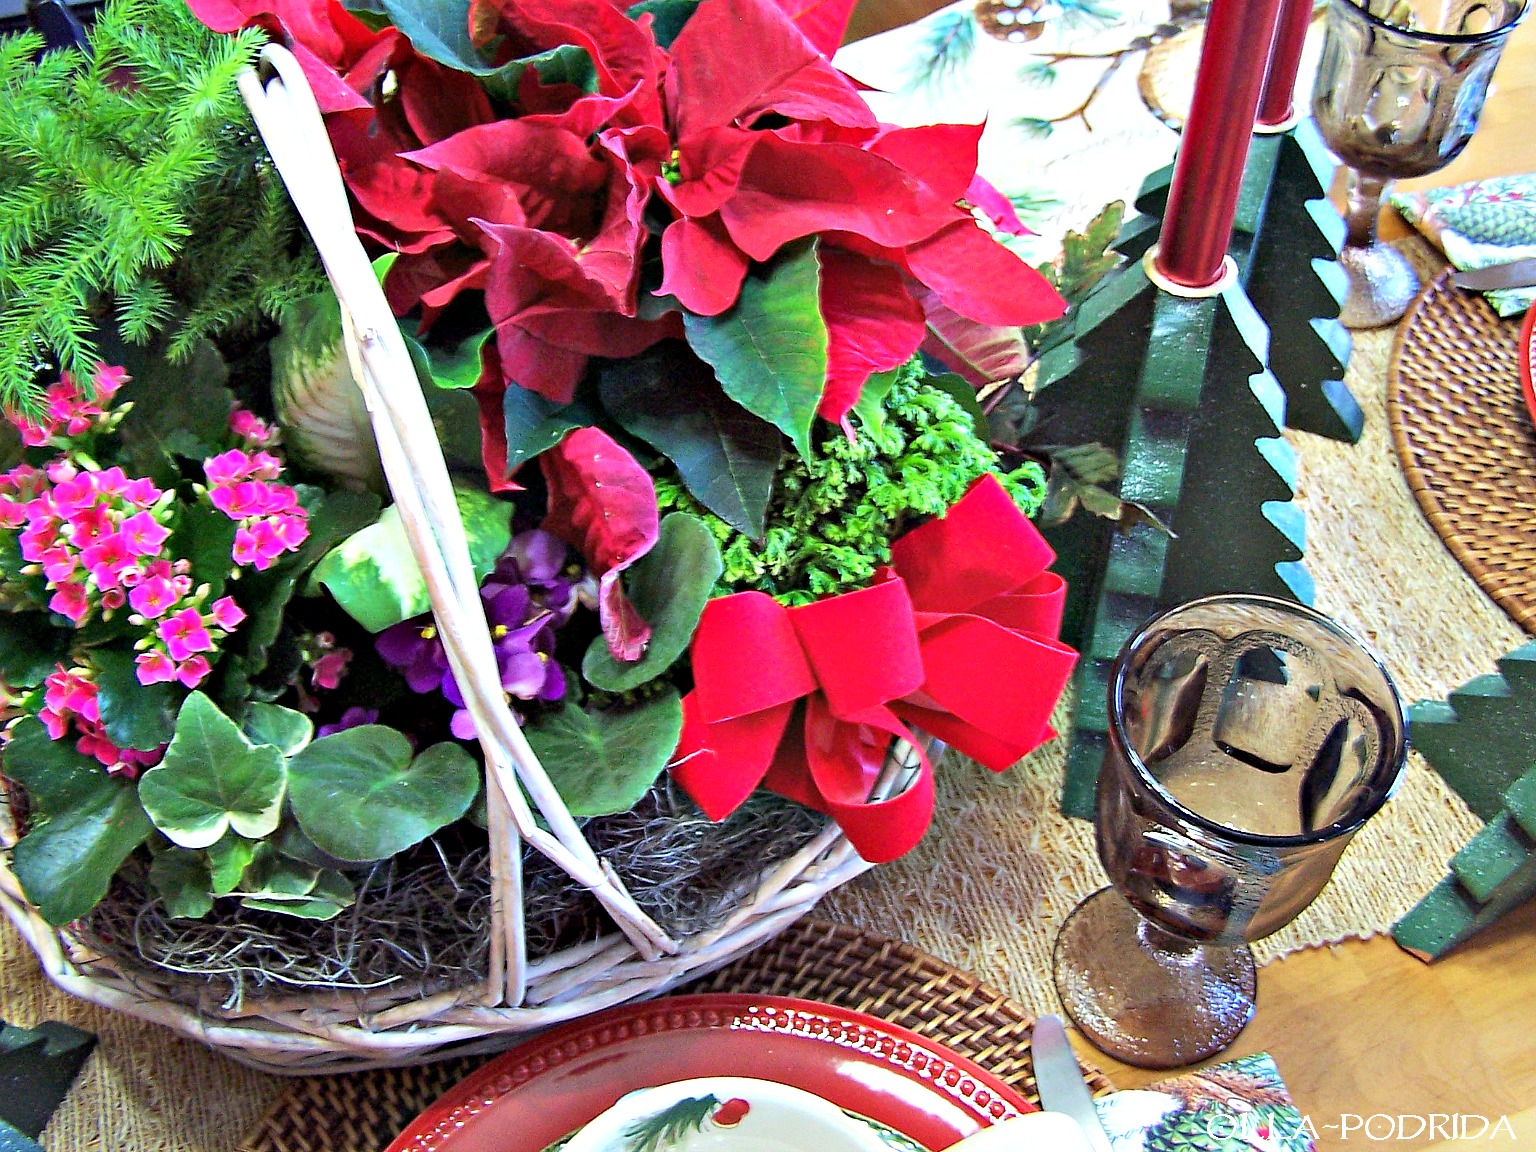
The centerpiece has gotten bigger since you saw it last week. A dear friend of ours whom I’ve known for 23 years sent this to me. His name is Lennie, and he is a wonderful man. He got me through so many rough times this past year. I was shocked and pleased to see this beautiful arrangement arrive a couple of days before my party, but so happy to have it. It brings me such wonderful feelings of joy.
I've identified all of the plants in this arrangement (and I do love arrangements that I can replant and continue to watch grow), but I haven't been able to identify the little evergreen plant on the lower right just above the bow. If any of you know what this is, I’d really appreciate knowing in order to properly care for it.
I always love to include rustic elements with even the most elegant of tablescapes, so once again you're seeing the round rattan placemats. They're topped with red plates from Pier 1, along with a green pinecone plate that is new to me this year; they are very versatile and I absolutely love them.
I also love my new flatware from Cabela's (Did you know they sold flatware at Cabela's?) I'm going to be using this until springtime.
Take a look at these napkins! Aren't they darling, and just perfect for this table setting? These are paper napkins! I never use paper napkins, but when I was out with a couple of friends for lunch and a bit of holiday shopping, I stumbled upon these at one of my favorite places to shop, Oma’s Barn in St. Peters, MO (That you can read about here and here.), and had to buy these. I just love them, and I'm already thinking of ways in which to use them in holiday decor for next year. 
Keep this table setting in mind when you're out shopping the after Christmas sales. Informal lunches can stand to have paper napkins, particularly when they are this beautiful.

I hope you're able to relax these days, and enjoy the rest of the holiday season. Put your feet up and take it easy, sip some soup, and brace yourself for 2017.

Round Placemats – Pier One
Red Plates – Pier One
Green Pinecone plates – Amazon
Pine cone S&P - Amazon
Owl Mugs, Bowl, and Tray – Ebay
Flatware - Cabela's
Stemware - My mother's

This post is linked to:

Saturday, December 31, 2016

Top Ten Posts of 2016


It's time for my year-end wrap-up featuring the 10 most popular posts of 2016. It's an agreeable assortment I think, nicely varied, and it tells me a couple of things. First of all, that you like tablescape blog posts, second, that you like slow cooker recipes. I'm going to be working on more of both of those for 2017. I was pleased to see that Jim's Steak Diane recipe came in at number three. He would have been delighted with this.

Thanks to all of you who visit my blog, I really appreciate having you here. To see the blog post and recipe associated with each of these pictures, click on the title below the photo and it will take you directly to the post. Happy viewing, and have a wonderful New Year.

Slow Cooker Pumpkin Bread Pudding

Cherry Delight

Jim's Steak Diane

Da Vinci Pasta

Cozy Winter Table

Set a Table with a Simple Centerpiece

Cream of Tomato Soup with Pumpkin

Blueberry Croissant Puff

Blue & Yellow Easter Tablescape