Thursday, July 19, 2018

Mini Lemon Cheesecakes in a Jar


One of the reasons that I made that tart and delicious homemade lemon curd earlier in the week (aside from the fact that I wanted to drizzle it on top of pancakes, waffles, biscuits, as well as using it as a spread on my morning bran muffin) was to make this recipe for mini cheesecakes. It is based upon one that I found on the same blog in which I found the curd recipe. I changed it up a bit by adding more lemon zest, and switching out the crumb crust for my own pretzel crust, my new favorite crust for almost anything sweet. Don’t feel that you need to do the same. You can switch out the same amount of pretzels for graham cracker crumbs, cinnamon graham crumbs, vanilla wafer crumbs, or gingersnaps, they all work equally well; it’s a matter of personal taste.

Personally, I don’t think there is anything cuter than food in a jar. Who wouldn’t want to grab and devour one of these adorable mini cheesecakes? An added bonus is that these can be made up to two days prior to serving, and stored in the refrigerator. When ready to serve, top with lemon curd, a spritz of whipped cream, and your favorite fresh fruit. Beautiful and delicious!
 
Mini Lemon Cheesecakes in a Jar
Adapted from My Baking Addiction

For the Crust

¾ cup pretzel crumbs
2 tablespoons sugar
3 tablespoons unsalted butter, melted

For the Cheesecake

¼ cup granulated sugar
Zest of one
Melissa's seedless lemon
1 8-oz. pkg. cream cheese, room temperature
1 large egg, room temperature
2 Tablespoons heavy cream
½ teaspoon vanilla

For the Garnish
Whipped cream
Blueberries

Preheat the oven to 350°F.

In a small bowl, stir together pretzel crumbs, sugar, and butter.  Press into the bottom of four Weck jars (I used these) or 1-cup ramekins (like these). To ease tamping them down into your small jars/ramekins, I suggest using a tart tamper – an invaluable kitchen tool. Bake for 6 minutes; remove to a wire rack to cool.

In the bowl of a stand mixer fitted with the paddle attachment, combine sugar and lemon zest, and mix until the sugar is moistened and fragrant. Add cream cheese, and cream together until smooth. Add egg; beat well. Add heavy cream and vanilla and mix until smooth.

Pour batter into serving dishes, on top of the pre-baked crusts, about 3/4 of the way full. Place jars into a larger pan with high sides and pour boiling water into the larger pan until halfway up the sides of the jars.

Bake 25 to 30 minutes, until the edges are set. Do not overbake. Carefully remove the cheesecake jars from the water bath and place on a cooling rack to cool completely. Once the cheesecakes are completely cooled, place them into the refrigerator for at least 5 hours. Before serving, top each cheesecake with lemon curd, whipped cream, and berries.

Makes 4


If you prefer something equally cooling, but less work, you might consider this refreshing Lemon-Lime Ice Milk.


This post is linked to:

This post contains affiliate links.


Wednesday, July 18, 2018

Microwave Meyer Lemon Curd


There is something about summertime that makes me go lemon crazy! I have been using it in almost everything I cook or bake, and after last week’s refreshing homemade lemonade, not to mention the Frozen Boozy Arnold Palmer, I decided I need to do more. 

Having come across a recipe for lemon curd made in the microwave, I knew I had to give it a try. I am wild about lemon curd, but I am not wild about standing next to the stove stirring until I’m ready to scream. This worked out beautifully! If you like lemon curd as much as I do, make this. Now! Do use Meyer lemons, they are sweeter than regular lemons, and give your lemon curd a wonderful depth of flavor.
Microwave Meyer Lemon Curd
Slightly adapted from My Baking Addiction

1 cup granulated sugar
3 large eggs
1 cup fresh Meyer lemon juice (from 5 Melissa’s Meyer lemons)
1 tablespoon lemon zest
1/2 cup unsalted butter, melted

In a large microwave-safe bowl (I used
Duralex), whisk together the sugar and eggs until smooth and thoroughly combined. Whisk in lemon juice, lemon zest, and melted butter.

Cook in the microwave on full power for one-minute intervals, stirring after each minute. This process will take about 3-5 minutes depending upon the wattage of your microwave. (Three minutes worked for me.) The lemon curd is done when it coats the back of a metal spoon.

Remove from the microwave, push through a fine, mesh sieve, and pour into sterile jars or a container.

Allow to cool to room temperature, and then cover it with a lid and store it in the refrigerator for up to 2 weeks. The curd will thicken as it cools.

Lemon Curd would be wonderful in these Easy Lemon-Filled Ebelskibvers!


This post is linked to:

This post contains affiliate links.

Tuesday, July 17, 2018

Delicious Beef Burgers


​Grilling season has been upon us for some time, but in my case, it has been way too hot to grill. Still, it is National Grilling Month, and I could not resist the call of the burger. I made up a number of them to grill early in the morning before it got too hot, slathered them with barbecue sauce, simmering them in that same sauce in the oven later in the day before enjoying them between two slices of toasted bun.
I think this is probably the most delicious grilled burger I have ever eaten (if I do say so myself). It’s a wonderful combination of tastes, and while you may question the inclusion of mushrooms, particularly those of you who don’t like them, let me tell you that they impart a wonderful flavor to the burger while adding moisture at the same time. If you have ever eaten a grilled burger that was bone dry, it’s because it didn’t have enough moisture, and some cuts of beef just don’t. Adding mushrooms to the meat before you form it into patties and grill it, gives it moisture without fat. It’s mighty good.
Delicious Beef Burgers

2 lbs. ground chuck
4 crimini mushrooms, finely diced
1 tablespoon Worcestershire sauce
1 tablespoon Dijon mustard

Break ground chuck apart over a large bowl. Add remaining ingredients and gently mix together until everything is incorporated. Grill until interior of burger reaches at least 160°F. Slather with the barbecue sauce of your choice. This one is my favorite.

If keeping cool and making your barbecue indoors is how you prefer it, you can’t go wrong with this Crockpot Barbecued Beef!


This post is linked to:

Monday, July 16, 2018

Slider Cupcakes


The apple didn’t fall far from the tree when it comes to my cousin, Emma. This nine-year-old soccer player is following in the footsteps of her mom, and generations of women before her, developing her talents as a baker. When her mom sent me this darling picture of the burger cupcakes that she had made for a soccer barbecue get together, I knew that I wanted to have her as a guest blogger in the hopes of encouraging other young people to join in on the baking fun.

Emma says that she got the recipe last year at Living World Church Cooking Camp. Ever since first trying them, she has been keenly interested in making them at home. “We made them first at my grandma's house just for fun, then I made them for my soccer team's swim party and BBQ,” she said, “My friends said they were the best burgers ever! At first, the grown ups didn't even realize they weren't real sliders.”

The results, as you can see, are wonderful.
Slider Cupcakes
Recipe from Living World Church Cooking Camp

1 box white or yellow cake mix
1 box brownie mix
2 cans vanilla frosting*
Red, green, and yellow liquid food coloring
Sesame seeds

Prepare cupcakes according to directions on cake mix package. When cool, slice them in half horizontally with a serrated knife to create the
“bun.”
 Prepare brownies according to package directions. When cool, cut them with a 1-1/2-inch circle cookie-cutter to create the “meat.”
Use ample amounts of food coloring to mix a batch of red icing (ketchup), green icing (lettuce), and another batch of yellow icing (mustard).
Lightly dampen burger “lids” with water, and sprinkle with sesame seeds so they stick.

To create burger layers, put red icing on the bottom bun, then add the “meat,
” then add the yellow and green icings, and top with the lid. Finish by using a cocktail toothpick to keep it all together.

* An equal amount of homemade frosting would work here too.
Many thanks to Emma for this wonderful post, and her mom for the lovely photos.


This post is linked to:

This post contains affiliate links.


Friday, July 13, 2018

Grape Salad with Toffee Almonds


I have seen other grape salads, in fact, I have made other grape salads (like this one here.), that really push the “salad“ boundary to the limit. Let’s face it; a lot of grape salads really aren’t salads at all, but delicious desserts.

Because this is Muscato grape season, and because I love grapes, I try to use them in as many ways as possible, including green salad, chicken salad, coleslaw, and yes, a salad all their own. But, it occurred to me that to be able to truly call this a salad, it needed a vegetable or two. So, I turned the traditional dessert-y-type of grape salad on its head, and added actual salad ingredients. It doesn’t lose a thing when it comes to great taste, but gains a little bit when it comes to nutrition. If you’re looking to sneak some vegetables into your family’s meals, you can hide them fairly well here.
Grape Salad with Toffee Almonds

1 8-oz. pkg. cream cheese, room temperature
1/2 cup sour cream
1/3 cup granulated sugar
2 teaspoons vanilla extract
Pinch of cinnamon
1 3-pound pkg.
Melissa’s Organic Red Muscato Grapes
½ cup chopped celery
2 Tablespoons grated carrot
1/2 cup toffee almonds (find recipe here), plus extra for garnish

In a large mixing bowl, beat together cream cheese, sour cream, sugar, vanilla, and cinnamon. Fold in grapes, celery, carrots, and almonds. Refrigerate at least one hour. Serve in one large, or eight individual serving dishes topped with a few toffee almonds.


For a refreshing salad that uses a variety of grapes, try this Fresh Grape Salad.


This post is linked to:

This post contains affiliate links.

Thursday, July 12, 2018

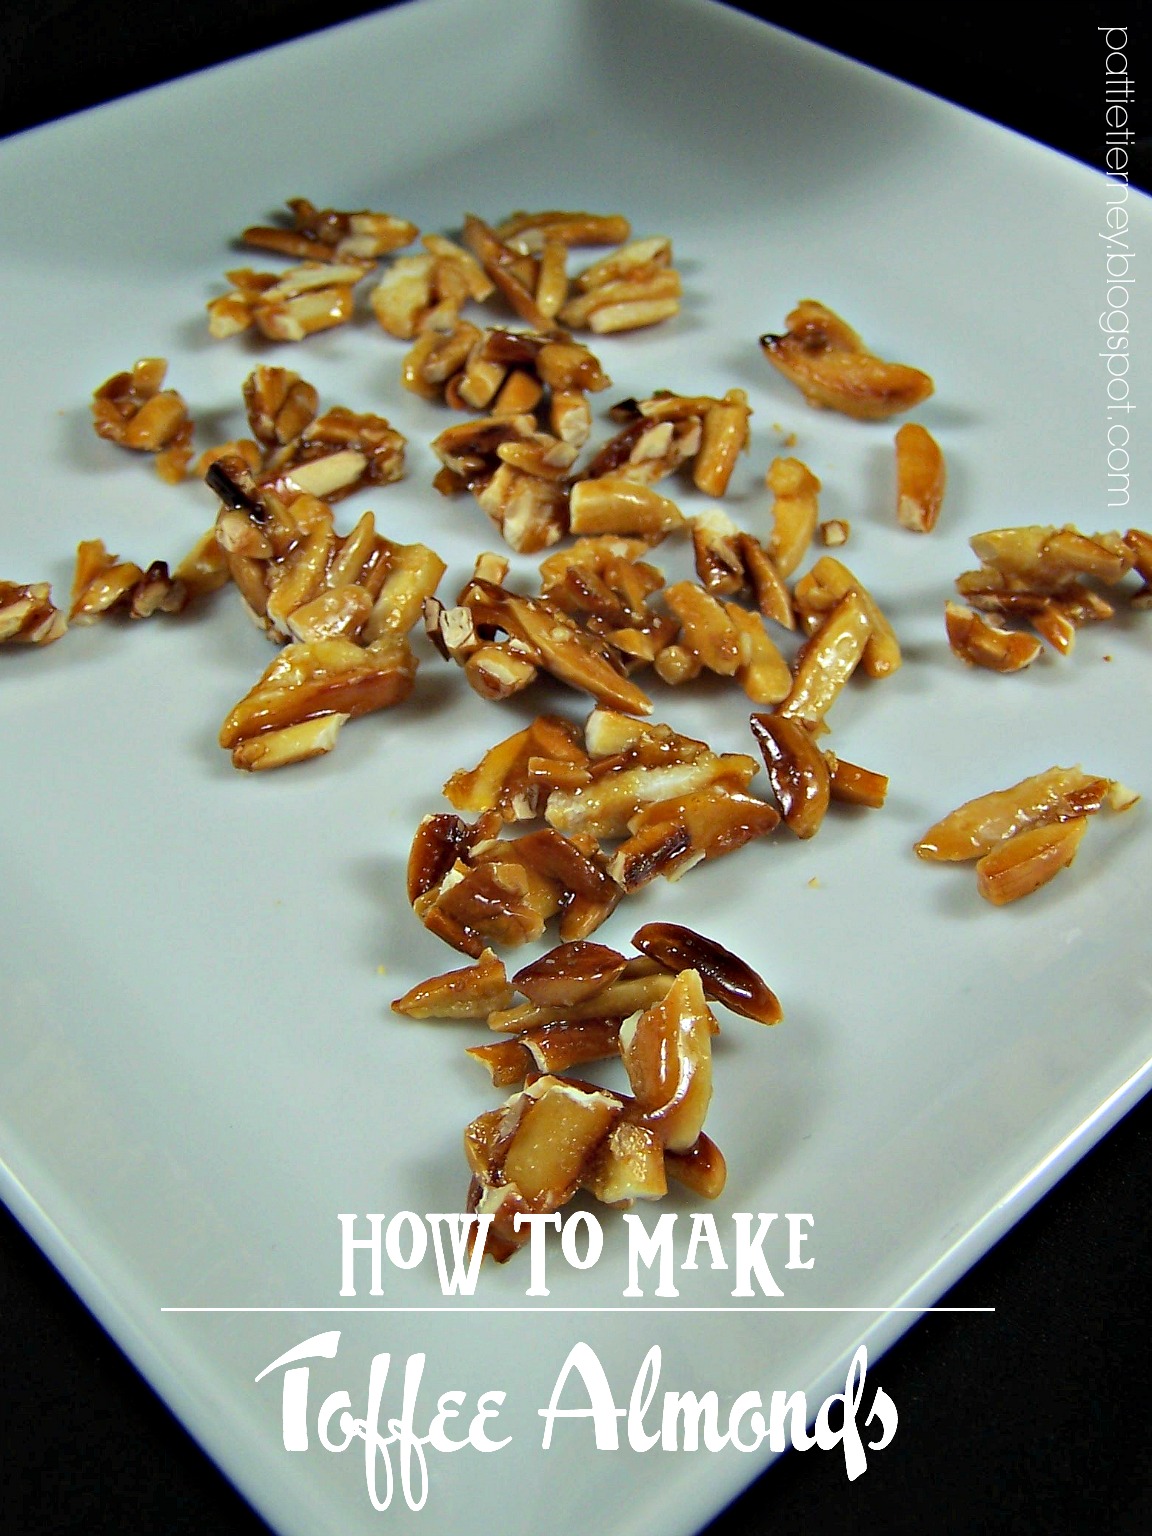
Toffee Almonds


Back in the 70s, my mother used to make Mandarin Orange Salad. You may be familiar with it; it was comprised of lettuce, celery, chopped scallions, and mandarin orange segments, all tossed together in a light dressing along with toffee almonds. I loved that salad, but in my opinion, the toffee almonds were what made it. One time, she made the salad without those almonds, and it just wasn’t the same.

As a young person (and I was young once), I figured they were complicated to make. I mean, just look at them, they look like something you would find in specialty candy! But the fact of the matter is, they are very simple to make, and I wished I had asked my mother how to make them long before I actually did. There’s no need to provide you with a recipe for this, printable or otherwise, because it’s only two ingredients: sugar and almonds, at a ratio of 2:1.
Just place twice as many slivered almonds as sugar into the pan (Here I used 1/8 cup of sugar (2 tablespoons) to 1/4 cup of almonds), and set the burner to medium high.
Stir until the sugar melts and coats and toasts the almonds.
The aroma is incredible! Turn them out onto a cool plate to harden, and then break them apart.
So good! You may want to make a lot of these.You will certainly need them for tomorrow's recipe!

Candied Pecans and Vanilla Walnuts are also worth trying.


This post is linked to:

This post contains affiliate links.

Wednesday, July 11, 2018

Toffee Caramel Banana Crêpes


An unexpected guest dropped by the other day, and stayed far longer than I expected (read: he would not leave!). Yes, apparently, I am that delightful. I was in the midst of something, hadn’t had lunch, so during the last hour of our visit, my stomach growled uncontrollably. Finally, waiting for him to take a breath so that I could interrupt the onslaught of conversation, I asked if he would like a cup of coffee and a sandwich. Yes, he told me, he would like a cup of coffee, but since he’d had lunch, he’d prefer to have dessert with his coffee. Dessert? Who said anything about dessert?! Is the word “Bakery” stamped on my forehead? I was so weak from hunger that I agreed to serve him desert with coffee before I realized that I didn’t have any.

The entire time I was in the kitchen grinding coffee beans, slicing bread for my sandwich, and getting out lettuce, tomato, ham, and cheese, my brain was on overload. Dessert, dessert, what do I have that I could use as dessert? I scanned the room left to right, right to left. I spotted a rather sad bunch of bananas that had seen better days, grabbed them, and set them on the counter in front of me. What would go with bananas, I wondered? I started rummaging through the cabinets, as discreetly as possible, pulling out a package of
Melissa’s Ready-to-Use Crêpes, a jar of salted caramel sauce, toffee bits, and, while grabbing the mustard from the fridge, pulled out a bowl of Devonshire cream that I had made the day before.


As I was slicing my sandwich and plating it, I laid a crêpe out on the cutting board, topped it with a dollop of the Devonshire cream, bananas, toffee bits, rolled it up, gave it another topping of everything, drizzled it with caramel sauce, plated it, and handed it to my wordy guest along with a fork. He didn’t bother with the fork, simply picked up the crêpe as though it were a hotdog, and took a big bite. Sounds of ecstasy emanated from deep within. Mutterings of “delicious,” “exceptional,” and “SO good,” followed. Obviously, he loved it. This was not the first time that I silently thanked Melissa‘s Produce for saving my bacon. Their crêpes have saved the day for me time and time again. They last a good while in the pantry, but also freeze beautifully, so it’s wise to have a couple of packages on hand. My friend added that peanuts would be good crumbled on top, so I made him another one and added peanuts. I think for a moment there he visited heaven.

I had considered calling these Emergency Banana Crêpes, but decided instead upon Toffee Caramel Banana Crêpes, because it sounded so much tastier. Don’t be put off by their austere appearance, there is decadent goodness contained within. These are good, folks, and easy, and cool, and perfect for summer. Consider using any fruit that you happen to have on hand such as strawberries, blueberries, or peaches. Any one (or a combination) of those would be sensational. So cool yourself off, and treat yourself to this delicious, easy, last-minute dessert.
Toffee Caramel Banana Crêpes

1
Melissa’s Ready-to-Use Crêpes
1 banana (or fresh fruit of your choice)
2-3 tablespoons Devonshire cream (recipe follows)
1 tablespoon toffee bits (I used
Heath Bits-of-Brickle)
1 tablespoon Salted Caramel Sauce

Place crêpe on a flat surface. Dollop Devonshire cream down the center, top with slices of banana, and about a tablespoon of brickle bits. Roll up, place on a plate, top with more Devonshire cream, bits, and a couple of slices of banana, and drizzle salted caramel over all. You may also consider adding chopped peanuts, or a sprinkling of
fleur de sel to up the saltiness. Experiment and have fun, you simply cannot go wrong.

Devonshire Cream

4 ounces cream cheese, softened
3 tablespoons granulated sugar
Pinch of salt
1 cup heavy whipping cream

Beat together cream cheese, sugar, and salt. Slowly stream in whipping cream, beating constantly, and continue to beat until stiff peaks form. Chill for two hours before serving. Store in a covered container in the refrigerator.

NOTE: I used my stand mixer with the whisk attachment to make this. I found it worked much better when streaming in the cream. As you can see from the photos, the results were beautiful.


A savory way in which to use these life-saving crêpes is this crowd-pleasing Chicken and Mushroom Crêpe Casserole.


This post is linked to:

This post contains affiliate links.