Showing posts with label crudites. Show all posts

Monday, July 1, 2024

Herbed Ranch Dressing

 
I’m not proud. I will gladly admit that I like ranch dressing. I also like a wedge salad. To me a wedge of iceberg lettuce, topped with ranch dressing, and a few crumbles of blue cheese (perhaps some crumbled bacon) is like heaven. I also like to keep ranch dressing on hand for crudités, crackers, and pretzels, because all of these things cry out for a dip. I like to tinker around with different recipes, and I think this quite possibly might be my favorite.

Herbed Ranch Dressing

½ c. Duke’s mayonnaise
½ c. sour cream
½ c. buttermilk
1 t. fresh lemon zest
1 t.
dried minced onion
1½ t. dill weed
½ t. dried parsley
½ t. garlic powder

¼-½ t. Johnny’s Seasoning Salt
¼ t. freshly ground black pepper

  Place all ingredients into a medium bowl, and whisk until creamy. Refrigerate for at least eight hours or overnight to allow flavors to meld. This will keep in the refrigerator for 7 to 10 days. Before you ask, yes, you can use fresh herbs, but it will only keep for 3 to 4 days.

As an Amazon Associate I earn from qualifying purchases.


Monday, July 17, 2023

Cheddar Ranch Dip

 
I’m not going to lie, now that I am an adult and can do what I want with never any scolding, there are times when I’ve had dip for dinner. Not just spooning it out of the bowl, mind you, but serving it with a nice array of freshly cut vegetables, as well as crackers, and the occasional bit of rolled salami — cigarette style — that I use as a dipper. Today I decided to use this dip as a topper for a baked potato. Why not? I mean, think about it. You top potatoes with sour cream, bacon bits, chopped scallions, and shredded cheese, why not combine all of that into one, making it so much easier to deal with, and far less messy. It's also amazingly delicious when dolloped on top of an omelet. Seriously, you cannot go wrong with this delicious dip that is suitable for breakfast, lunch, or dinner.
Cheddar Ranch Dip

16 oz. sour cream

3 T. (1 packet) Ranch dressing mix

1 3-oz. pkt. bacon bits

1 c. shredded Gouda cheese

2-3 scallions, chopped

 Whisk together sour cream and dressing mix in a medium bowl. Fold in remaining ingredients. Cover and store in the fridge overnight before serving.

As an Amazon Associate I earn from qualifying purchases.


Monday, April 24, 2023

Cannellini Bean Dip with Kalamata Olives


I was feeling particularly domestic over the weekend, perhaps because it took a cold turn and I was able to use up the last of my logs for the season, perhaps it’s because I had a blank calendar for the week ahead. Whatever the reason, I whipped up a massive amount of things in the kitchen, one of which was this delicious bean dip that is so good I could have eaten it with a spoon. I did use it as a condiment on a TLT (turkey, lettuce, and tomato), and it was phenomenal!

Cannellini Bean Dip with Kalamata Olives

1 15-oz. can cannellini beans, rinsed and drained
1 t.
Melissa's minced garlic
2 - 3 T. extra-virgin olive oil
¼ t. rubbed sage
¼ t. dried thyme
¼ t. kosher salt
Few gratings freshly ground black pepper
1/8 t.
lemon pepper seasoning
4 Kalamata olives, pitted
1 T. freshly grated Parmesan

Place everything into a food processor or blender (I used a mini food processor) adding oil as needed. This recipe can be doubled or tripled. Just play around with it, tasting as you go. You honestly can’t go wrong.

As an Amazon Associate I earn from qualifying purchases.


Tuesday, August 2, 2022

Cannellini Bean Spread

If you don’t follow Daniel Mancini on Facebook or Instagram, I strongly encourage you to do so. He is very generous with his recipes, and posts often. In this intense heat, I am looking for things that are cool and refreshing; his cannellini beans spread fit the bill. This was so good that I really didn’t need dippers as a spoon would suffice. I altered his recipe a bit, adding freshly squeezed lemon juice, because I had some left over from a pasta dish that I’d made and I didn’t want to waste it.  I don’t consider myself a particular lover of beans, but having tried this, I’m ready to buy cannellini beans by the case. Feel free to change up the fresh herbs to suit those that you have on hand and/or like. I have now made this a couple of times, varying each slightly, sometimes using basil and chives. You can’t mess this up. What a wonderful, healthy snack!

Cannellini Bean Spread

Slightly adapted from Daniel Mancini

 1 15.5-oz. can cannellini beans, drained and rinsed

¼ c. extra virgin olive oil

1 t. fresh lemon juice

2 fresh sage leaves, optional

½ t. fresh thyme, optional

½ t. kosher salt

 ¼ t. freshly ground black pepper

1 T. freshly grated Parmesan

 1 garlic clove, chopped

Place everything into a food processor or blender process till smooth. Taste for salt and adjust.

Daniel says that he makes this very often, and uses it as a dip for fresh cut vegetables, or spreads it onto slices of toasted Italian bread. It’s so delicious and, as I was saying, it’s healthy alternative to many commercial dips.


As an Amazon Associate I earn from qualifying purchases.


Tuesday, February 22, 2022

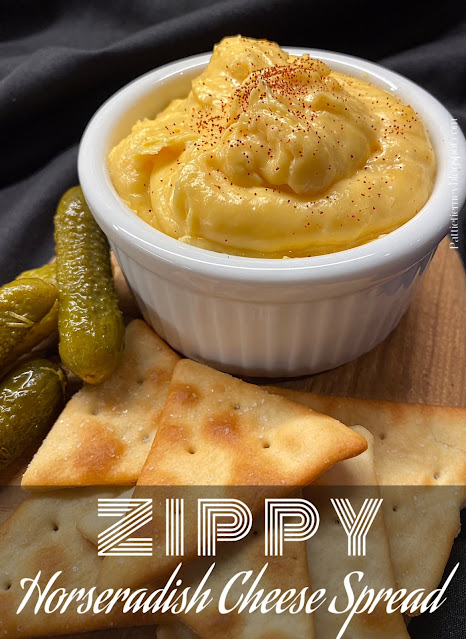
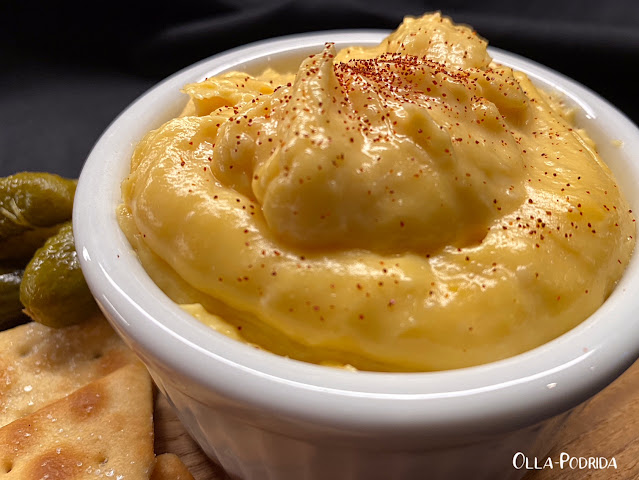
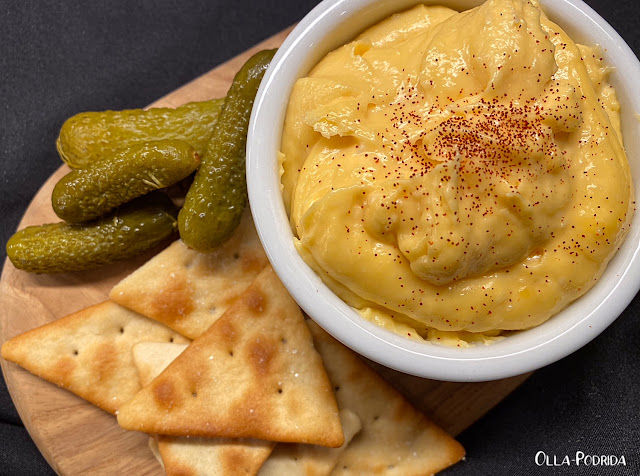
Zippy Horseradish Cheese Spread

You are going to love this spicy little number, particularly if you have some nasal congestion. This stuff will open those sinus passages right up. Horseradish has amazing medicinal powers; you don’t have to use a lot of it to benefit. What I’m trying to say here is that this can be as strong or mild as you like it. This is a wonderful spread for crackers, chips, crudites, and can also be an excellent topping for a baked potato, absolutely luscious on top of a burger, and makes stellar cheese fries. Easy to prepare, it keeps in the refrigerator for 7 to 10 days. Give it a try.

Zippy Horseradish Cheese Spread

1 1-lb.box of Velveeta
½ c.
Duke’s mayonnaise
3 to 4 oz. creamy horseradish
3-4 drops Frank’s Hot Sauce
Pinch of garlic powder

Cut Velveeta into cubes and melt in the top of a double boiler (if you don’t have a double boiler, a
Duralex bowl over a saucepan works quite well), stirring occasionally until smooth and creamy. Remove from heat and immediately add remaining ingredients, stirring until combined. Pour into individual ramekins, cover, and refrigerate until ready to serve.

As an Amazon Associate I earn from qualifying purchases.


Monday, July 12, 2021

Blue Cheese Spread

This post contains affiliate links.

I am a fan of blue-veined cheese: Gorgonzola, Stilton, Danish bleu, any cheese of that ilk blows my skirt up big time. I like to use it in as many ways as possible, and started adding it to my Homemade Boursin Cheese (the recipe of which you can find here). It occurred to me that it would probably make a decent spread all on its own, and here is the result. It’s an excellent spread for crackers, to use with crudities (I love filling snow peas and celery with this), I’ve even used it with Bugles, and it works wonderfully, and, enjoying it this way, I have to admit, is a heck of a lot of fun. But don’t stop there, it’s super delish when spread on a toasted bagel half or English muffin at breakfast, a dollop does a wonderful thing to a baked potato, and enhances a steak when a small amount is put on top immediately upon removal from the grill. Versatile and delicious, who doesn’t love that? 

Blue Cheese Spread

1 5-oz. container blue cheese crumbles, room temperature
1 8-oz. pkg. cream cheese, room temperature
1/8 c. (2 T.) sour cream
½ t.
Worcestershire sauce
¼ t. freshly squeezed lemon juice
5-6 gratings
black pepper
½ T. chopped parsley (for garnish)
Additional blue cheese crumbles (for garnish)*

Place all ingredients into a medium mixing bowl, and beat, at high speed, until thoroughly combined, 2 to 3 minutes. Turn out into your favorite bowl, garnish with crumbled bacon and chopped chives, and served with crudités or crackers. Refrigerate leftovers.

*You can also cook and crumble a slice of bacon to use as a garnish. Or, stir it in; I’m not your mom. You can do what you like.


Friday, July 17, 2020

Green Goddess Salad Dressing

This post contains affiliate links.
There’s no doubt about it, it’s a crazy world. I’m not sure if it’s the current state of affairs that has caused me to become seriously nostalgic for the 70s or what, but I have found myself digging out recipes that my mother used to make, and re-creating them for me to enjoy. There’s such comfort in these old favorites; with every bite I'm transported back to the dinner table with my mom and dad, and, oh, how I miss those days.

I was in the mood for a wedge salad with Green Goddess Dressing, and found this in my mother’s recipe box. It is just as good as I remember it. If you’ve never tried it, you must. Do not eliminate the anchovy paste, that’s where it gets its flavor.
Green Goddess Salad Dressing

1/2 c. mayonnaise
3 scallions, chopped
1/2 c. fresh basil leaves, torn
2 T. fresh lemon juice
1 garlic clove, smashed
1/2 t. salt
1/4 t. freshly ground pepper
1/2 c. sour cream 

Place above ingredients into the work bowl of a blender or small food processor. Process until creamy. Use immediately,or refrigerate for up to three days.


Wednesday, June 17, 2020

Pickled Asparagus

​​ This post contains affiliate links.
I have long had an Etsy shop wherein I sell mystery and literary theme gifts and jewelry. Recently, ​​I decided to go out on a limb, and add some culinary offerings, including cocktail theme bracelets. They ended up being quite popular. So much so that I have been receiving requests. Where am I going with this, you ask? Hold on and I’ll tell you. A recent request was for a Bloody Mary theme bracelet. The requester mentioned a variety of things she would like on her bracelet to reflect the various garnishes in a Bloody Mary. One of the things she wanted was asparagus. I like a good Bloody Mary, but I’m not a Bloody Mary drinker, and I was trying to imagine how a piece of asparagus would be. Then, she educated me by telling me it was pickled. Pickled?! Now that interests me.

I am not a “pickler,” per se, but I do go wild for pickled onions, radishes, and green beans, so thought I would add this to my repertoire. As it turned out, I liked them a good deal, and plan to make more, changing up the recipe each time, adding more onions and more garlic, because they were such delicious additions. Even if you don’t imbibe, consider these as excellent additions to a crudités or charcuterie tray. It’s hard to stop eating them.
Pickled Asparagus

2 bunches Melissa’s asparagus spears*
1/3 c. coarse salt
2 quarts cold water
1 2/3 c. white vinegar
1/4 to 1/3 c. sugar
1 t. kosher salt
1 t.
yellow mustard seed
2 Melissa’s shallots, sliced into rings
2 cloves garlic, peeled

½ t. chili pepper flakes
2 sprigs of fresh dill

Trim the cut end of the asparagus spears, and cut them into 3” links. Place them in a large bowl with 1/3 cup salt, and cover with water. Allow to stand for two hours. Drain, rinse under cold water, and pat dry.

Sterilize
two pint-size wide-mouth jars in simmering water for five minutes.

In a saucepan over medium heat, combine the vinegar, sugar, 1 teaspoon of salt, mustard seed, and onion rings. Bring to a boil and boil for one minute.

Place half of the onions in the bottom of each jar. Top onions in each jar with one sprig of dill, one clove garlic, and a portion of red pepper flakes. Pack asparagus stems, tips up, as tightly as possible, in the hot jars leaving ½” of space from the rim. Pour hot pickling liquid into the jars to within ¼”of the rim. Wipe rims with a clean, damp cloth and seal with lids; process in a boiling water bath for 10 minutes.

Cool to room temperature. Check seals when cool by pressing the center of the lid. It should not move. Label and date; store in a cool, dark place. If any jars have not sealed properly, refrigerate and eat within two weeks.

*I had thin asparagus on hand, so it took me two bunches to fill two jars; if your asparagus is thicker, one bunch may do it for you..


Wednesday, June 27, 2018

Pimiento Cheese Spread


You do not have to read this blog long before you come to the realization that I am a woman who loves her Pimiento Cheese. But, I am also a woman who likes Pimiento Cheese Spread. Aren’t they the same thing, you ask? Indeed not, is my haughty reply. Pimiento Cheese has few ingredients, is simple, without complexity, and elegant in its pureness. Pimiento Cheese Spread is anything but pure. It’s more like your trampy cousin from Poughkeepsie. You know, the one the family doesn’t talk about. Yep, that’s Pimiento Cheese Spread.

Whereas Pimiento Cheese needs to be folded gently together with a spatula, Pimiento Cheese Spread can be whipped with the whisk attachment of your Mixmaster. The idea is to beat those ingredients into submission to form a wonderful creamy spread. Not all of the components can be identified like they can be in Pimiento Cheese, but that doesn’t matter. This spread is creamy, spicy, loaded with flavor, and works equally well as a dip, a sandwich spread, a sandwich topping, spread on crackers or warm toast, and is mighty tasty on a toasted bagel or apple wedge.

I like mine with a bit of a kick, so you may want to tone things down a bit. That’s all right, it doesn’t matter. There is an artistry to making cheese spreads, and it is extra special when you make it all your own.

Here is the recipe that I used, change it up as you see fit.
 
Pimiento Cheese Spread

2 cups shredded extra sharp cheddar cheese
1/2 cup diced
Melissa's Fire Roasted Red Peppers
4 ounces cream cheese, softened
1/2 cup Duke's mayonnaise

1/4 teaspoon garlic powder
1/4 teaspoon onion salt
1/4 teaspoon paprika
1/4 teaspoon Old Bay seasoning
A pinch of cayenne pepper
A few gratings of freshly ground black pepper
1 tablespoon juice of pickled jalapeños

Toss all of the ingredients into a medium to large bowl, and beat it into submission. You can use a whisk, you can use your hands, I used the whisk attachment on my KitchenAid.
 

If you are more of a don’t-add-anything-extra traditionalist, then you will no doubt enjoy Tupelo Honey Café’s Pimiento Cheese. I think it is my very favorite…I think.


This post is linked to:

This post contains affiliate links.

Sunday, May 27, 2018

Spicy Jalapeño Ranch Dressing


I always consider Memorial Day to be the official start of summer.(Don’t get me started on the stifling, sub-tropical, record-breaking temperatures that we’ve had here…ALL MONTH! Just don't.) I like a bit of zing during the summertime, so created this Spicy Jalapeño Ranch Dressing to drizzle on salads, crudités, grilled corn on the cob, well, pretty much everything! I’m giving it to you today, because you’re going to need it for the recipe that I’m going to share with you tomorrow. I always find it best to make my own homemade Ranch Dressing from my special mix (see below), but if you prefer not to do that, and use the packet (I will not judge), you can just add the taco seasoning, and pickled jalapeño. You’re going to love this one, let me know how you use it.

Have a happy and safe Memorial Day, everyone!
Spicy Jalapeño Ranch Dressing

2 cups Ranch Dressing, prepared with 
Ranch Dressing Mix (see below)
1 Melissa’s pickled jalapeño, seeded and quartered

Place dressing, jalapeño, and taco seasoning into a blender. Blend until creamy. 

Ranch Dressing Mix

8 tablespoons dried parsley flakes
1 teaspoon dried dill weed
5-1/2 tablespoons instant minced onion
4 teaspoons salt
1 teaspoon garlic powder
1/4 teaspoon freshly ground pepper

Stir ingredients together and store in a cool, dry pace. To prepare, combine 2 tablespoons of the mix with 1-cup buttermilk and 1 cup mayonnaise. This will keep for six months.


This post is linked to:

This post contains affiliate links.